This post contains affiliate links. Learn more here.
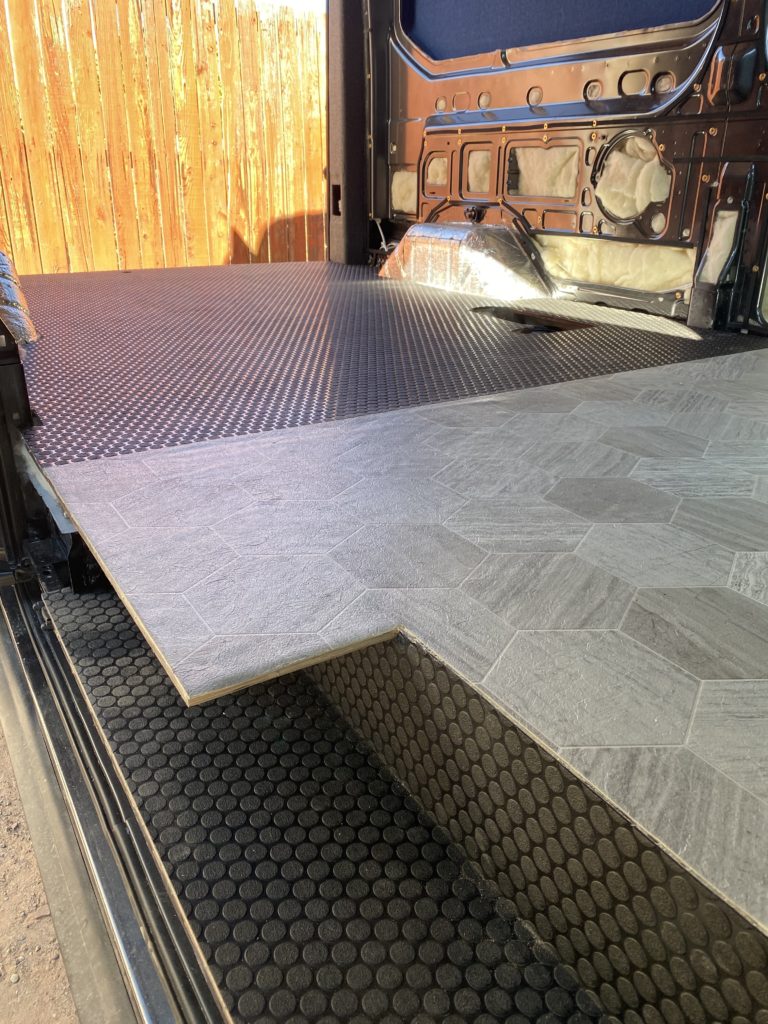
Wow, I can’t believe it’s been a full year since I started working on my van floor. There were several months this past winter/spring that I didn’t touch the van at all, and the rest of the time, I’ve been working on so many projects simultaneously that it just took a while to get back to a point where I was ready to focus on knocking out the floor.
Honestly, it was kind of nice having a bare plywood floor for a bit longer while I was working on other projects… MaxxAir fan install, running wires for electrical system, hanging T&G planks on ceiling, building and test-fitting cabinets, installing Flares, and lots more. Having the finished floor in through all of that would have likely resulted in some unwanted “wear and tear” prematurely – the plywood got dinged up pretty good in the process.
I finally hit a point where not having the floor finished was blocking me from making significant progress on building out my cabinetry, and the threat of winter weather on the way forced me to get the floor in while the temps were still in the acceptable range of the adhesive.
I’m really happy with how the entire floor turned out! If you missed Part 1 or Part 2 of this three part “Ultimate Van Floor Guide”, and want step-by-step instructions for installing an insulated floor in your van, you should back track and visit those posts first. Otherwise, lets get right back into it and finish installing our floor!
Tools & Materials You’ll Need
Flooring Essentials:
- Noico Sound Deadening Mat
- Havelock Wool
- Mannington Hive Swarm Stone Hex Flooring
- RecPro Rubber Coin Flooring
- RecPro Floor Adhesive
Tools & Materials:
- Noico Barrel Roller
- Isopropyl alcohol (surface prep)
- Scissors
- X-acto Knife or Utility Knife
- Tape Measure
- Drill & Impact Driver
- Countersink drill bits
- #8 x 1-1/2″ Countersink Screws
- Wood Filler
- 1/4″ plywood (for step)
- 3M 4200
- Culking Gun
Steps
Step 7: Install Noico Sound Dampener
Noico is easy to install, especially if you have a Noico Barrel Roller to firmly press it down. The manufacturer’s recommended installation procedures can be found here so I wont get into the specifics. This step could be done before the furring strip grid is installed [Part 2], but since I did it after, I cut strips that were the length of the grid sections (approx 14″ for the most part) at various widths so that they would lay flat between the differently spaced ridges on the floor. Rolling the Noico to the floor would have been slightly easier had the strips not been in the way of the barrel roller.
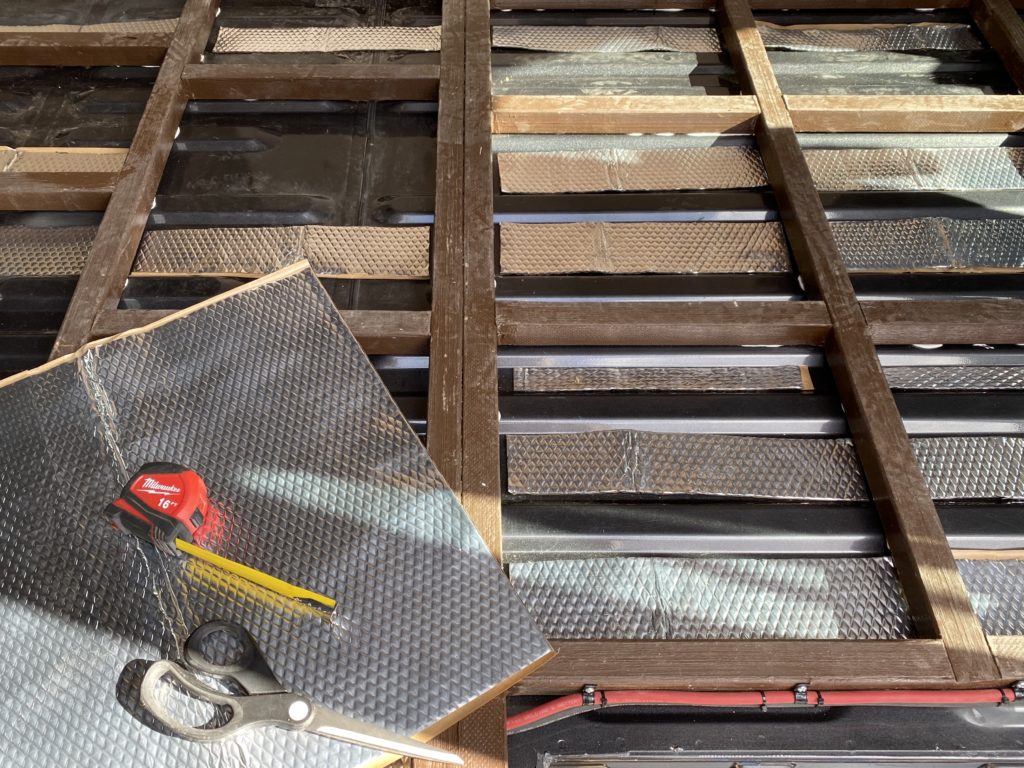
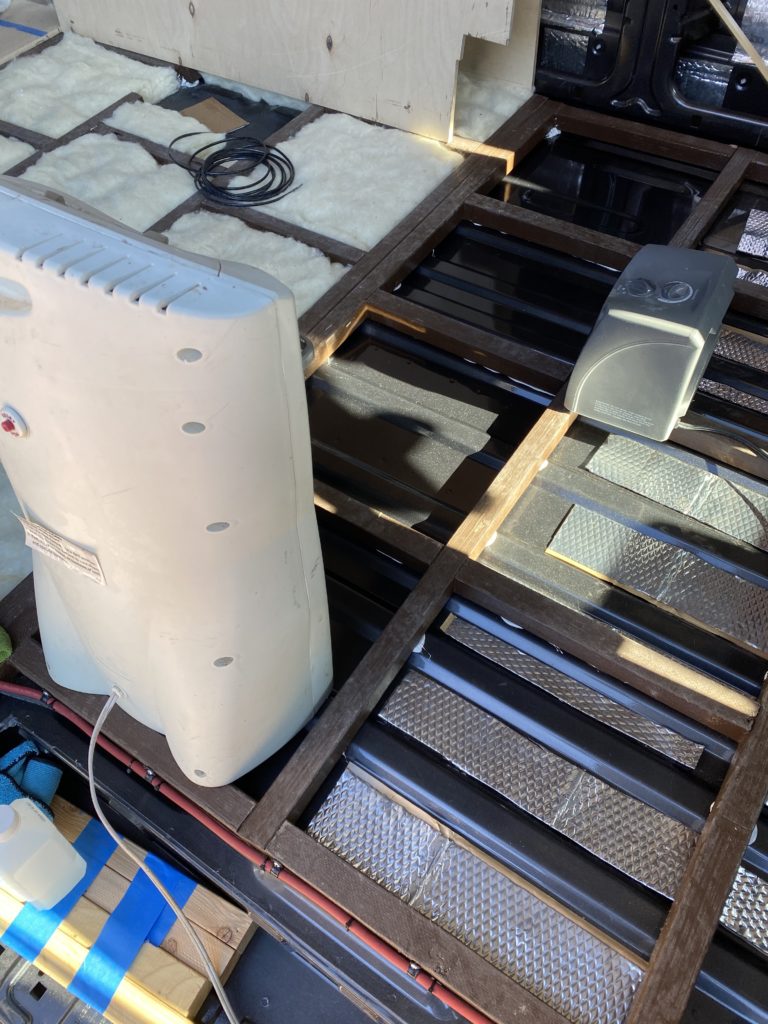
I installed the Noico outside, during winter, when the metal of the van was quite cold. Per the manufacturer, installation should be done above 53 degrees. I couldn’t wait until temperatures warmed up, so I used a couple of space heaters to run hot air over the floor to warm it up. I also laid out the Noico so the sun would beat down on it until it softened up some. The sound dampener seems to have adhered to the floor quite well with this method, so with some care, installation in colder temps seems possible. The floor should also be cleaned with Isopropyl Alcohol so the Noico has a clean surface to bond to.
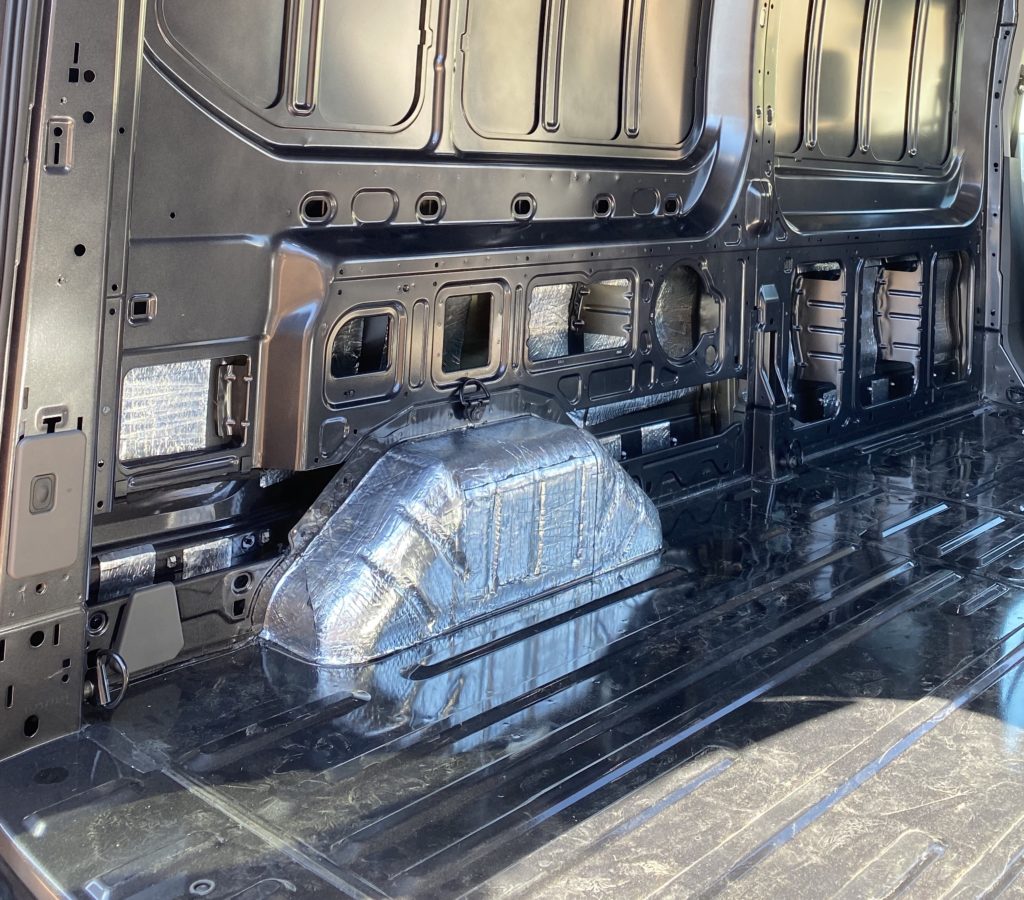
I installed Noico on the wheel well arches much earlier in the build process, it may have been one of the first projects I tackled actually. I covered them completely, since this area can be a source of a lot of road noise. Before I covered them, rocks that got kicked up would make terribly loud bangs, but road noise significantly reduced after they were covered. If you haven’t covered them yet, now would be a good time, although it was probably easier to install it before the grid went into place.
Step 8: Install Havelock Wool
Installing Havelock Wool into the grid is really straight forward – measure each cell of the grid, cut the Havelock to size, fluff it up, and drop it in place. Since the Havelock comes in 16″ sections, and the grid is 14″ wide in most areas, I cut the length a few inches short and then stretched the wool into the right dimensions. For example, if a cell measures 14″ x 14″, I would cut a piece about 16″ x 12″ and then stretch the 12″ side out a little bit, which shrunk the 16″ side inwards slightly, and the result would be approximately a 14″ x 14″ square that fit nicely into the grid.
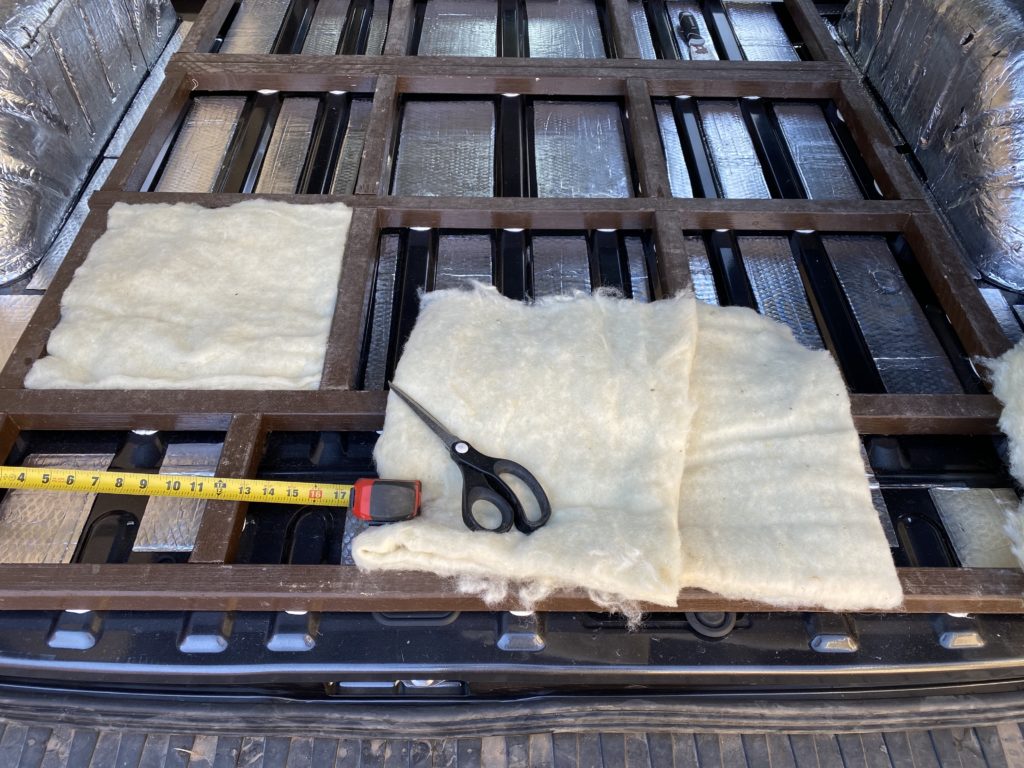
The insulation is a bout 2″ thick, so with the 1.5″ furring strips sitting on top of the corrugations in the floor, the wool batts sit flush with the top of the strips and will not be compressed when the plywood subfloor goes on top. I made sure to leave the areas clear where access to or through the floor would be necessary later (ie: Espar air heater location, drain tubes, etc).
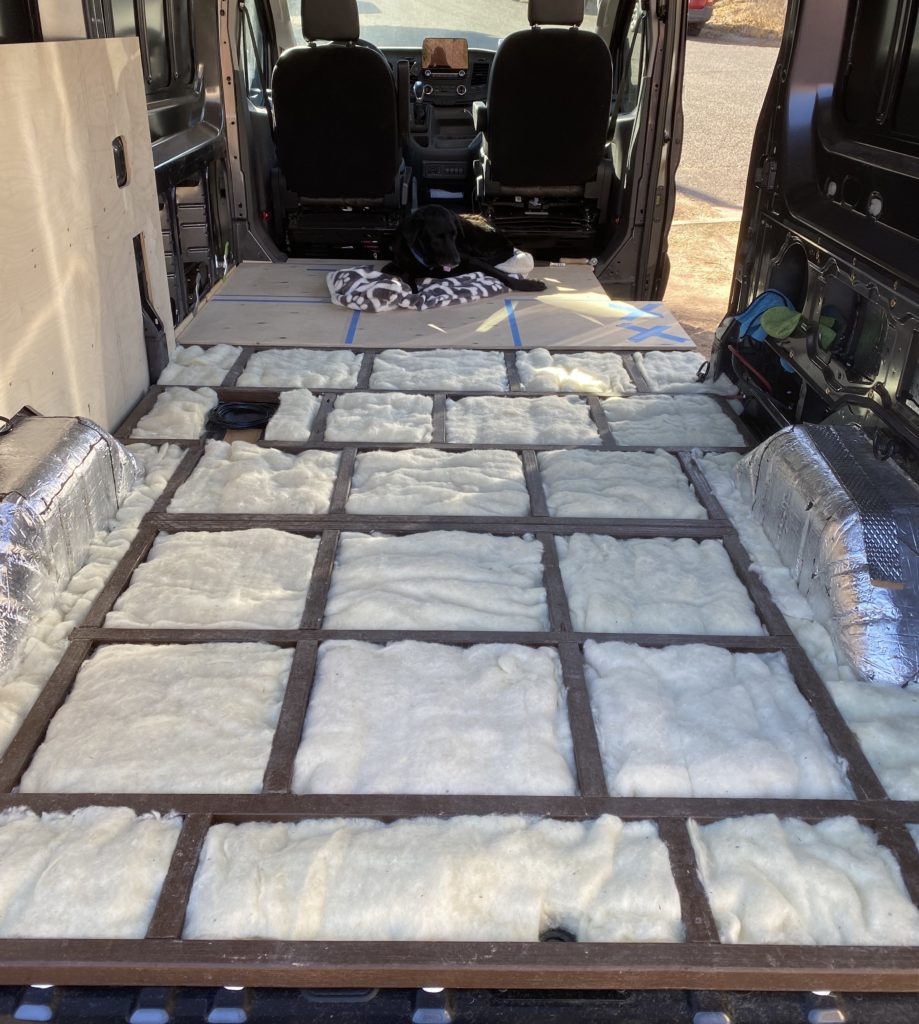
Step 9: Cut Flooring Top Layer
I wanted to do something a little different than the traditional “wood floor” look. Since I’ll have a pony wall that supports the bed, and separates the “cabin” from the “garage”, I also decided to use different types of flooring in the front and rear sections of the van. I like the look of the rubber coin flooring for the garage area, and went with a “hexagonal stone” vinyl flooring for the forward living space of the van.
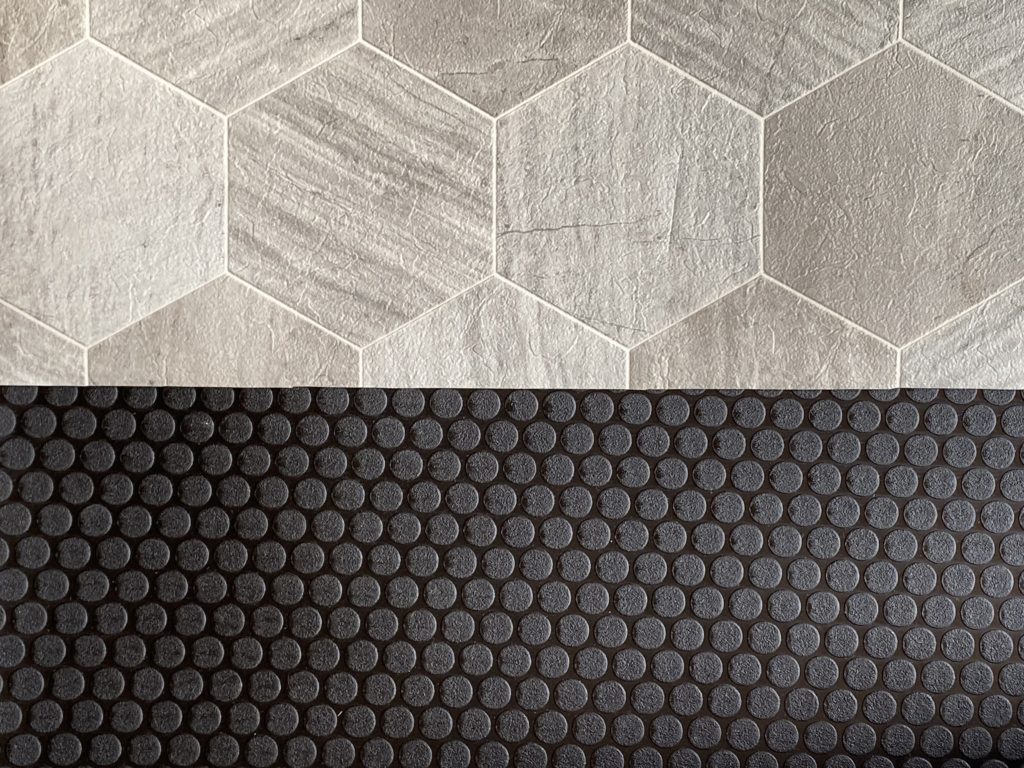
I’ll have bench seats facing each other with a raised step between them on the cabin side of the divider wall. Underneath the drivers side seat will house my Espar Air Heater and IsoTherm Water Heater, and under the passenger side seat will house my electrical system, but all of these systems will extend back into the garage space through holes cut in the divider wall. Rather than ending the rubber coin floor where the garage divider wall is, I decided to extend it forward for continuity to include the area under the seats as well.
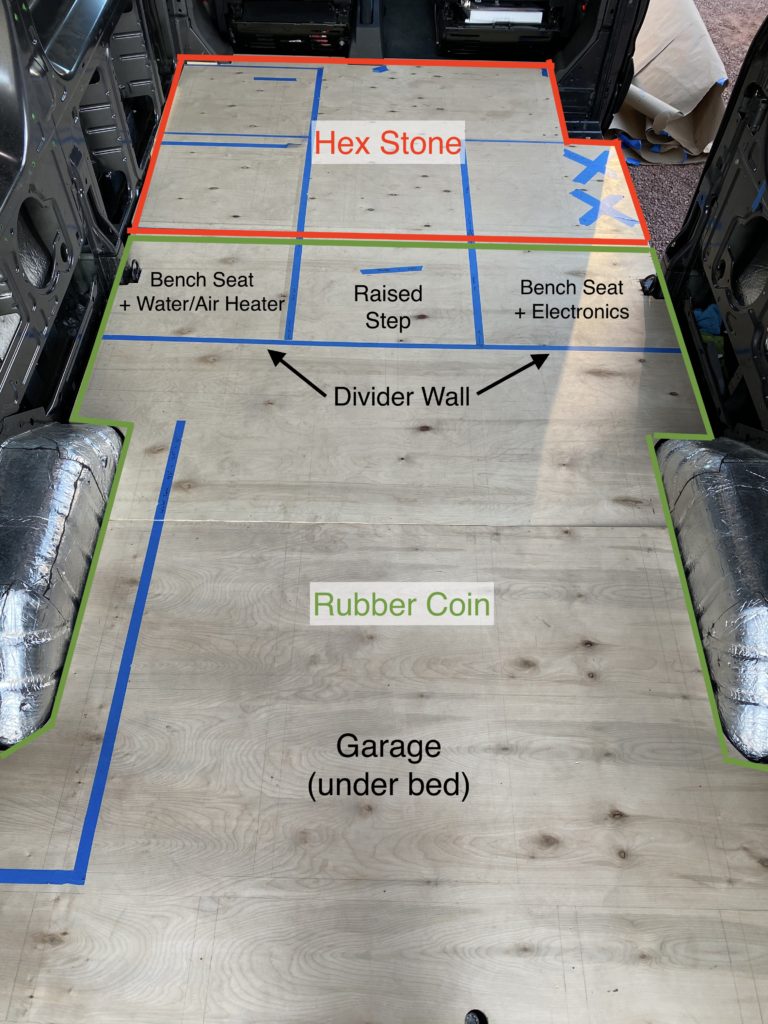
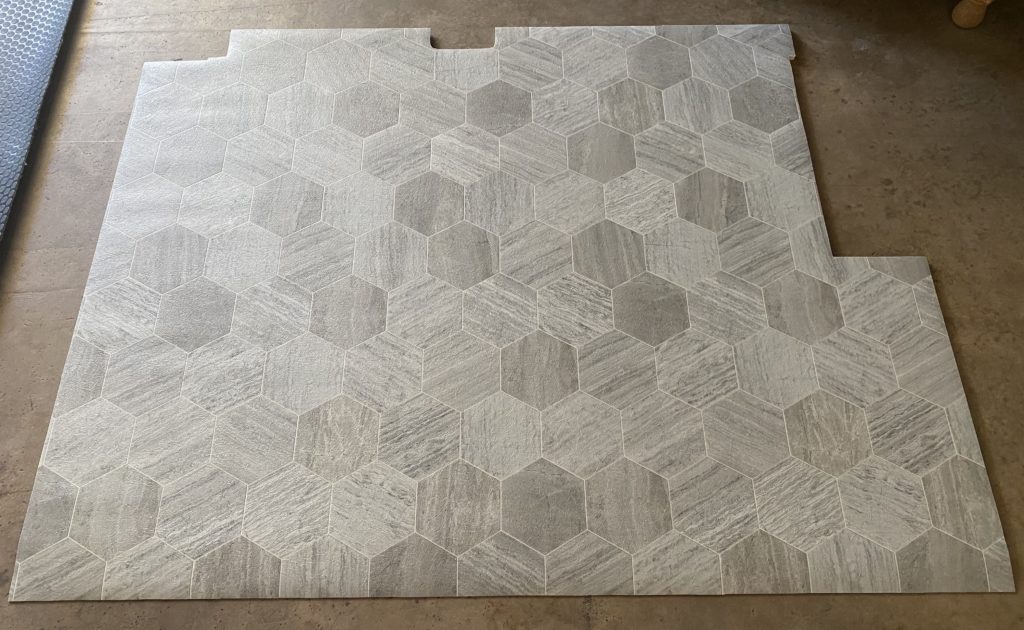
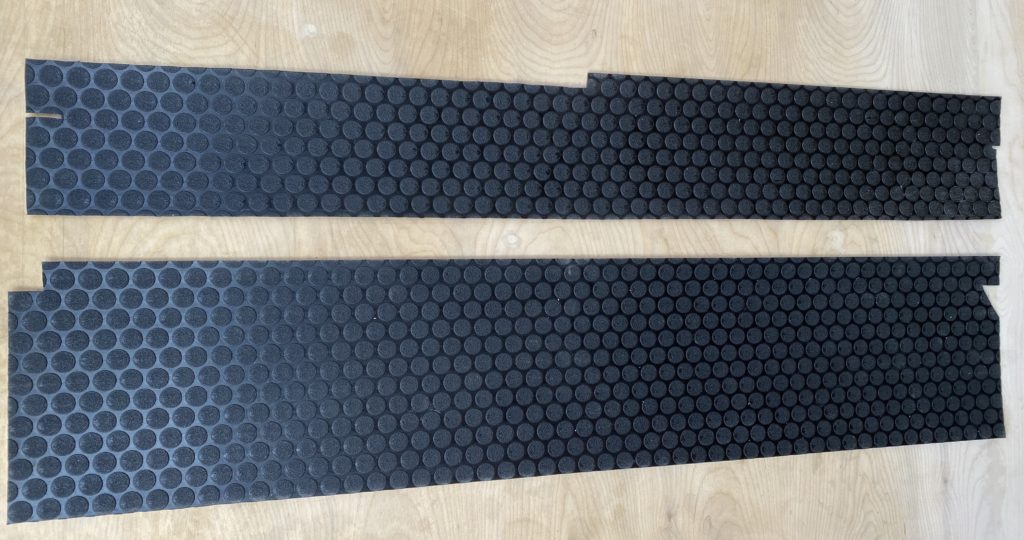
I laid out the front-most plywood sheet onto the stone hex flooring and used a utility knife to cut along the boarder of the wood. I wasn’t quite sure exactly where the flooring transition seam was going to end up yet, I left myself a few inches of flooring past where I thought it would be, knowing that I could trim it down later when I determine the exact placement of everything. The blue tape across the bottom indicates the cut line with excess to remove at time of install.
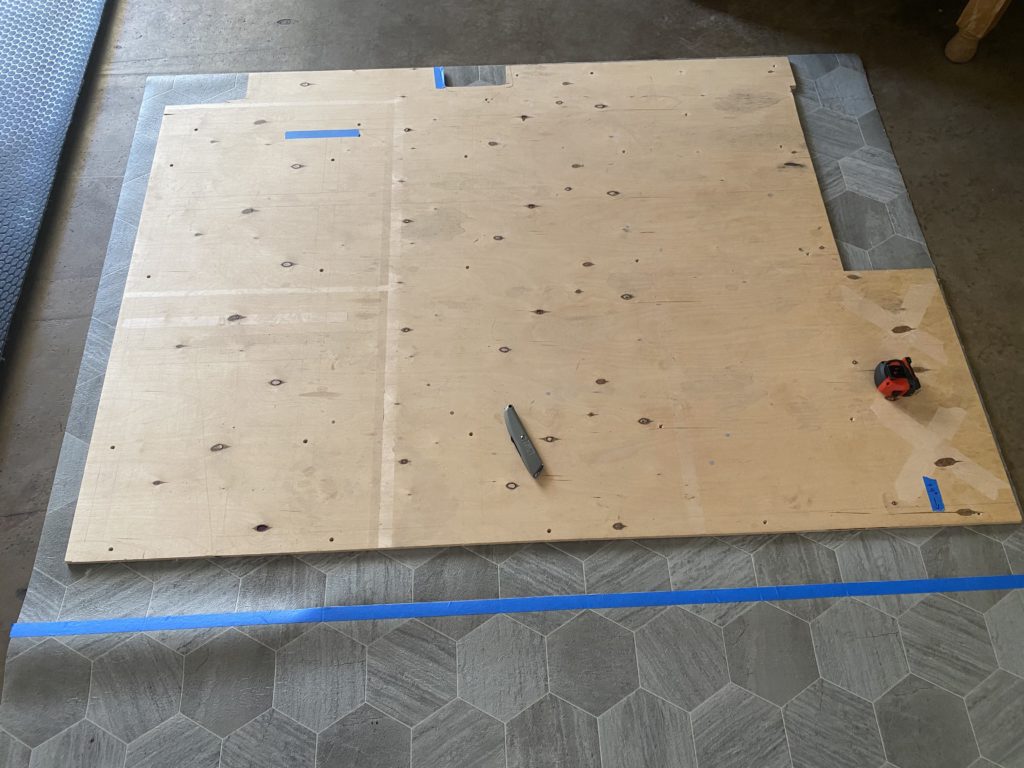
This stuff is pretty easy to cut with a few passed of a utility or x-acto knife.
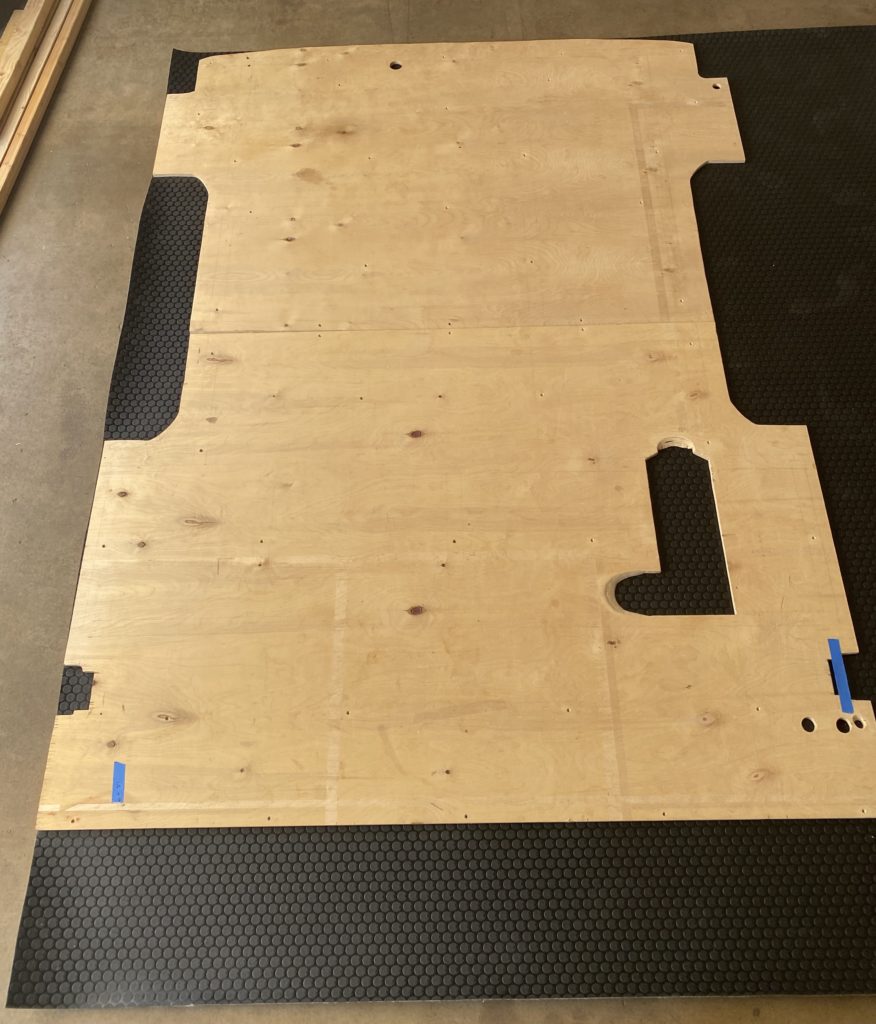
I did the same thing with the middle and rear plywood sections to cut out the rubber coin flooring, again leaving myself a few inches excess that will be trimmed down when I determine where the joint between the two flooring types will be hidden by the furniture built on top of it.
Since I already prepped the cutouts in the subfloor for my Espar Air Heater, IsoTherm Water Heater coolant lines, and fresh water tank drain, I cut those out of the flooring material as well. Don’t forget to leave yourself access to the spare tire hole in the rear of the van.
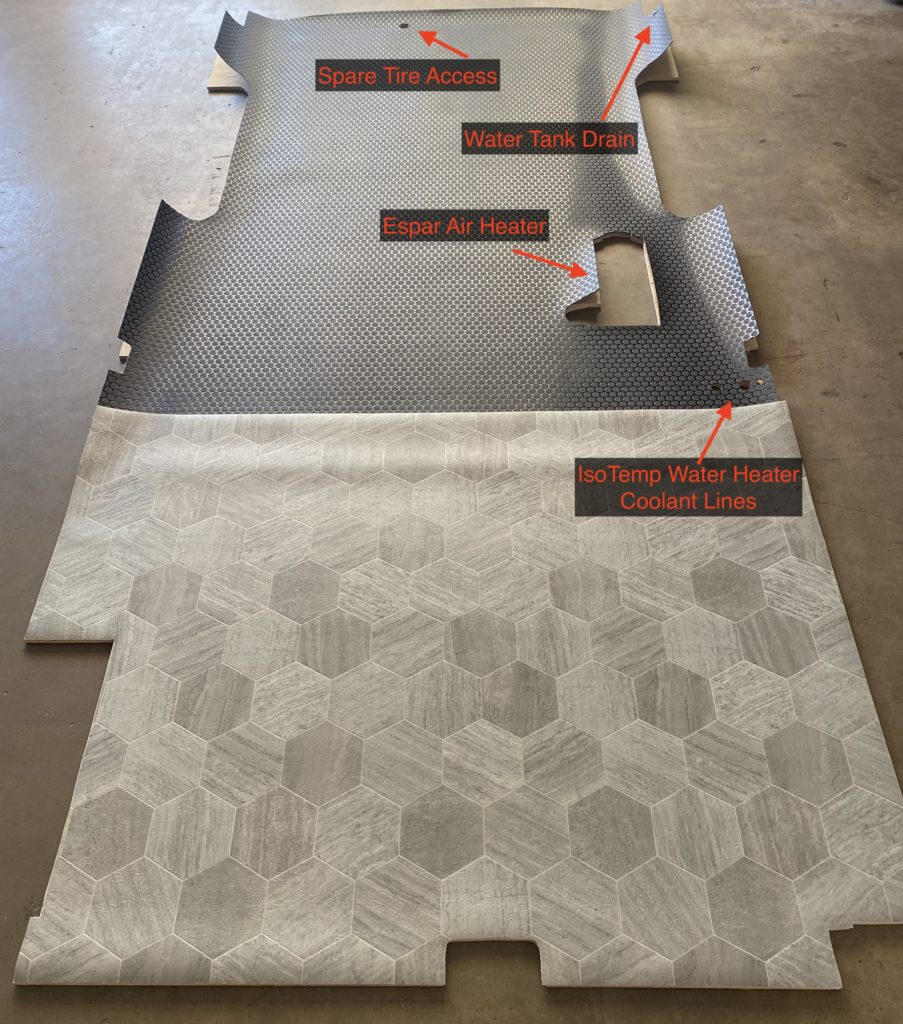
With the flooring cut, its time to get the plywood subfloor back into the van and finally screwed down to the furring strips for good.
Step 10: Secure Subfloor to Furring Strips
Before I glued the furring strip grid to the floor, I traced the outline of it into the top of the plywood subfloor so that I knew exactly where the strips were located once they were covered up. Then I used a drill and #8 countersink bit to drill into the subfloor where I wanted to secure it to the furring strips.
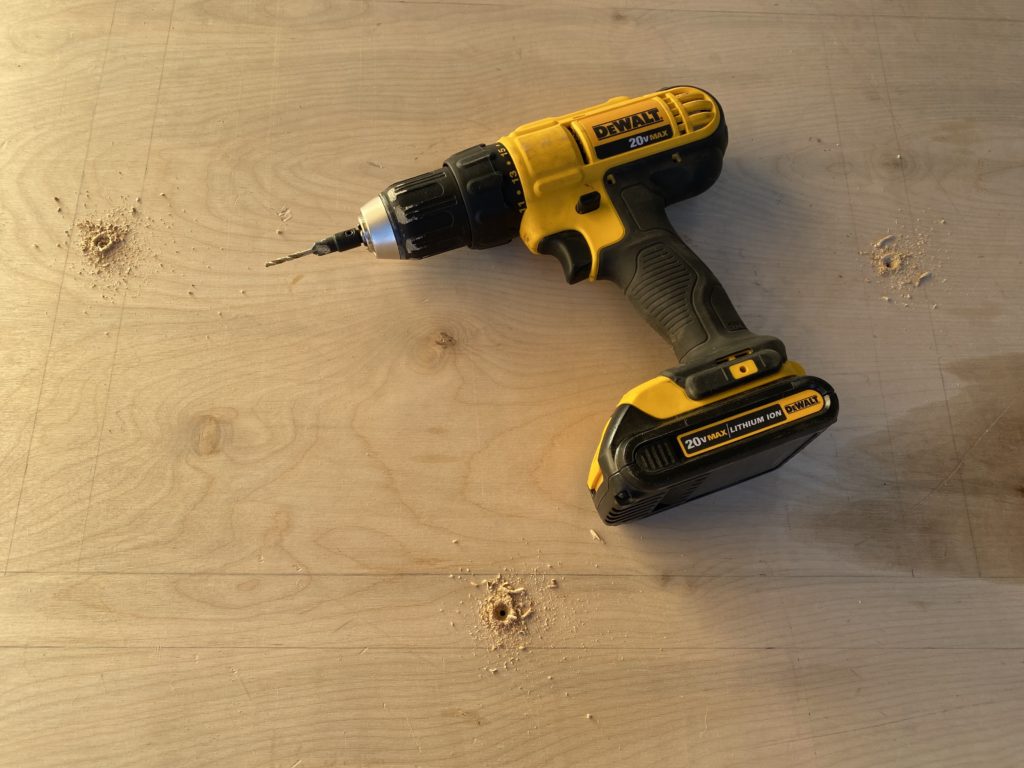
I spaced out the holes based on what felt like enough to hold the floor down securely, without going overboard and putting in too many. I then used a impact driver to attach the subfloor using #8 x 1-1/2″ Wood Screws.
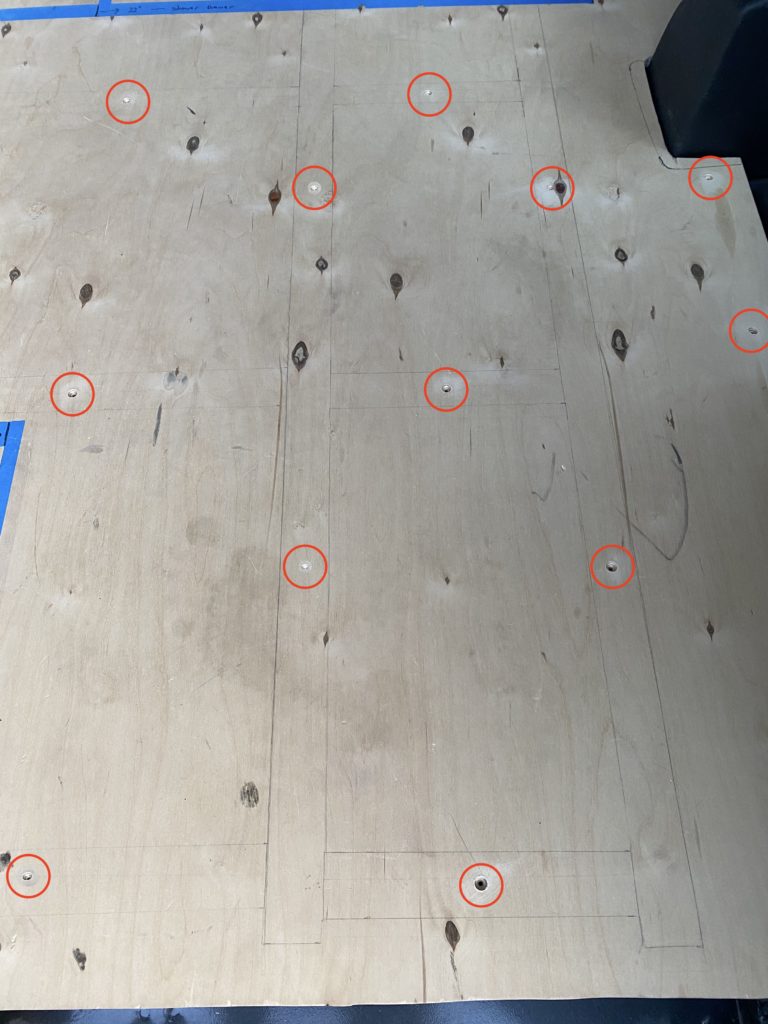
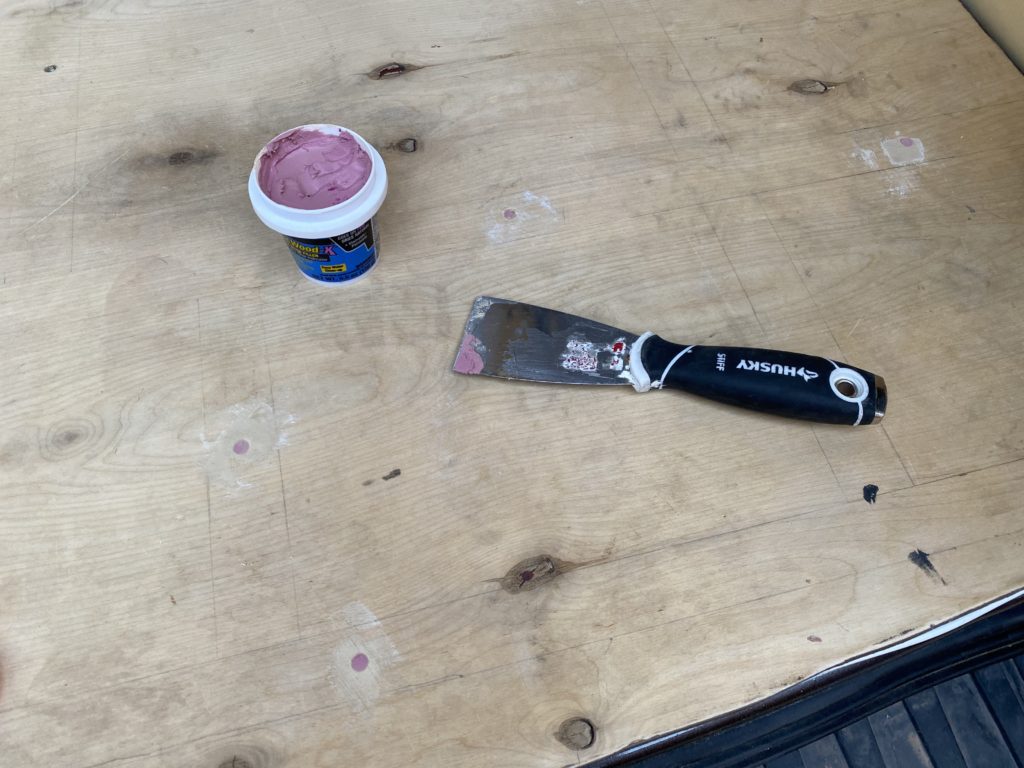
Since the countersunk screws left small divots all over the floor, I used a wood filler to level out the surface. They may not have been large enough to result in noticeable dips in the vinyl flooring, but I didn’t want to risk it – the smoother the subfloor, the better the vinyl should lay across it, at least in theory. Despite my best effort in ensuring that the joints where the plywood sheets meet were level, there were a few spots where they didn’t quite sit flush with each other, so I use a sanding block to even them out so there were no uneven spots on the flooring.
Step 11: Install Step
I wanted the upgrade the slider door step and finish it with the same rubber coin flooring I was using in the garage, so I removed the plastic cover that came from the factory, which left behind an uneven surface. I cut 1/4″ plywood to cover the vertical and horizontal surfaces, giving me something solid to adhere the flooring to.
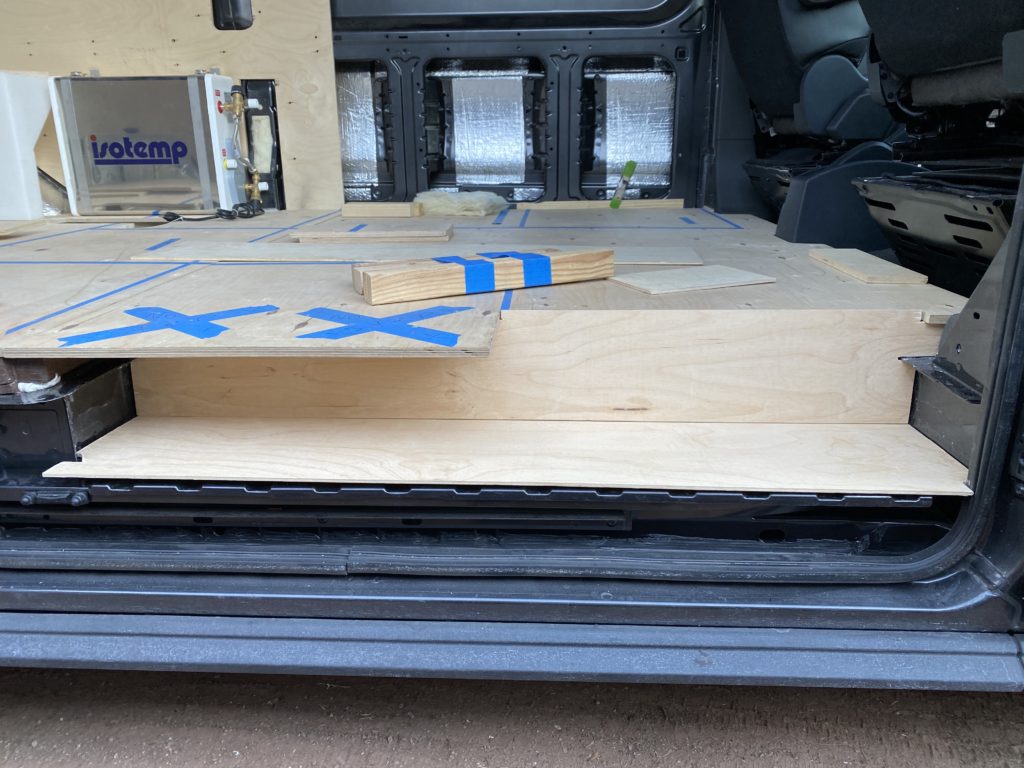
It was a process of test fitting & trimming to get the wood cut to the exact right dimensions to fit in the step properly. Once I was happy with how they fit, I laid them on top of the rubber coin flooring and cut out the sections of flooring for the step and back wall of it.
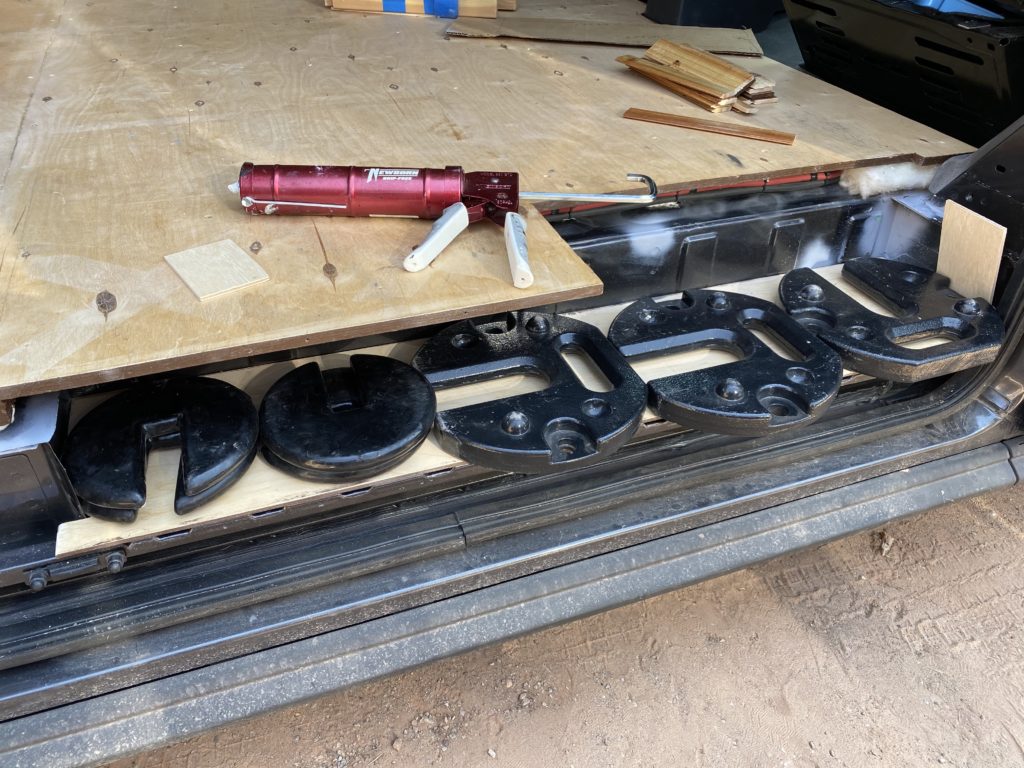
I used the same 3M 4200 that I used to adhere the furring strips to the floor [Step 6: Secure Grid to Van Floor] to secure the plywood to the step and weighed it down while it cured.
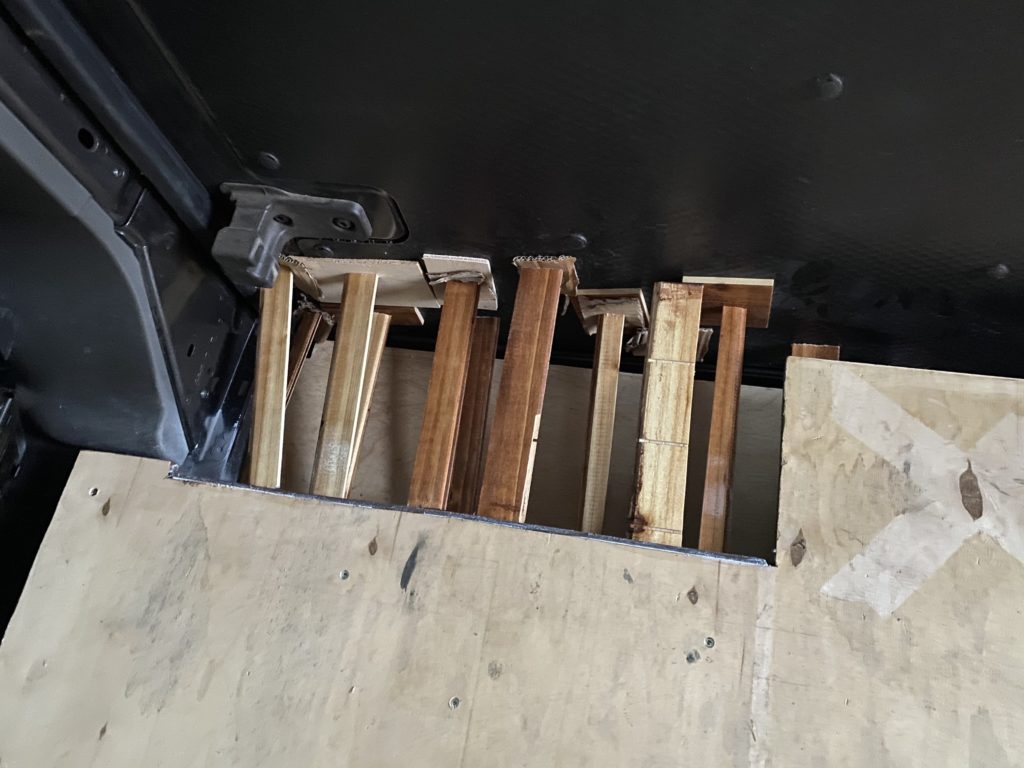
For the vertical back wall of the step, I had to get a little more creative, so I used wood strips (and cardboard to adjust for length) to wedge between the plywood and the slider door while the adhesive cured.
I essentially repeat that same process for gluing the rubber coin flooring to the step using RecPro Floor Adhesive and weighing it down/bracing against the slider door in the same manner.
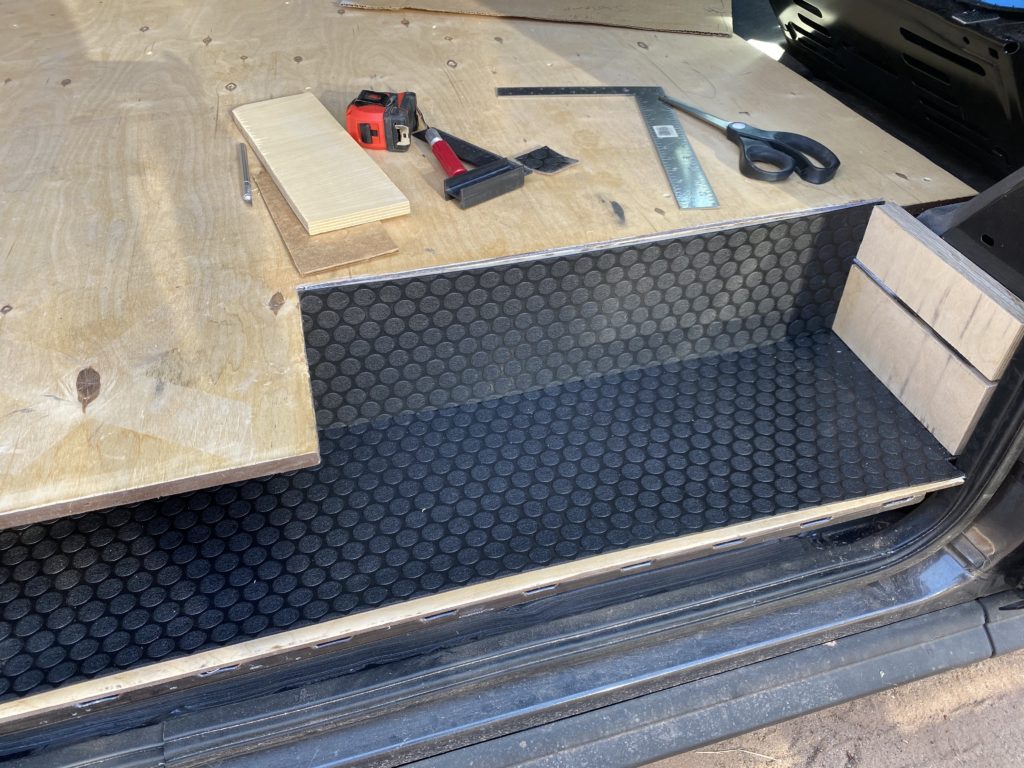
Installing the flooring on the step was a good learning experience, after that went well, the rest of the floor install didn’t seem very daunting any longer. In fact, I expected it to go quite smoothly, and it did!
Step 12: Install Flooring
The end is finally near! For installing the floor at least. In a sense, its just the beginning of lots more projects to come…
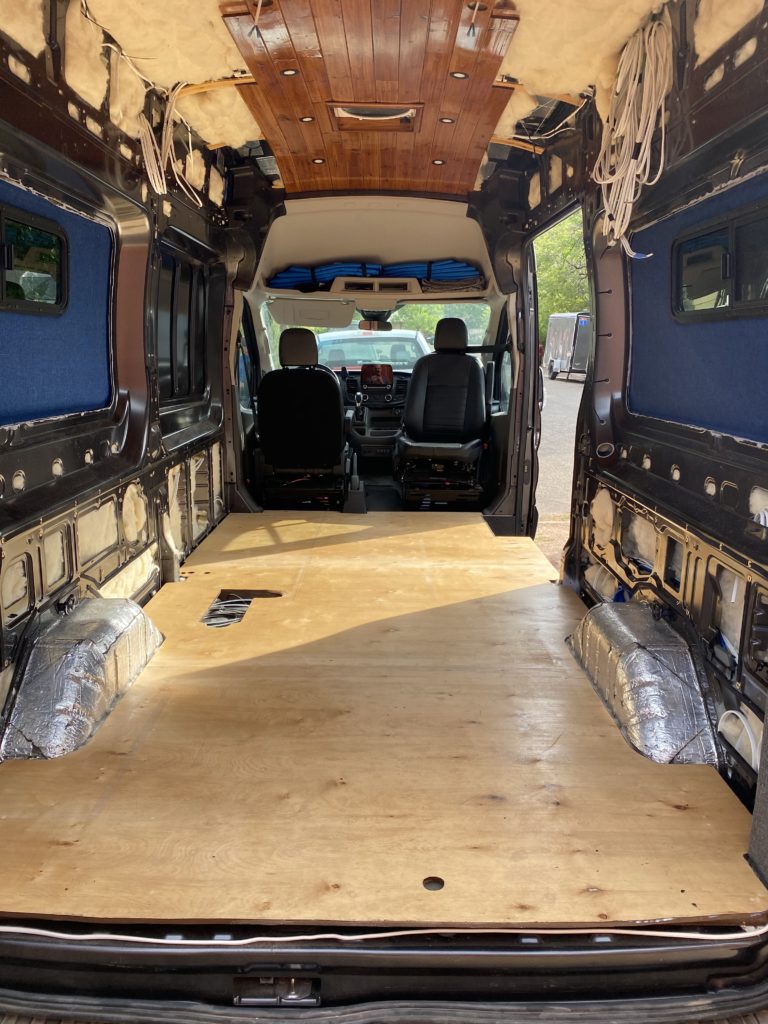
I ended up applying three coats of AFM Safecoat Safe Seal to the top side of the floor. It dries with the slightest tackiness which can be walked on once its cured. Back in Part 2 of this guide, I mentioned some of my troubles sealing the furring strips with a different AFM Safecoat product, Dyno Seal. In hindsight, I think Safe Seal would have been a better product to use on that part of the floor as well.
Once the last coat of sealer cured, I layed out the rubber coin flooring in the back of the van and hex stone flooring in the front, and made sure they were lined up exactly how they should be. They were overlapping a bit because of the excess I left back in Step 9: Cut Flooring, so I trimmed them both down to where the two floor types should meet.
Once I was ready to glue the floor down for good, I flipped forward the rearmost 2′ section of the flooring. Using a 1/16″ x 1/16″ Notched Trowel I spread out a generous layer of RecPro Floor Adhesive and then flipped the flooring back into place.
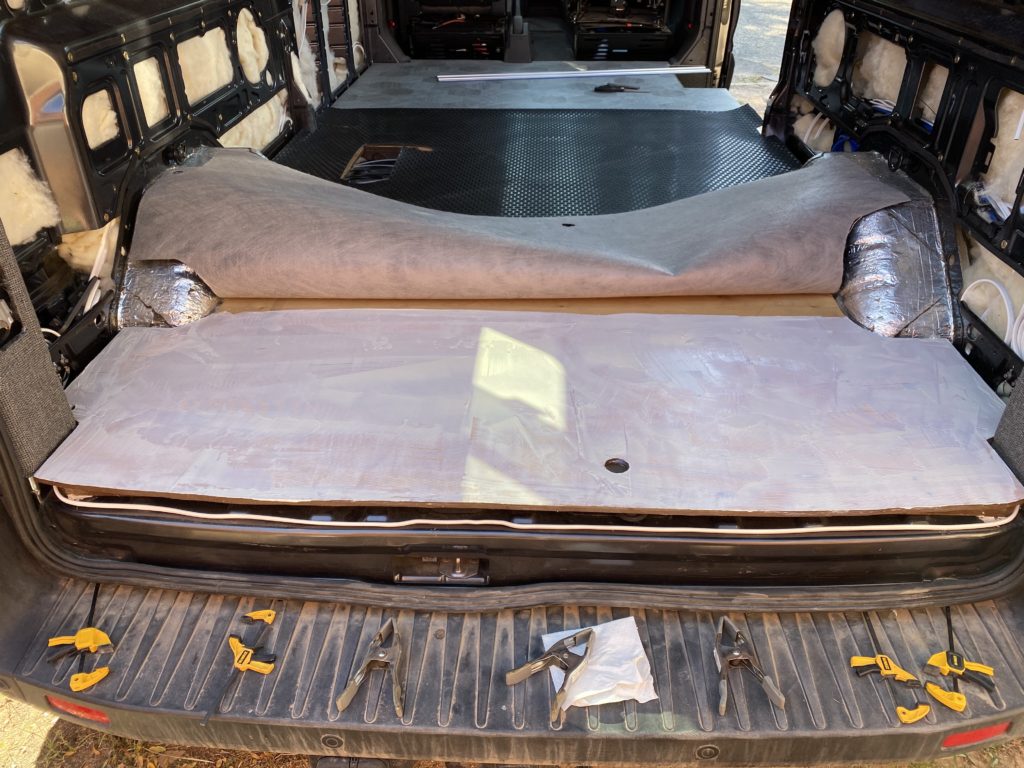
I clamped some scrap wood along the rear door threshold with trigger clamps and spring clamps to ensure a strong and secure adhesion of the flooring to the subfloor along the back of the van. I used some heavy canopy weights to “roll out” the floor… basically slid them around to push out any air bubbles and ensure a good bond of the adhesive.
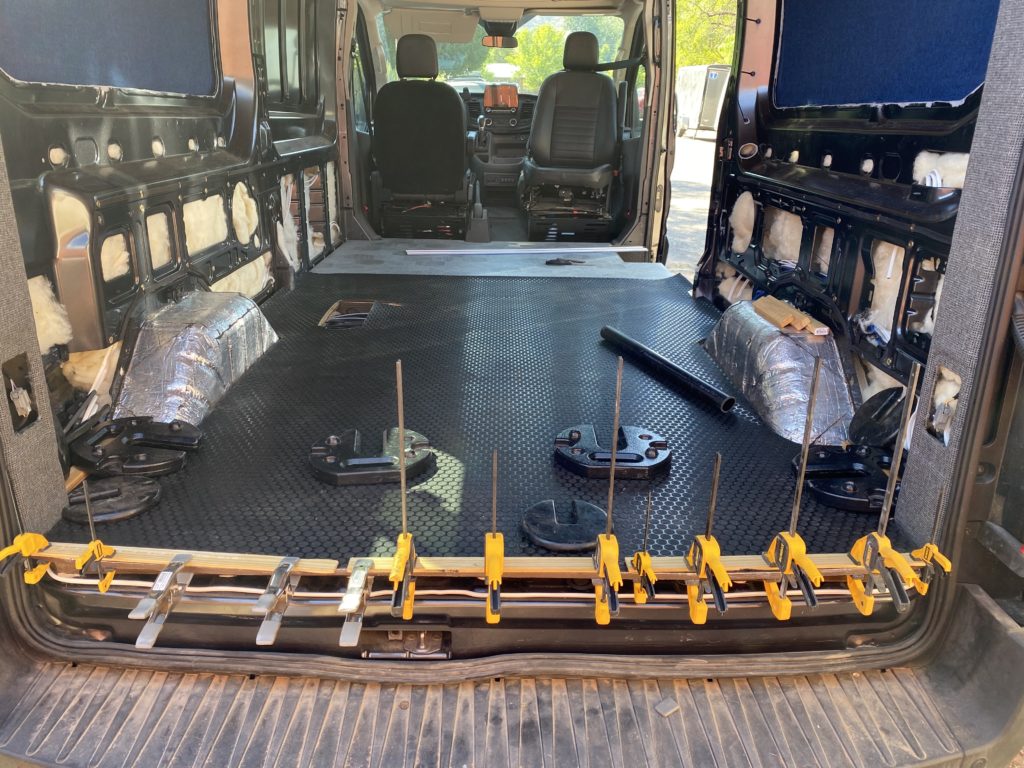
Once that had cured for a little while, I flipped the flooring over from the other direction and began moving towards the front of the van in couple foot sections. Apply adhesive, fold floor back over onto it, clamp along edges and use weights to ensure good bond… repeat.
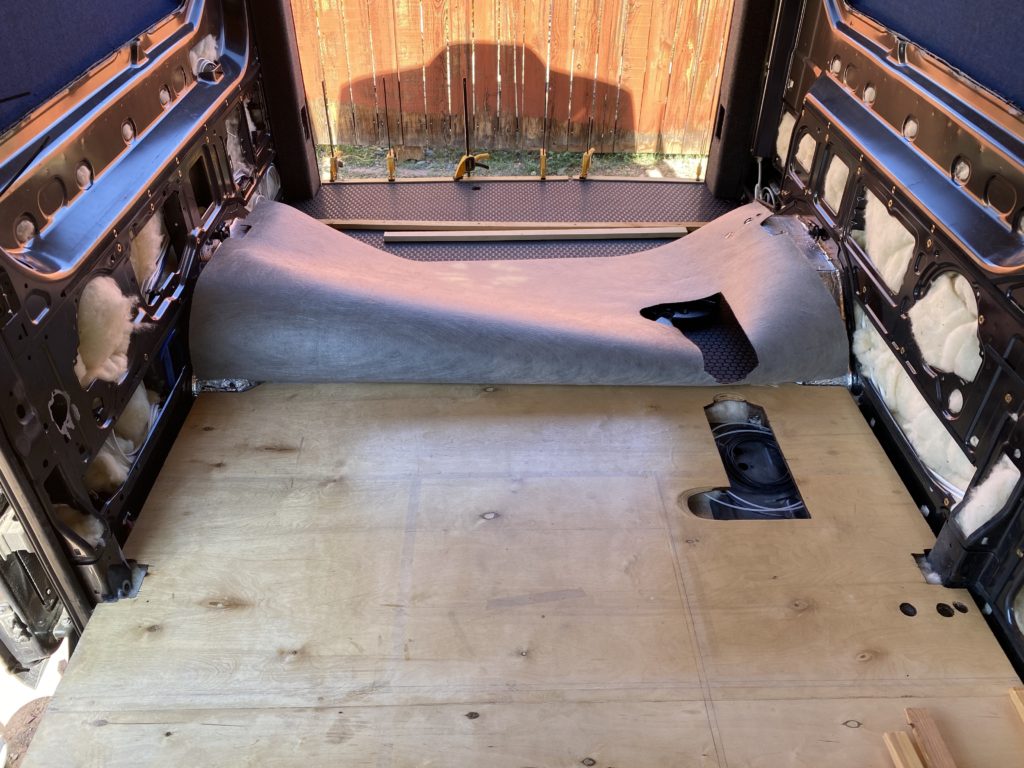
I did the last two quarters of the coin floor without taking any pictures. The adhesive was drying on my trowel, my hands were sticky, and I was quite focused on rolling out air bubbles and making sure the floor was clamped or weighed along all the edges so the floor would adhere well everywhere. I started pulling other heavy things from the garage (paint cans, etc) to apply as much weight as I could to keep the flooring from curling up while the adhesive cured.
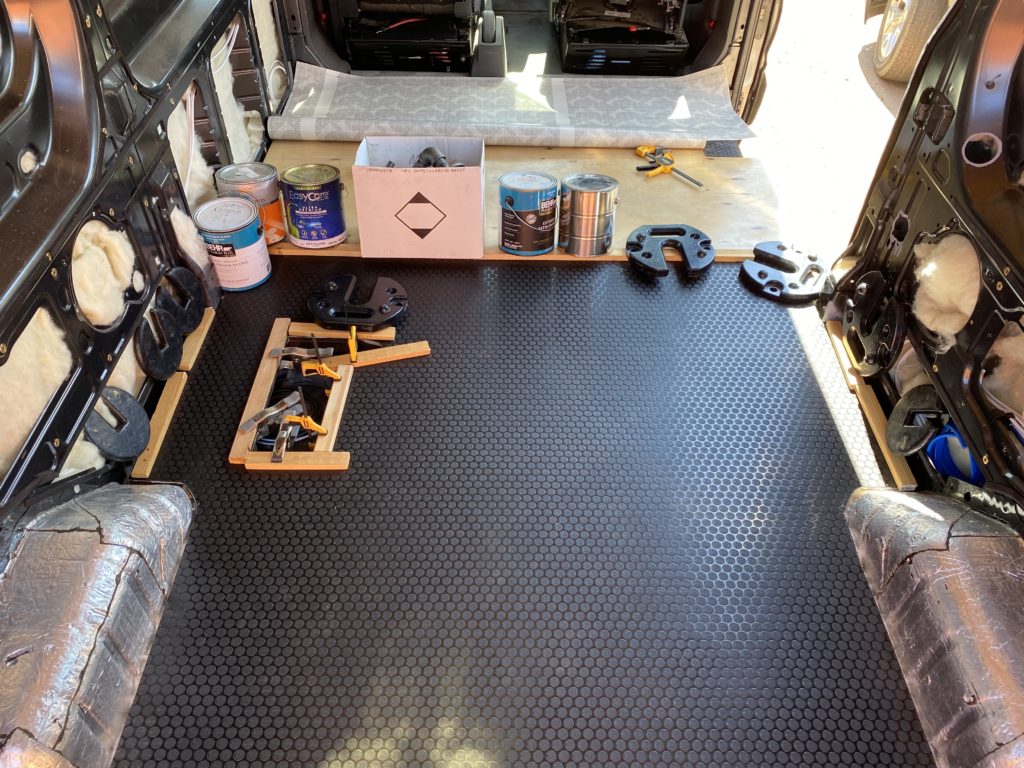
In the end, there were no bubbles, ripples, or lifting edges – it seems as tough the adhesive held quite strong all over. This flooring looks quite nice in a van!
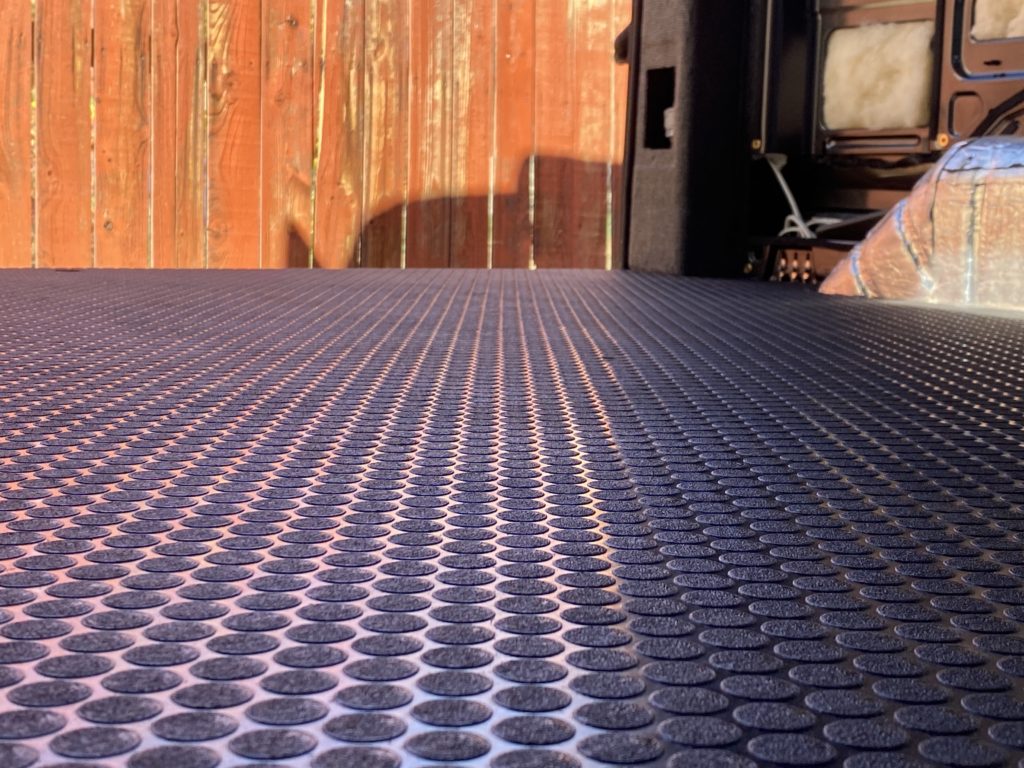
I’ve seen some builds use this coin flooring throughout the entire van. I wanted something a little different up front in the cabin, however. While browsing for vinyl flooring options that look like your standard wood flooring, this hexagonal stone pattern that caught my attention. It fits the color scheme I was looking for and the geometry brings a unique flare to the van.
I installed it in the same manner as the rubber coin flooring above, securing half of it with adhesive at a time. I didn’t capture any pics of weighing and clamping it down, but that all went just like above.
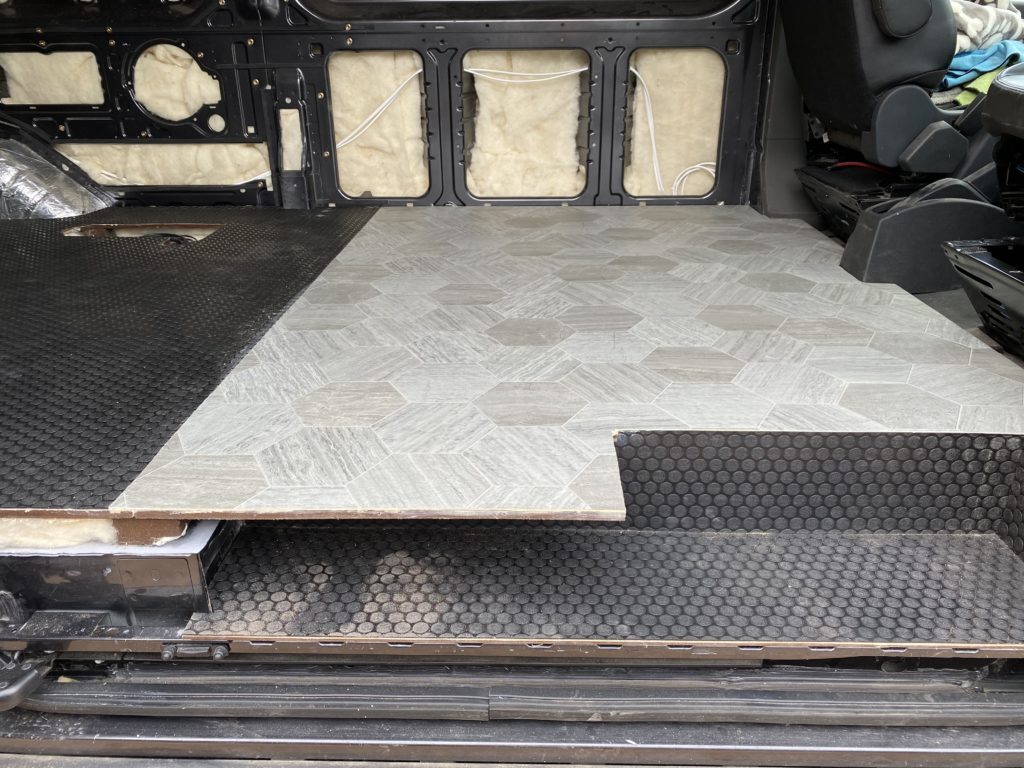
In the end, most of the hex flooring will be covered by cabinets anyway, only a little bit of it will actually be visible. Despite that, I think once everything else is built out, the part that you can see will look really nice!
There’s one last thing you might still want to do… stair nosing?
Step 13: Install Stair Nosing
It will be a bit before I complete installing the stair nosing, so check back later if you’re hoping to see details of that… I’ll be using Johnsonite Vinyl Stair Nosing to give a more complete look to the edges of the floor, glued down with JB Weld.
If you’ve made it through all three parts of this post series, thank you for sticking with me through it all! If you missed Part 1 or Part 2, be sure to check them out! I hope this series was beneficial for you in some way. Best of luck with your floor install and please let me know how it goes in the comments below!
Don’t forget to follow us on Instagram: @MauiTheVan
Thanks for spending the extra time to photograph and document your build. It’s going to make our life a whole lot easier! You’ve done a great job of documenting your build and it’s coming together very nicely.
I have a question for you about how you plan to finish the floor at the back of the van where the doors swing closed to meet it. With the raised flooring, plywood etc, you will now have about 2 inch lip. How do you plan to make this end/ transition smooth, professional looking? Or are you just going to leave the plywood edge raw? Curious on your thoughts.
thanks again,
Robert
Hey Robert! I’m glad you found my site useful. I plan on using “stair nosing” along the back door (and along the slider step) to finish the floor so that the raw plywood edges are hidden. I ordered this stuff, I just haven’t installed it yet -> https://www.tools4flooring.com/johnsonite-dtnxx-top-set-vinyl-stair-nosing-p-489.html