This post contains affiliate links. Learn more here.

High Roof Transit vans have a gigantic metal panel above the headliner that’s going to rattle and be a source of heat loss of those chilly nights at basecamp. Installing sound dampener and insulation above the headliner will help resolve both of those, and its relatively easy thing you can do early in your build like I did.
I found these videos explaining how to remove the 2015/2016 headliner helpful, but as I discovered, the 2020 Transits differ slightly.
Lets get started!
Tools You’ll Need
- Trim Tool Remover [19 Piece Kit or 5 Piece Kit]
- Screw driver Set with
- Flathead screwdriver w/ long handle
- T25 Torx bit
- 7mm Socket
- Noico Sound Deadening Mat
- Noico Barrel Roller
- Isopropyl alcohol (surface prep)
- Havelock Wool
- Tape Measure
- String
- Scissors
- Blue Painters Tape
Steps
- Step 1: Removing Visors & Dome Light Assembly
- Step 2: Removing Headliner Shelf
- Step 3: Removing the Headliner
- Step 4: Installing Noico Above The Headliner
- Step 5: Install the Havelock Wool
- Step 6: Reinstall Headliner
Step 1: Removing Visors & Dome Light Assembly
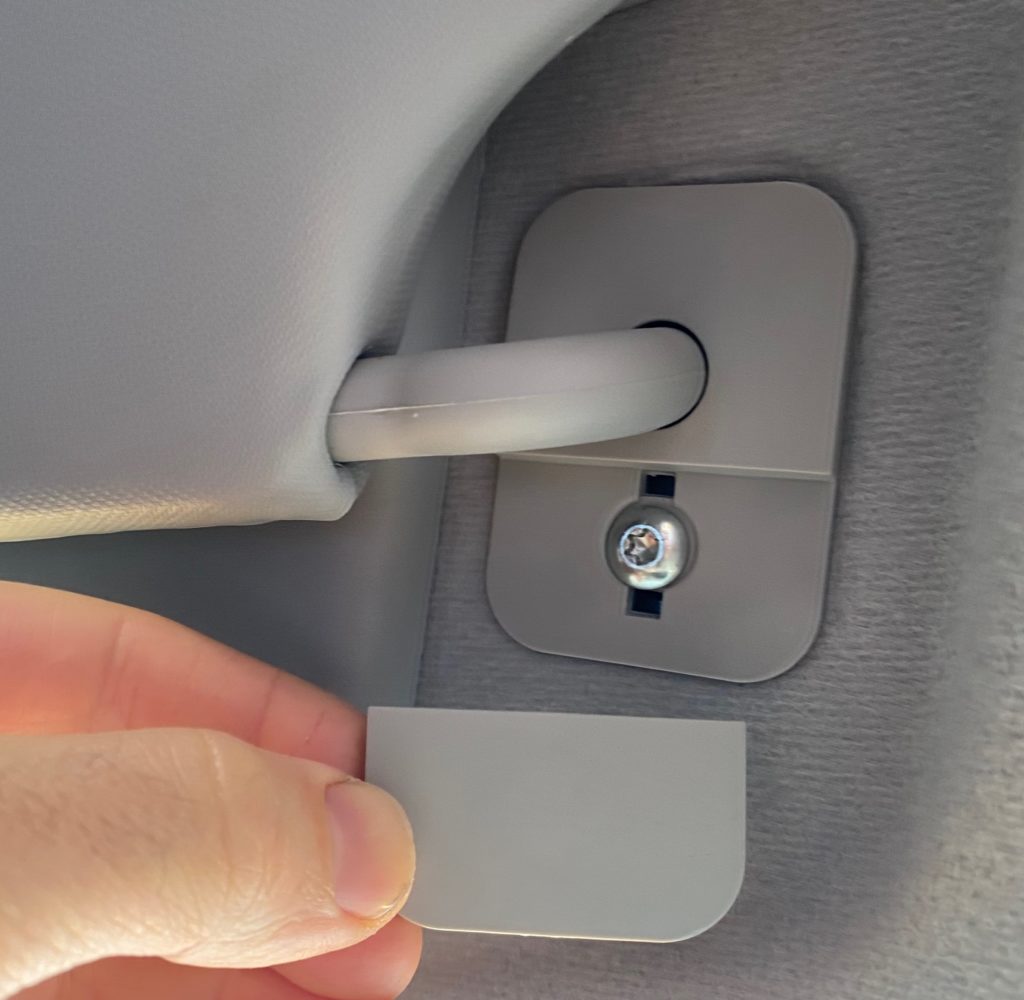
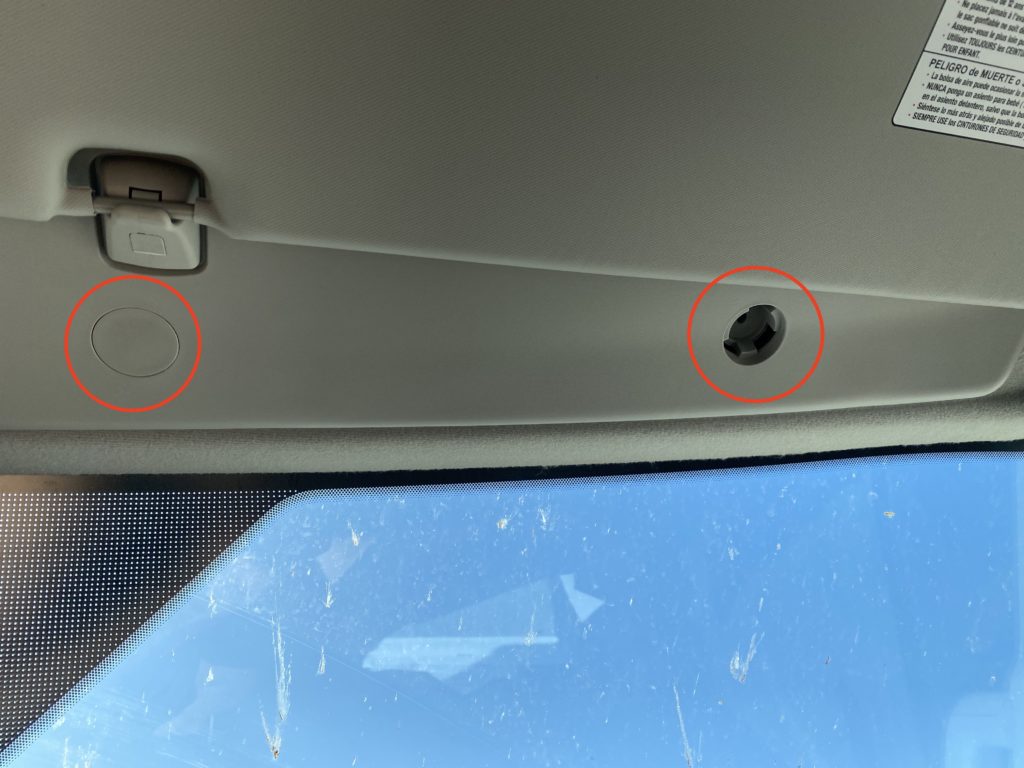
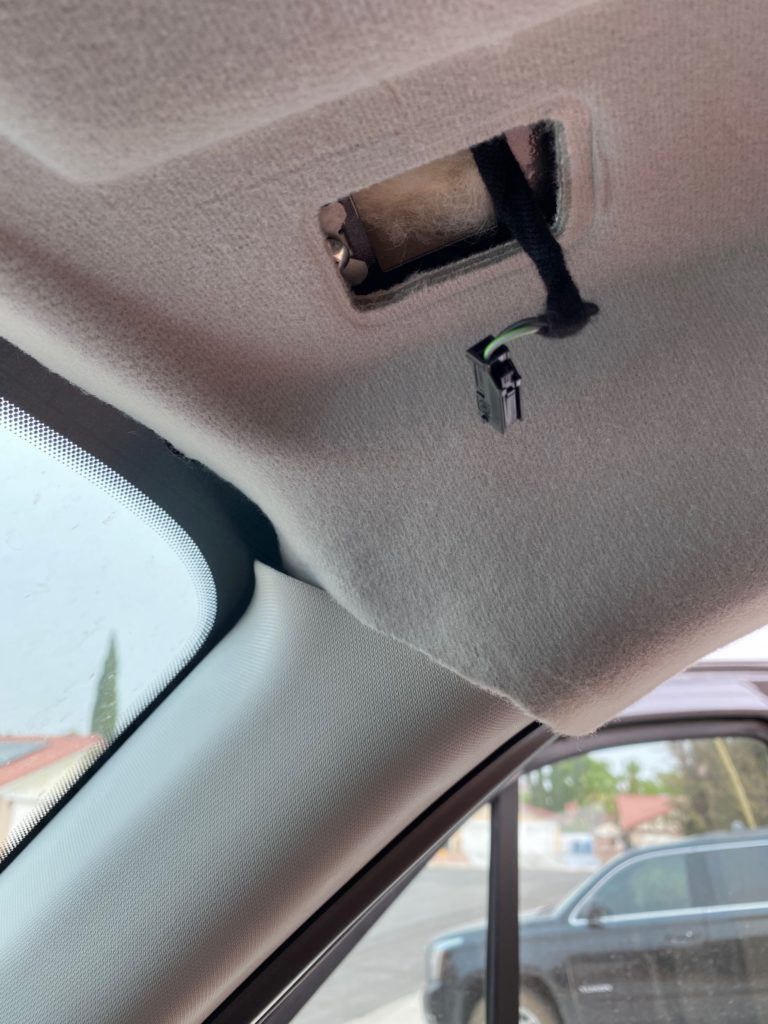
The sun visors are simple to remove, pop them off first and get them out of the way. There is a small cover that prys off with gentle force applied to the indentation, along the edge that faces the window. Excess force can lead to snapping off the tiny plastic clip on the back side of it preventing it from reattaching. Unscrew the T25 torx screw and the visor will release from the headliner, disconnect the wires and set the visors aside.
The next thing you should get out of your way is the light assembly. There are two clips inside the front corners that need to be depressed. You will need to squeeze a trim removal tool (or screwdriver) between it and the overhead shelf to depress the clips.
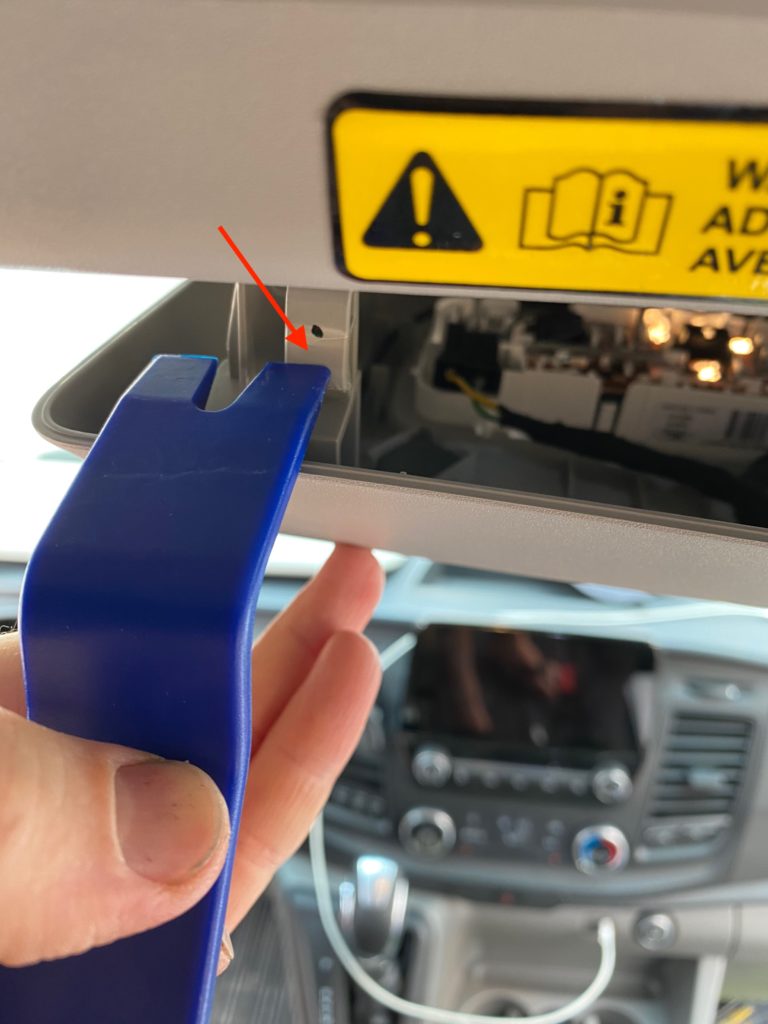
The front of the light assembly will easily drop down, allowing it to hang from the rear two clips. While its hanging, disconnect all of the wire harnesses and then remove the light assembly and set it to the side. The clips closer to the windshield are not attached, you should be able to lift up the assembly, and wiggle it down.

If it seems safe to start removing screws and drop the headliner at this point, its NOT!
The 2020 model requires a bit more to be done with that mess of wires on the underside of the shelf. I took out all the screws before I realized those wires were still attaching the shelf to the vehicle. I had to abort my attempt to remove the shelf, and somehow find a way to get it screwed back to the ceiling without letting all its weight dangle on those wires. Unfortunately there’s not a picture of me balancing the shelf on my head while I got a few screws in. It wasn’t easy, but I managed.
So, don’t make that same mistake… If you see something like the picture below when you remove your light assembly, you’re going to have to pull out all of those clips fastening the wires to the shelf. The only reasonable way to do this is with a trim removal tool. Take a few pictures from different angles so when it comes time to reattach all of these wires to the shelf, you know where they each go!
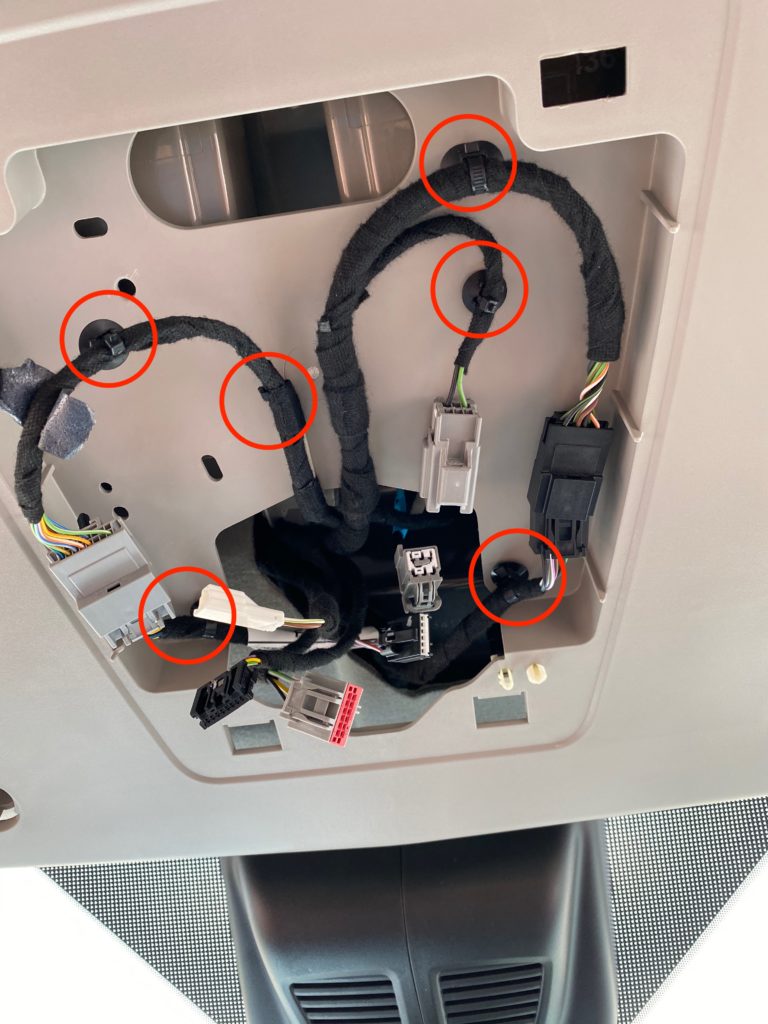
Once those wires are detached from the shelf, we can finally move on to dropping the shelf!
Step 2: Removing Headliner Shelf
There are NINE screws that need to be removed to free to shelf from the ceiling.
FOUR of them can be found up in the handles on each end of the shelf. There are two screws of different lengths on each side, they both take the same 7mm socket bit.
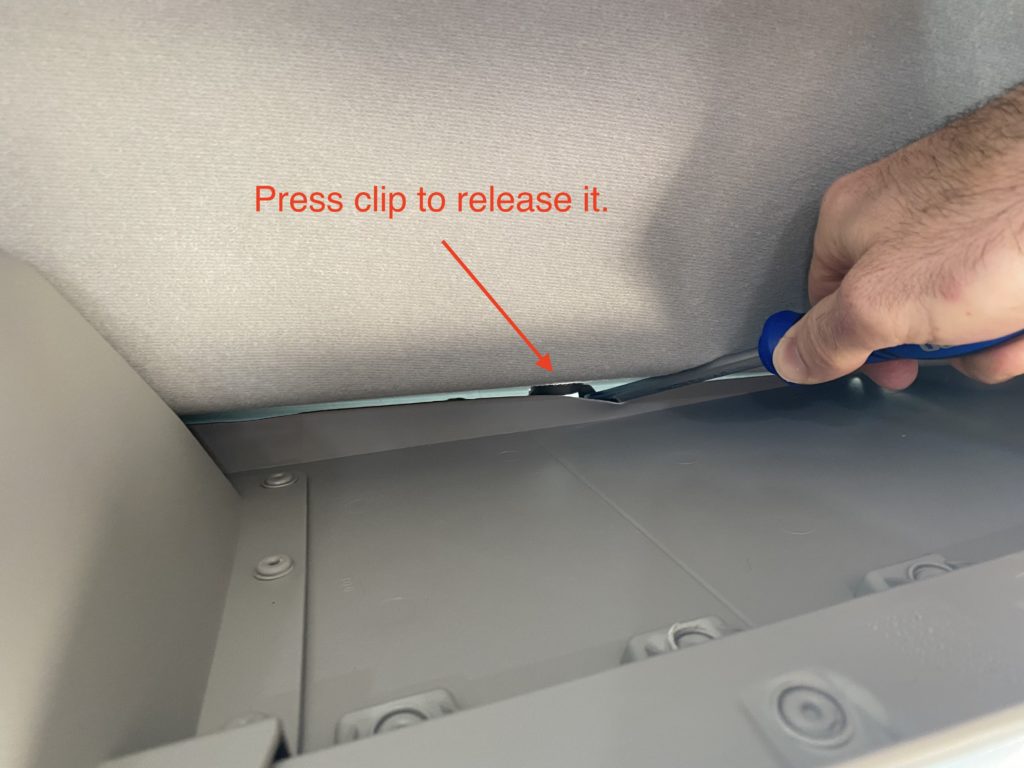
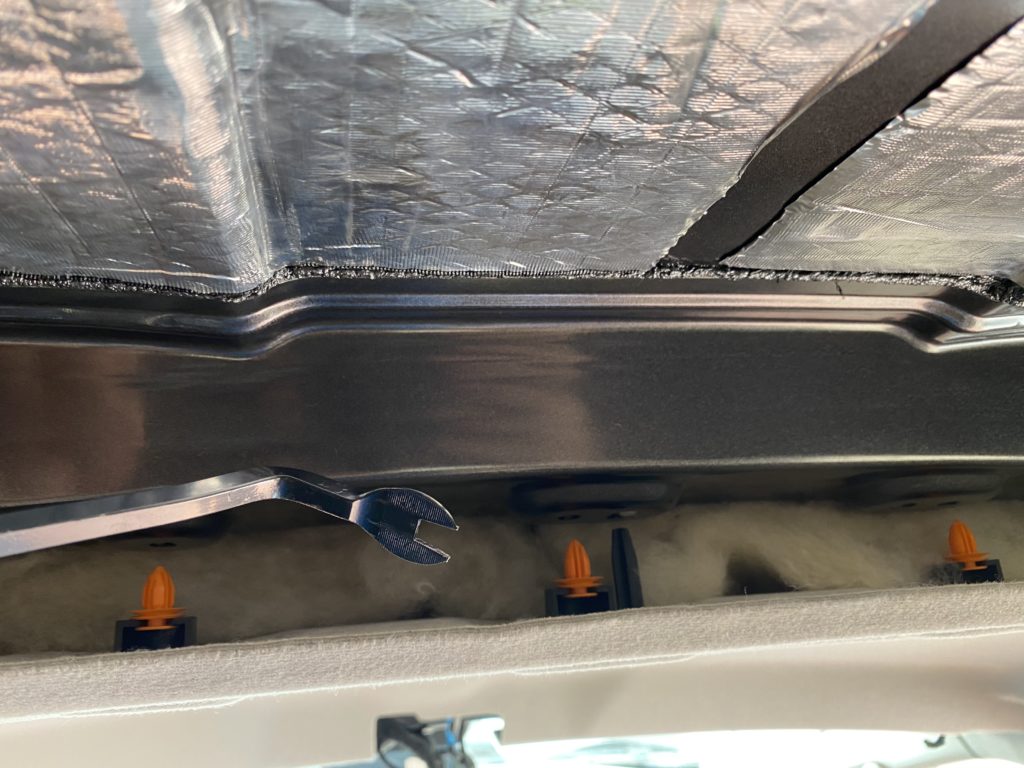
FOUR more can be found along the edge of the shelf closest to the windshield, hidden beneath those round caps that seem impossible to get off.
The trick is to use a long screwdriver to pop the caps off from above. There is a small gap you can squeeze a tool into and if you press on the correct spot on the clip, the screw cover will drop. Its best to remove the two outer caps and 7mm socket screws first, which will allow the shelf to pull down slightly improving your ability to access the other two screw covers in the middle that still need to be popped off from above.
The last ONE is hidden in the hole above the light assembly. Now that you have the wires freed from the shelf, you can push them out of your way and use a long screwdriver to get at the final screw easier. It requires the same 7mm socket as the other screws you just removed.
Once you remove that last screw, the shelf will come down thanks to gravity. Support the weight of the shelf as you are removing these screws and make sure none of the wires snag on the shelf as you pull it away.

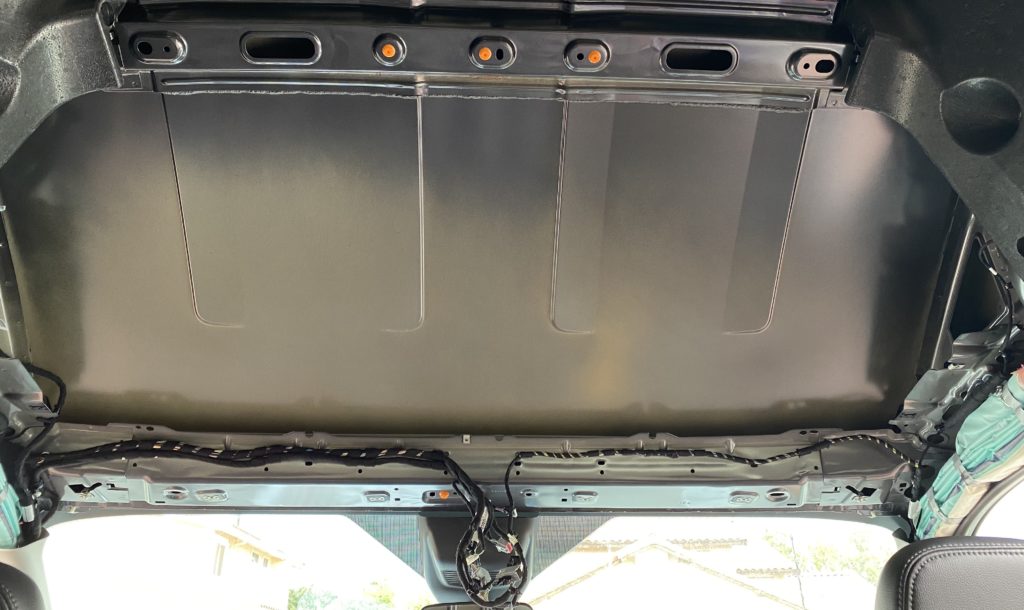
Now all that’s standing between you and that bare metal, is the headliner itself. Time to bring that down!
Step 3: Removing the Headliner
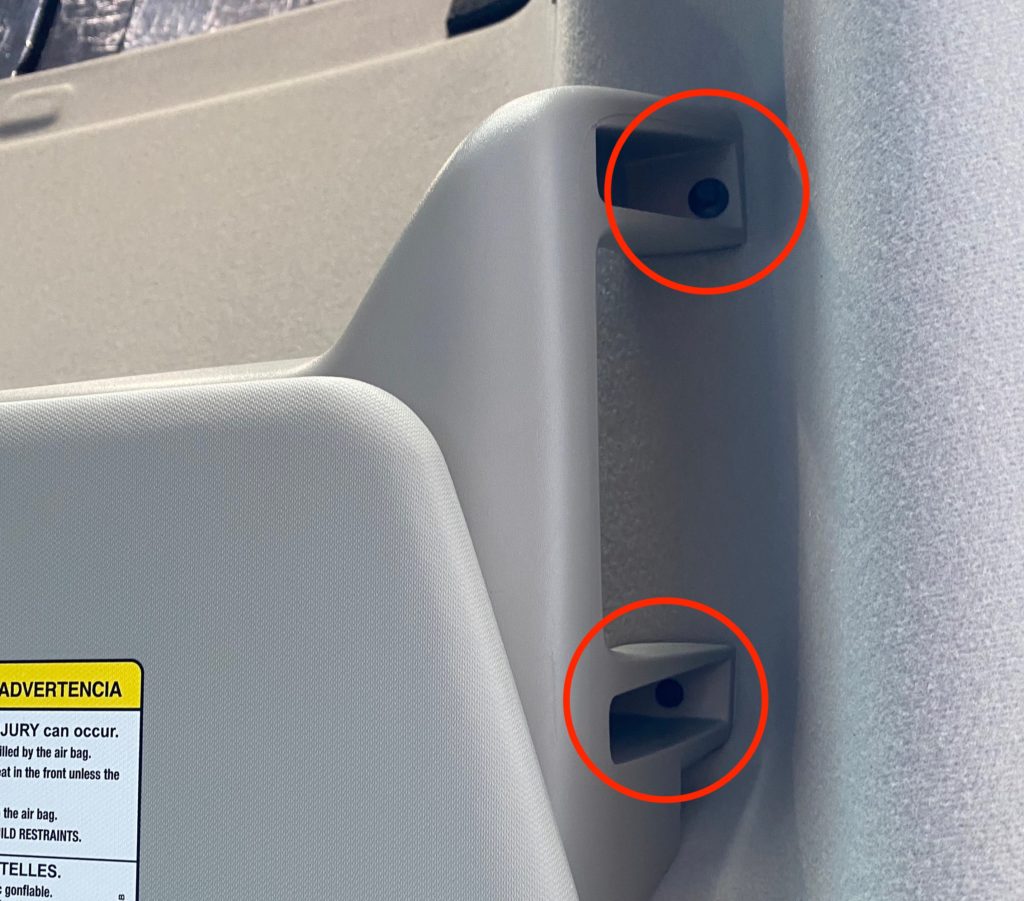
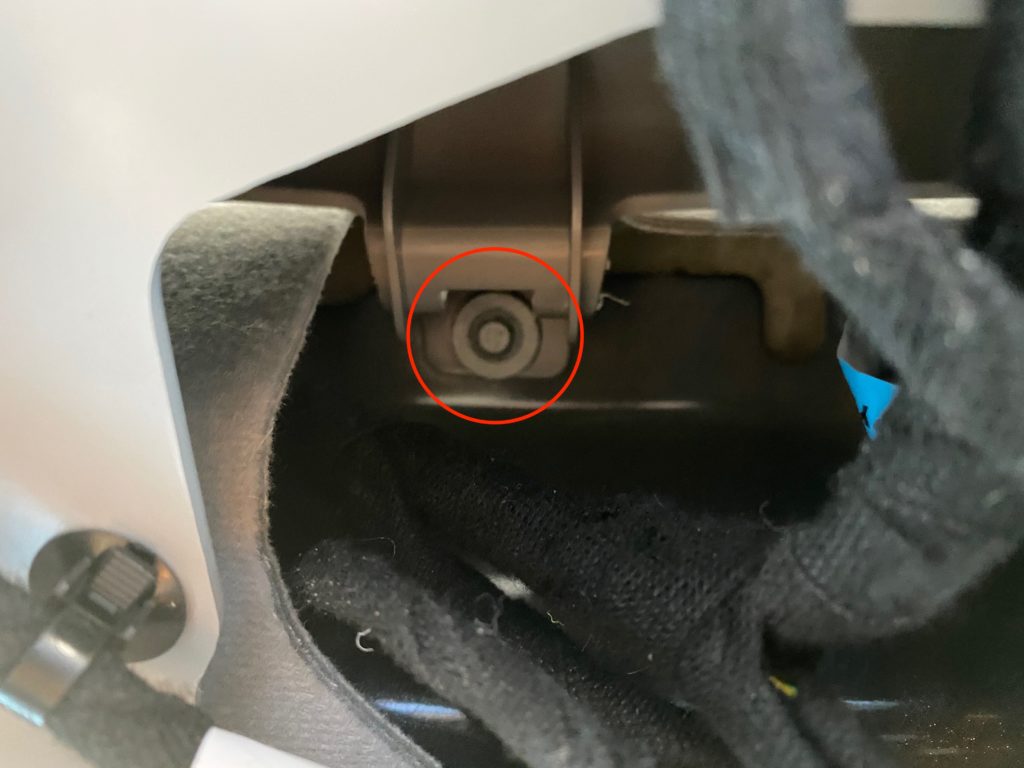
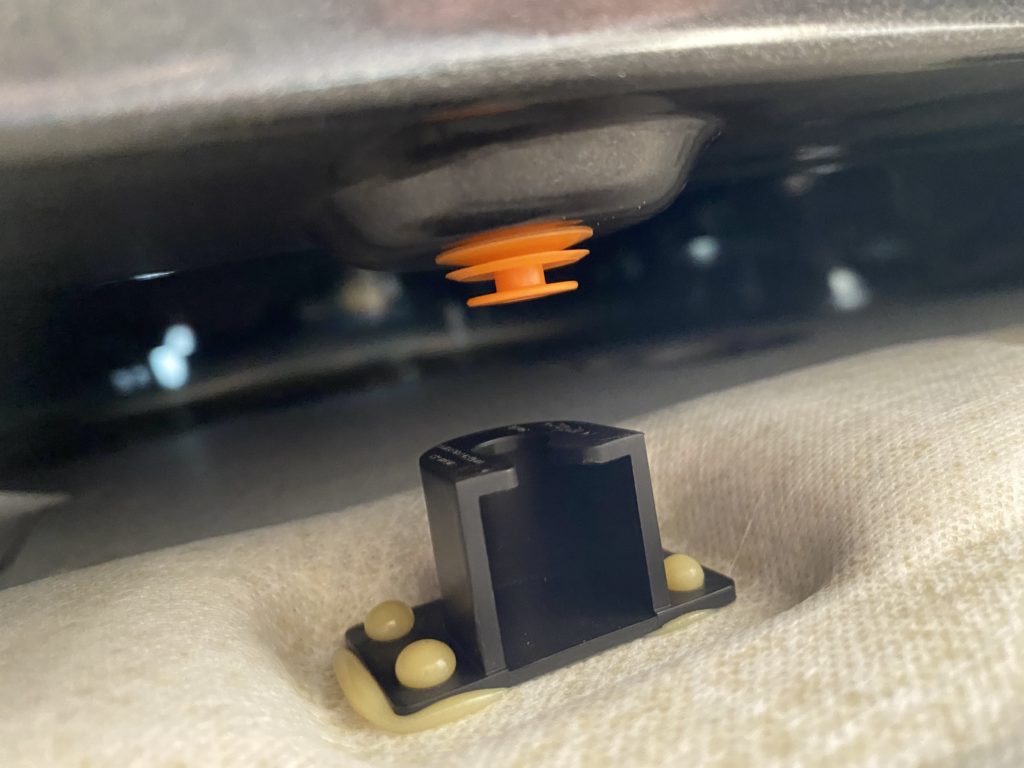
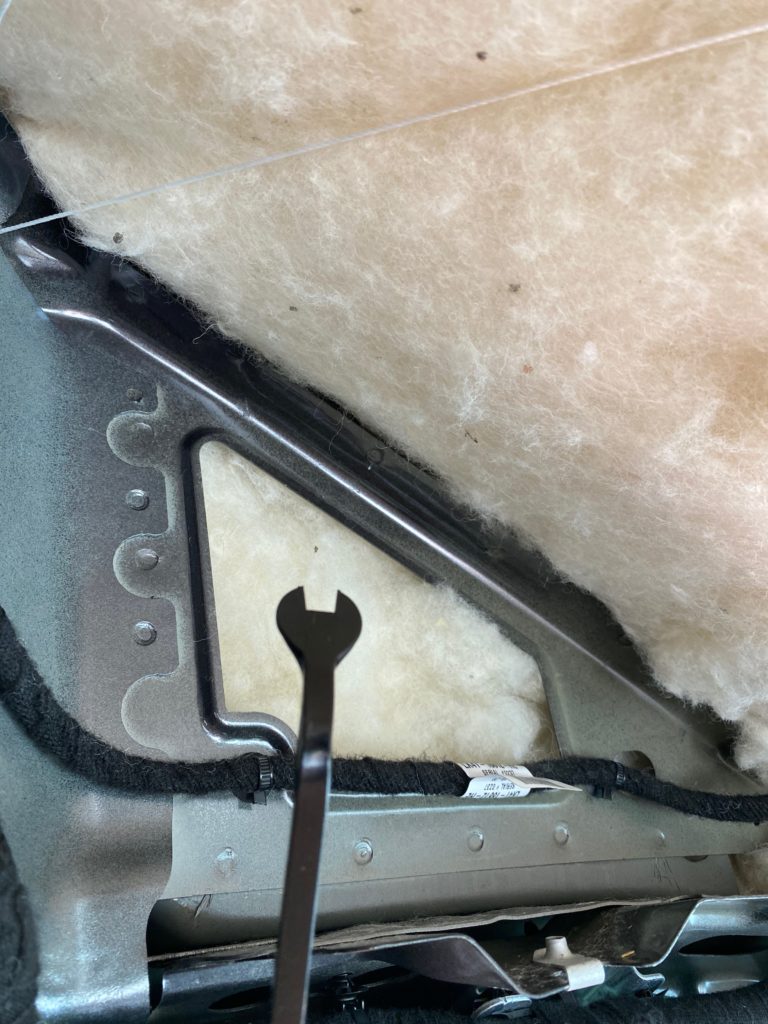
There are FOUR orange clips holding the headliner up and they are somewhat tricky to deal with.
If you’re not tall enough to peel back the front edge of the headliner to see the THREE orange clips attached to the van frame, grab something sturdy to stand on so you can. I attempted to separate the clips by pushing the headliner forward so the orange tab would slide out of the black clip. This was challenging for two reasons.
- The headliner doesn’t really want to bend far enough to allow the clips to release
- The middle clip has an additional pin sticking into an alignment hole, further limiting your ability to push the headliner forward to disconnect the clips.
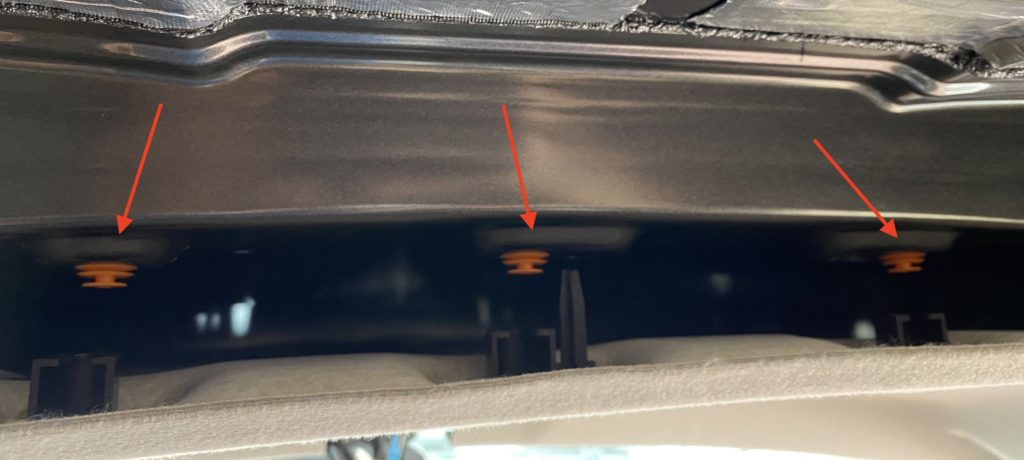
After pushing on it for a bit, I did manage to get the 3 clips undone. It later became apparent that getting the clips back on was going to be 1000x easier if I used my handy trim removal kit to remove the orange clips from the metal rib, put them into the black clips, then push them back in with the headliner already securely attached.
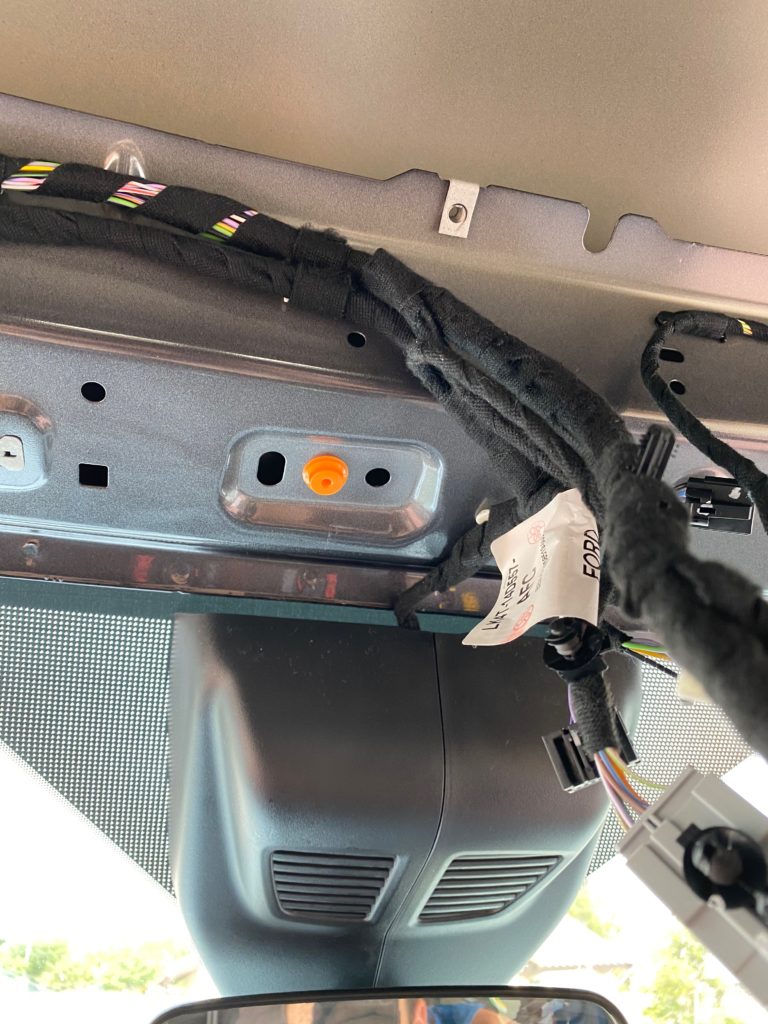
There is ONE last orange clip up front towards the center of the windshield. I once again finagled the headliner in all the right ways to get it to separate, but if you have a long enough arm you might be able to get a trim remover in there to pop the orange pin out, which you may want to do to get it back up later anyway. Once that is free, you can carefully pull the headliner away. Its wedged between some things, so go gently and work your way around, taking note of how you need to tuck it back together later.
Step 4: Installing Noico Above The Headliner
Snap your fingers, and voila!
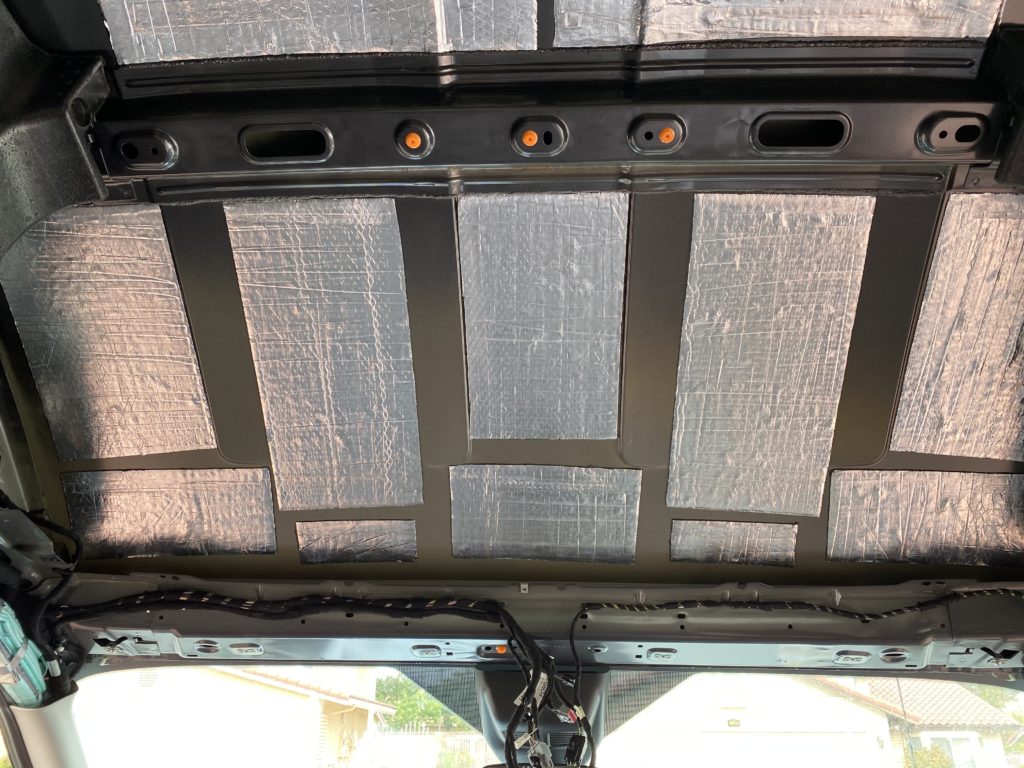
Ok, you actually still have to measure, cut, and adhere the sheets to the ceiling with a roller. There are tutorials online if you need help installing the sound deadener.
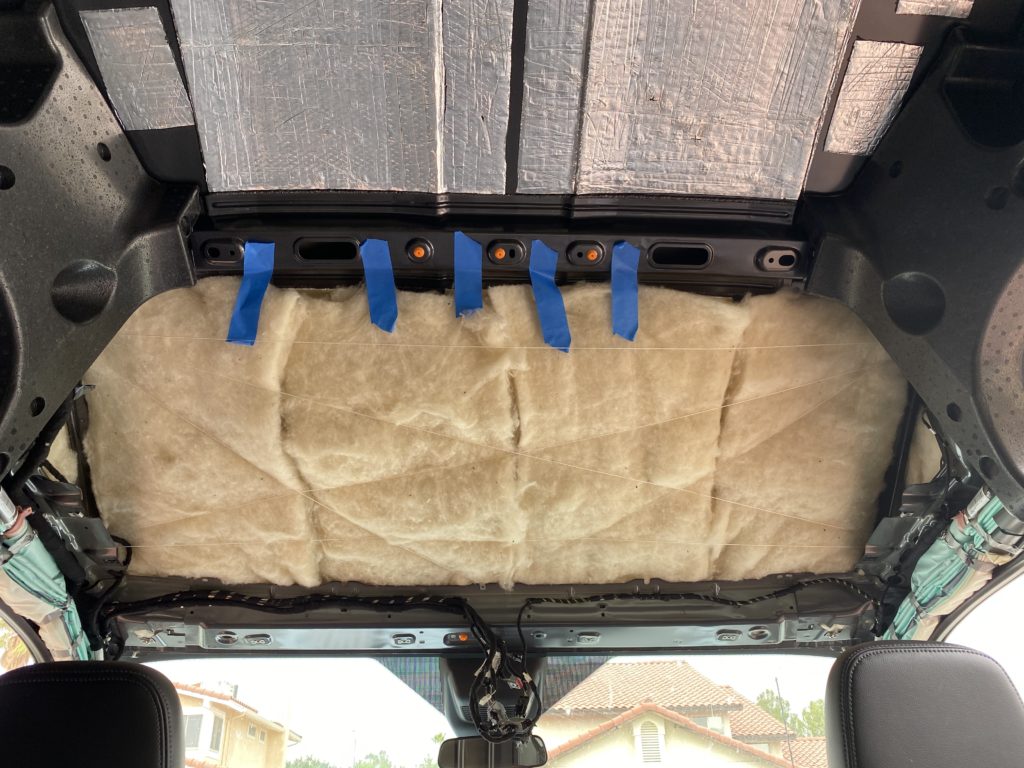
Step 5: Install the Havelock Wool
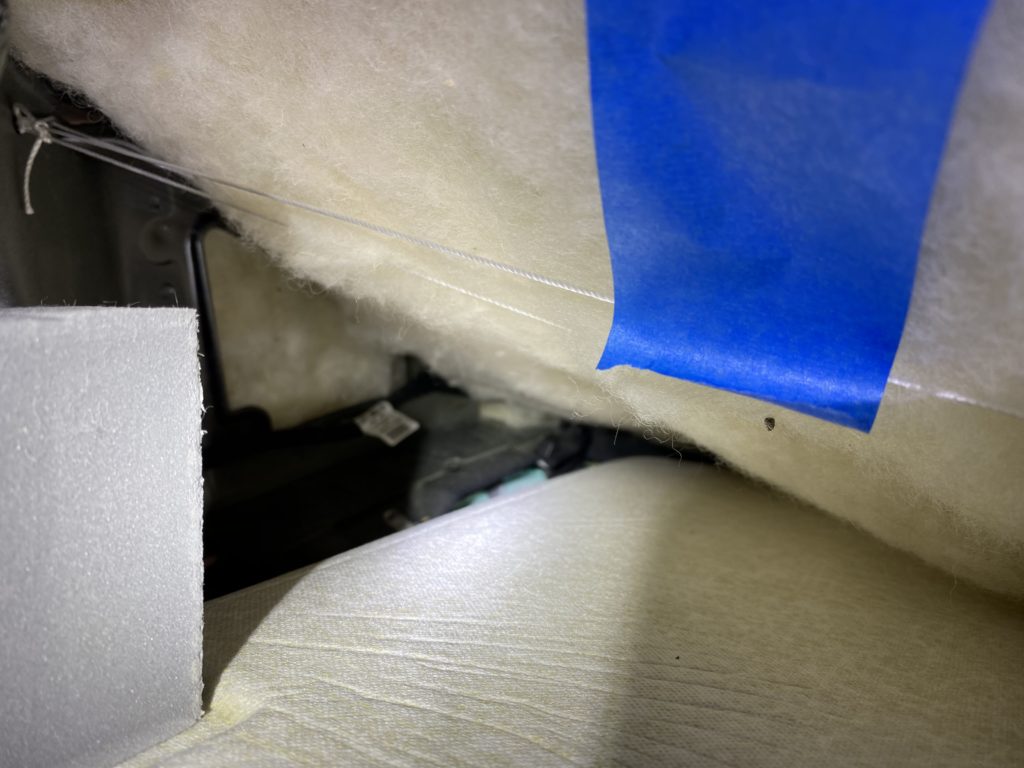
Whoa! I actually took a video for this part, so check it out for a rundown of the way I ran strings to hold up the wool and some hidden nooks and crannies you can tuck it into as well.
Got it? Ok good. Just get creative with how you zig-zag the string so that there is enough of it to hold up the wool. You can get an idea for how I did it in the video. The string shouldnt be the only thing holding up the wool, there are some pockets it can be tucked into for additional support as well.
I’ve been an avid promoter of trim remover kits in this post for good reason. This one (below), whatever its official name is, apparently has hundreds of uses, here’s one… tucking the wool into the narrow channels along the left and right edges above the triangle openings to hold it in place.
Step back and admire your work… I temporarily used some blue painters tape to keep the wool from flopping over the top string while I was getting the headliner back up. I pulled it out after the insulation was secured in place by the pressure of the headliner against it. Speaking of, lets get that back up.
Wait a minute! Did you notice that hollow crossbeam the orange headliner clips are in? Now would be a good time to tuck some insulation into that channel before its covered back up. I found it easy to cut 4″ strips and push them through with various tools

Step 6: Reinstall Headliner
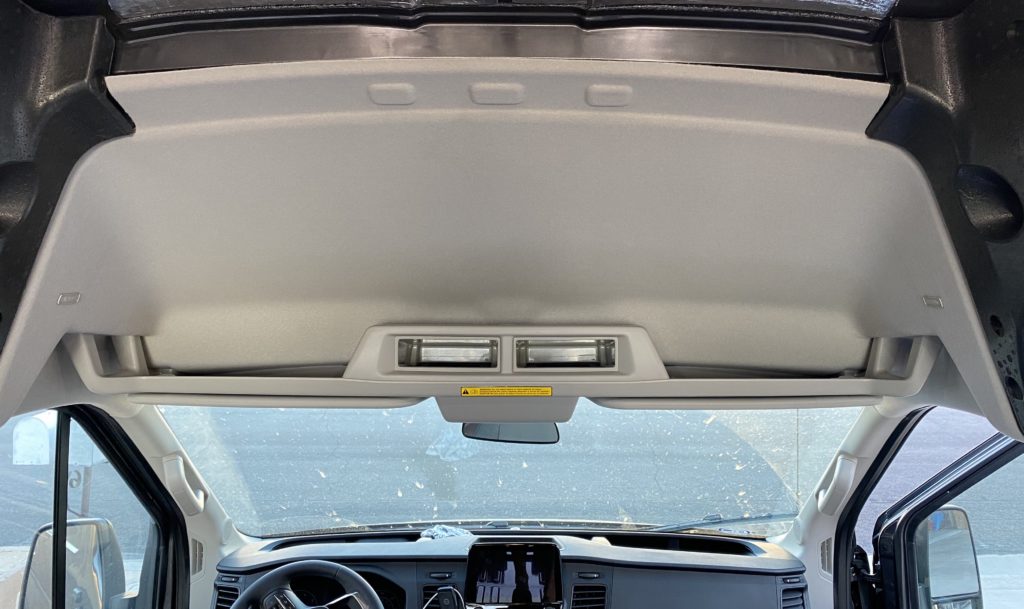
Ok… now you can reattach the headliner! Don’t forget to pass your dangling wire harasses back through the opening! Then, start with reattaching the single orange clip near the center of the windshield and work your way up to the other three. As you do, check to make sure that the headliner is tucked into all the places you untucked it from when you pulled it out, like the A-pillar, for example.
Here’s the tool I used to take down the orange clips and attach them to the black clips. Once that was done, it was super simple to push the headliner straight up into place. It really was 1000x easier.
The headliner creates two other large voids above the driver and passenger seats that you may want to insulate before you fasten the clips back to the ceiling. With the headliner almost back to its original location, reach in to the left and right and fill the gaps you can. Make sure you avoid the area directly around the airbag mechanism – keep the wool where it won’t interfere with any of those components performing their jobs!
So… now its basically down to reassembling everything in the reverse order we took it out – starting with reinstalling the shelf. Have a friend or two lift the shelf up so you can feed the wires through. Then attach the center screw above the light assembly, as well as the two screws on each handle above the doors and the four along the window.
Once that’s all secure, dig up those pictures you took earlier and reattach the clips holding the wires to the underside of the shelf. Next, dangle the light assembly with the back two hooks, allowing you to reattach all of the wire connectors. Close the light assembly by gently pushing it up until the front two clips click in place. Finally, reattach the visors.
…and there you have it folks. From start to finish it took me most of one morning. If you have the right tools and all materials you need, you can definitely get it done in less than a day, even if you have little or no experience with this kind of thing.
If this post was helpful, drop a comment below and share it! Thank you!
Don’t forget to follow us on Instagram: @MauiTheVan
Very good information. However, I still have some questions.
1)What specific van did you get?
2) Is it a cargo van?
3) Did you get any additional safety features?
I am asking because my 2020 AWD 350 GVWR 10360 ecoboost does not appear to have an airbag installed above the passenger and driver doors. I would be happy to send pictures.
Thanks for the help!
Jeff
Hey Jeff! If you go to the “About” page, I have the full specs listed for my van. It is a cargo van, but I don’t think there are any special options that would have added side curtain airbags, thats likely a standard safety feature? Here is a pic that shows the air bags from a different angle, look towards the bottom left of the image to see the airbag.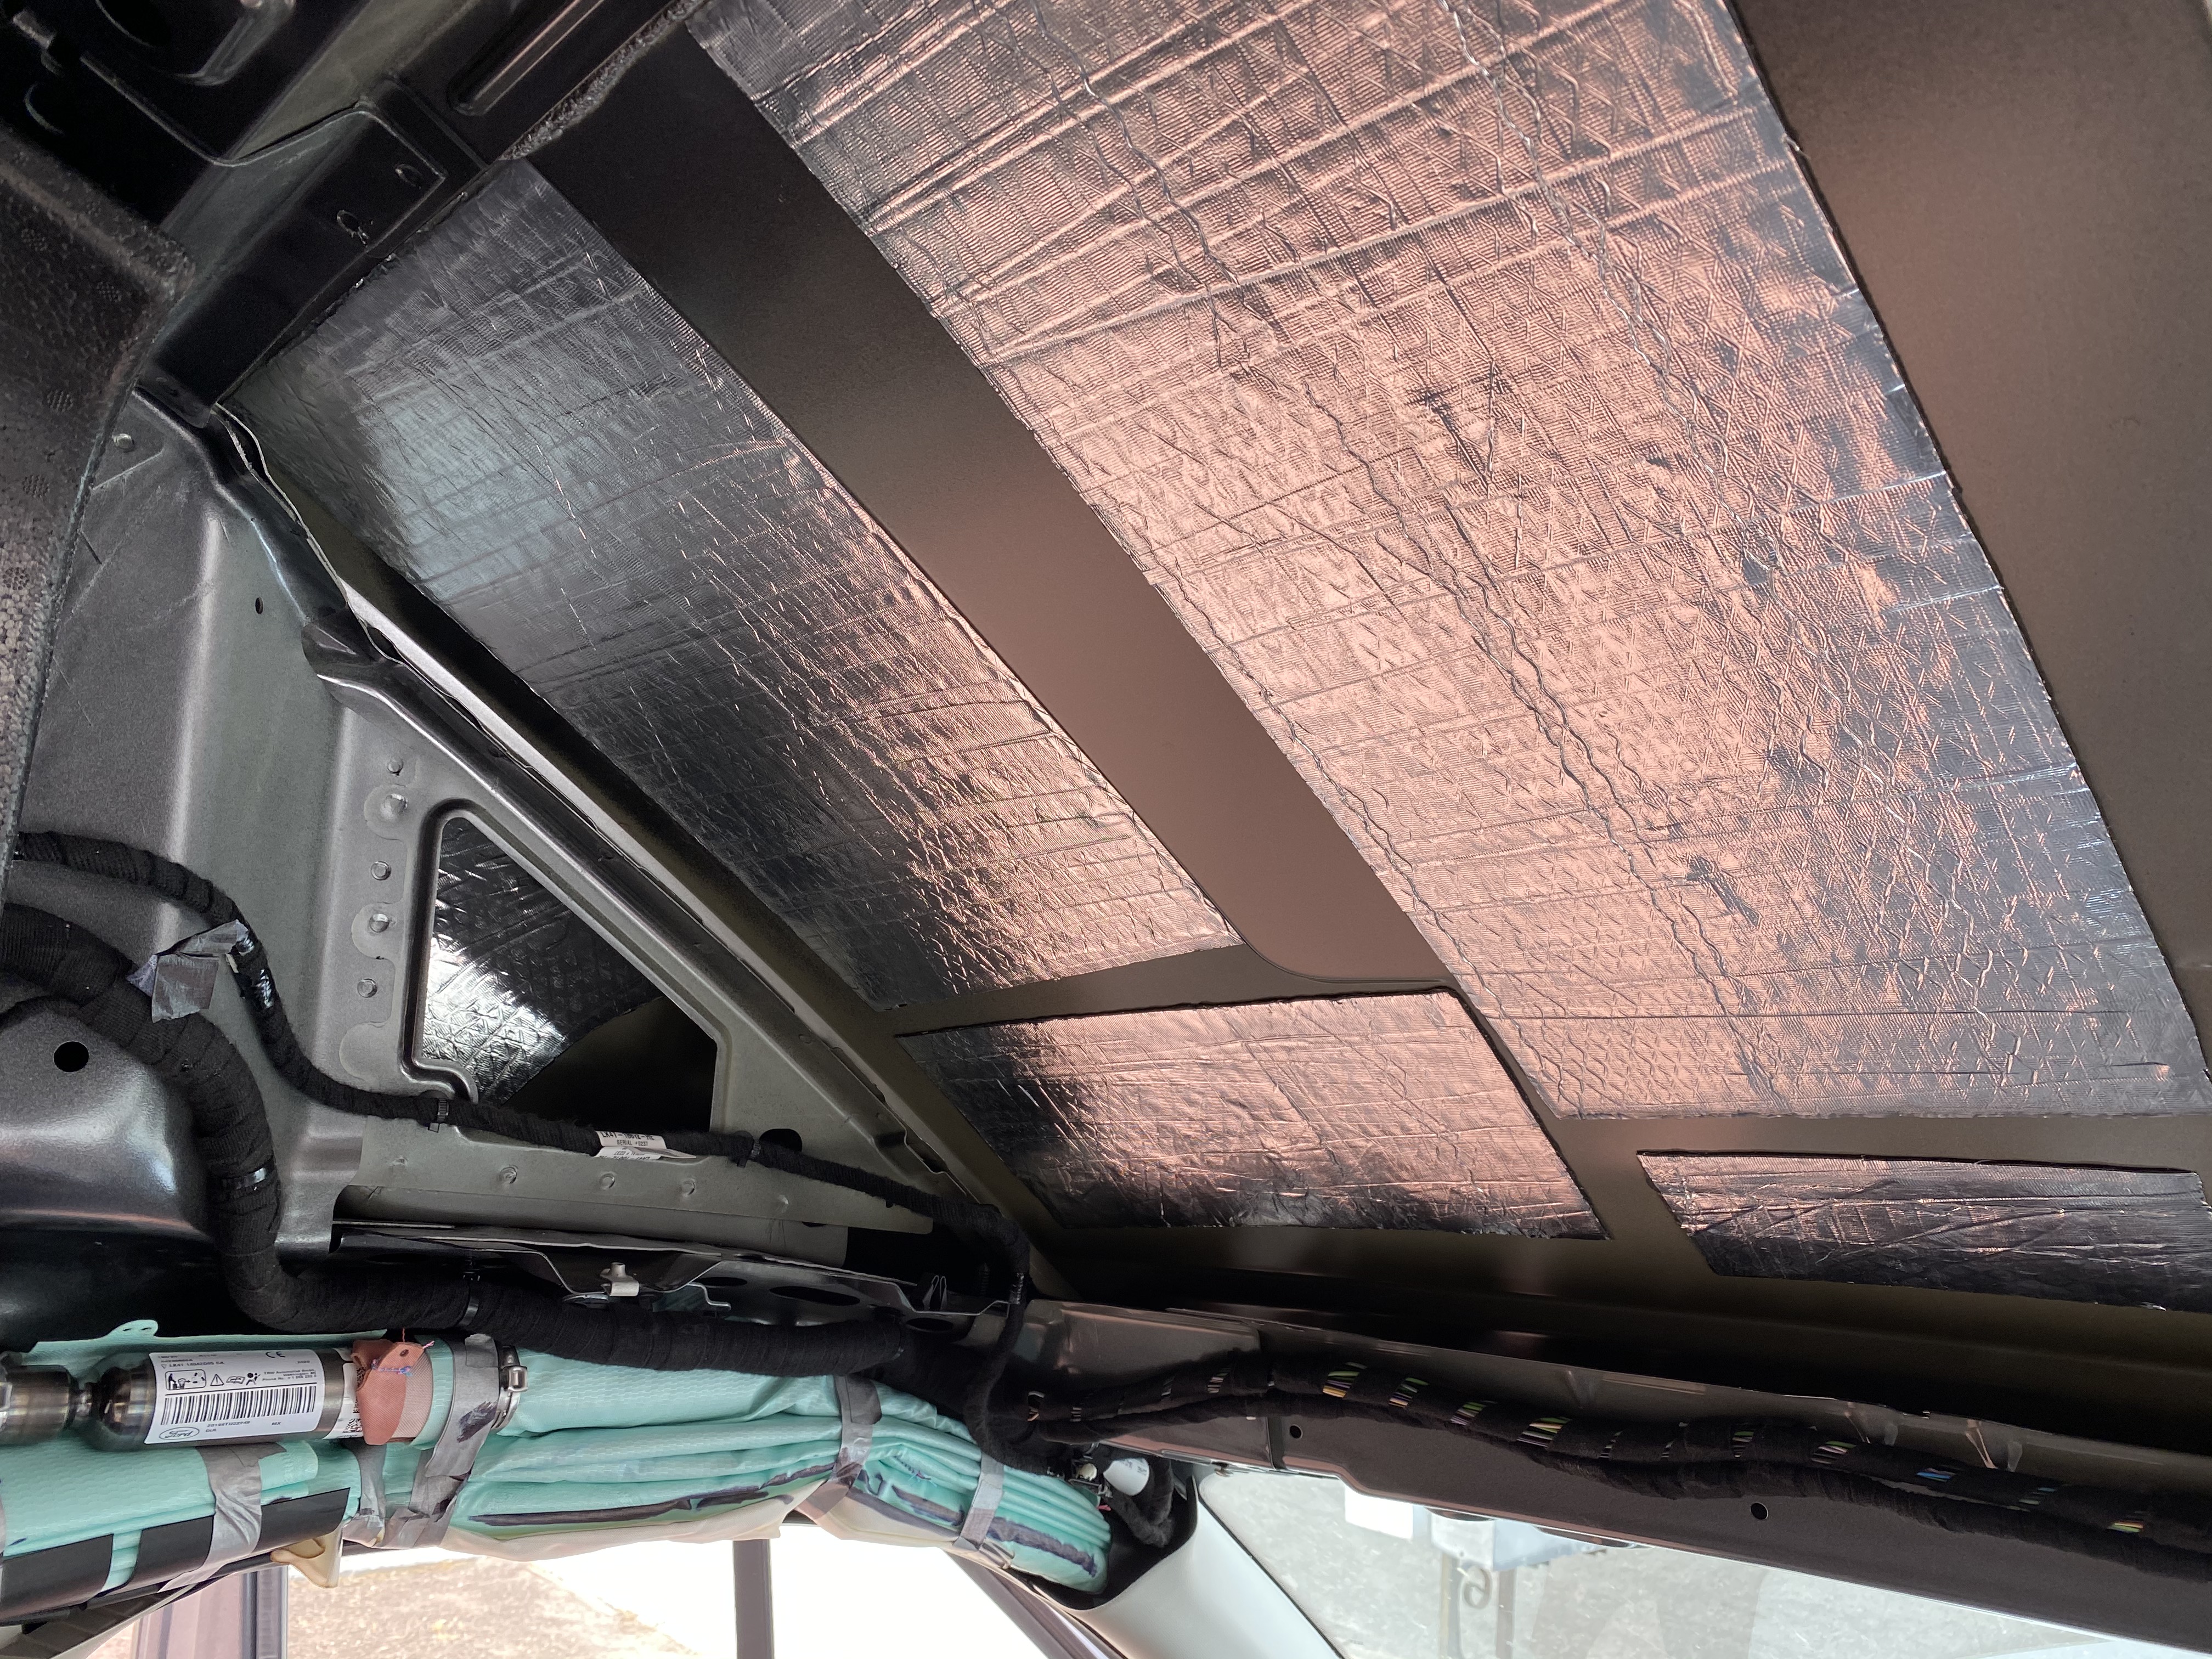
Yeah, I am getting into it with Ford now. It states on my Window sticker under Safety/Security “Airbags Front, Side and safety canopy system” but it appears the only airbags installed are in the dash. I am told you can not add airbags after a car is built at the factory, so my van build has stopped. How can I cut holes in my van for a vent fan or window if this van may go back as a lemon? Not happy with Ford.
Consider yourself lucky if you don’t have the side curtain airbags. Nearly ever van built since 2015 does not have them, they are just showing up on the newer models. One more big brother thing you will most likely NEVER need and why would anyone even think about sending a van back for THAT ? I removed them from our van – if you look up the crash stats they end up doing more damage than good and are actually dangerous in rollovers. Dumb option if you ask me.
All Transits have the side airbags above driver and passenger windows. The crew vans have additional side airbags above the second row seats, and the passenger vans have them running all the way back. In other words, all occupants sitting in factory installed seats along the sides of the van are protected by side airbags.
About to start this. Appreciate the detail! What’s to prevent me from using my trim removal tool at the get go to pop those orange clips out still attached to the headliner? Seems like that would simplify the whole process further?
If I was going to pull the headliner down again, I would do exactly what you suggested… pop the orange clips out using a trim removal tool while they are still attached to the headliner. I managed to free the headliner by pushing it forward until it separated from the clips, but then I realized it was going to be easier to get the headliner back in place by removing the orange clips from the metal rib, reattaching them to the headliner, then lifting the headliner into position and pushing the orange clips back into their original holes. Your proposed solution seems like it would simplify that process a bit. Let me know how it goes once you attempt it!
As a follow up. It took exactly 2 seconds to pop out all three plugs and reinstall with a cheap auto trim removal tool ($8 kit). Amazing, considering how much grief these plugs seem to have given people.
BEST details for transit headliner removal/reinstallation on the Internet!
Just what I was looking for. Thanks! 🙂
Great pictures and advice. The whole job, taking the headliner out, took 1 1/2 hour. Your description of the job was spot on, Thank you
Awesome! Glad you found this post helpful.
Matt – Thank you so very much for your detailed information on this “simple” part of the build. It saved me a ton of frustration and likely damaging parts of this system. I especially appreciated the tip of using the long screwdriver to pop the four “impossible” screw covers near the windshield. This was simply awesome!
That’s fantastic to hear! I always enjoy hearing success stories from others knowing my blog posts helped them on their van build!
Hey Matt – the wife and I did our 2020 Transit today using your awesome instructions, pictures and advice. We started around 10:30 and were done by 3:30 or so (with a break for lunch).
We could not have done this successfully without your notes and high quality pictures – thank you for sharing these. We only made one mistake of sorts, the covers for the visors have a very small/thin piece of plastic holding them in, and both side broke when we removed them. No issue, we used a hot glue gun to put them back in place as we expect to never have to remove them again.
We did make one modification; rather than put up the Havelock wool with string, we set the bats on the top of the headliner after we had insulated all the nooks & crannies front, left and right, then reinstalled. No issues at all.
Thank you again for sharing your experience and photos!
Vernon & Linda
Amazing! Glad to hear you had a successful install other than those darn little tabs on the visor screw covers. I actually broke one during my install as well, so I’ll update the post to warn others to be gentle with that clip!
These were super helpful for taking the headliner down and putting it back up.
We got a little stuck in a couple of places, mostly because we did not know how to effectively use the trim tools.
Except for the usual difficult spots in taking it down the frustration putting it together was reassembing the light assembly. I should have taken more pictures and we pulled it apart.
Thanks for the write-up. I printed it out and had it with us. First step of insulation is complete.
Thank you for the detailed write-up. It’s not an easy task when you don’t want to break your new van. It really step by stepped me through the procedure. I have the crew van so it was very slightly different (the 3 orange clips on the back were 1 and the other 2 orange clips were on the crew van part of the headliner, and no styrofoam blobs to worry about). So the instructions work for both variations and probably the passenger van also.
Just like you, I broke one of the screw covers on the sunshade and I was being careful. A couple of pieces of masking tape over the hole and the cover stays on. 🙂
Do you remember which of the two screws was longer?? I removed them and forget which one went in front/back
I dont remember how the screws were configured, I did this project a while ago. You might be able to figure out by trial and error with a high degree of certainty?
Matt,
Thanks for the fantastic information. Some slight modifications to the instructions for 2021 Transit, but first I’ll second a few points.
– Get the trim removal tool. Well worth the $16
– Pop out the screw covers from above. Works great. Notice that there are two different styles of covers with different prongs. When putting them back, they only fit in the correct hole.
– Absolutely take a photo of the electrical.
For 2021
– The screws on the handles above the door are not both 7mm. The one closest to the windshield is 7mm, the other is 8mm. My 7mm socket would not fit in the slot, but I was able to use a 9/32 nut driver just as well, and a 5/16 for the 8 mm.
– The light assembly is held on by two small metal clips that fit over plastic posts in the front. The clips are loose. IMPORTANT. Make sure you take them off and put them with the rest of your parts, or you’re likely to discover that you lost one or more when trying to put things back together.
Cheers
Thanks for that great information!!
It has only taken us almost 2 1/2 years to get around to insulating our medium roof Transit. But I bookmarked this page right after you posted it and am so glad I did.
THANK YOU for a great write-up with plenty of clear and helpful pictures.
Thanks for that feedback. I’m glad the post was helpful for you. Best of luck on the rest of your build.