This post contains affiliate links. Learn more here.
There are lots of obvious spots in a Ford Transit, or any van for that matter, that should be insulated to help keep the interior quiet and temperature comfortable – the giant wall panels and roof for example. There are all sorts of other nooks and crannies that are just as important and often get overlooked. The slider door is one of those, and fortunately, its super easy to remove the factory panel covering it to gain access to the cavities in the door. This spot is significantly easier to access than above the headliner, which I covered in my last post, so tackle this area first if you need to build up some confidence before dropping the headliner!
Tools You’ll Need
- Trim Tool Remover [19 Piece Kit or 5 Piece Kit]
- Screwdriver Set with T25 Torx bit
- Noico Sound Deadening Mat
- Noico Barrel Roller
- Isopropyl alcohol (surface prep)
- Havelock Wool
- Scissors
- Blue Painters Tape (optional)
Steps
Step 1: Remove Factory Panel
The plastic panel covering the slider door is held in place by 14 push pin clips and four T25 Torx screws. You can use a trim removal tool or screw driver to pop out the pins and then the clips detach from the door with ease. Work from the bottom up, removing the center pins along the top row last so that the panel is held in place until the very end.
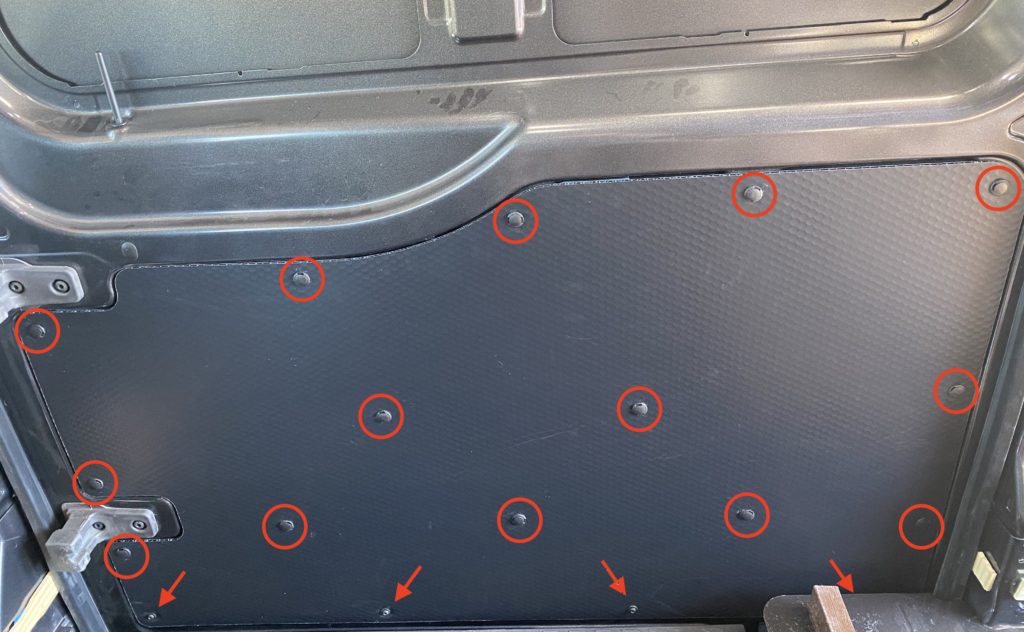
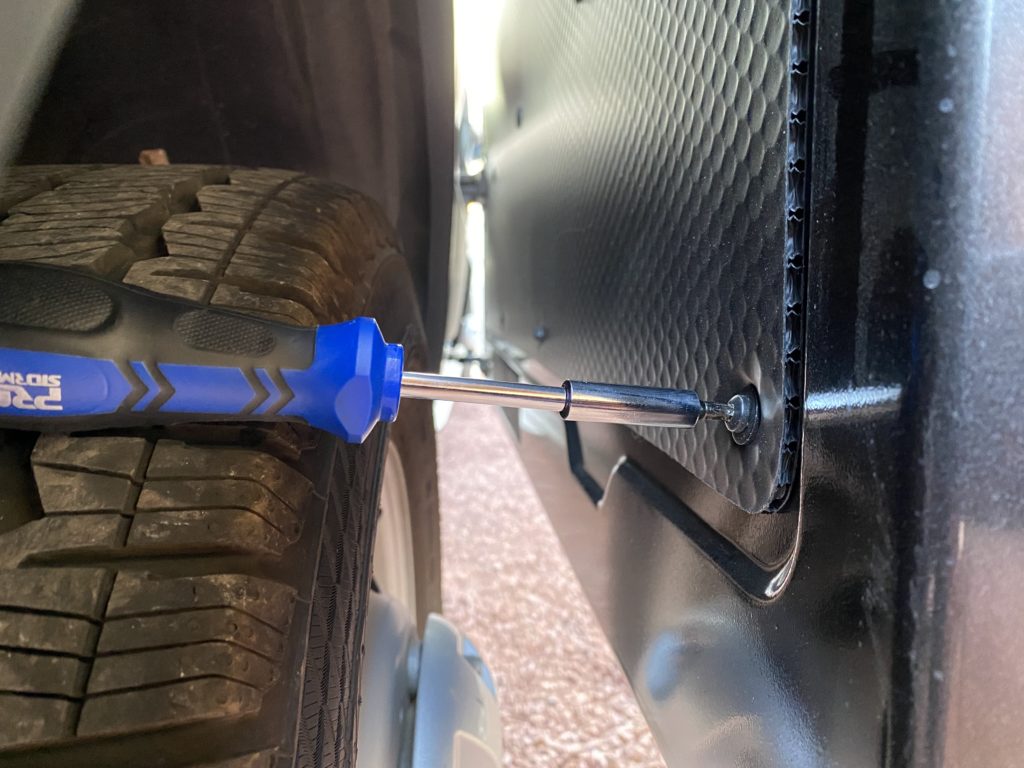
Three of the four T25 Torx screws along the bottom are easily accessible, the last one I could only reach by fully opening the door and using the space created by the wheel well to access the screw.
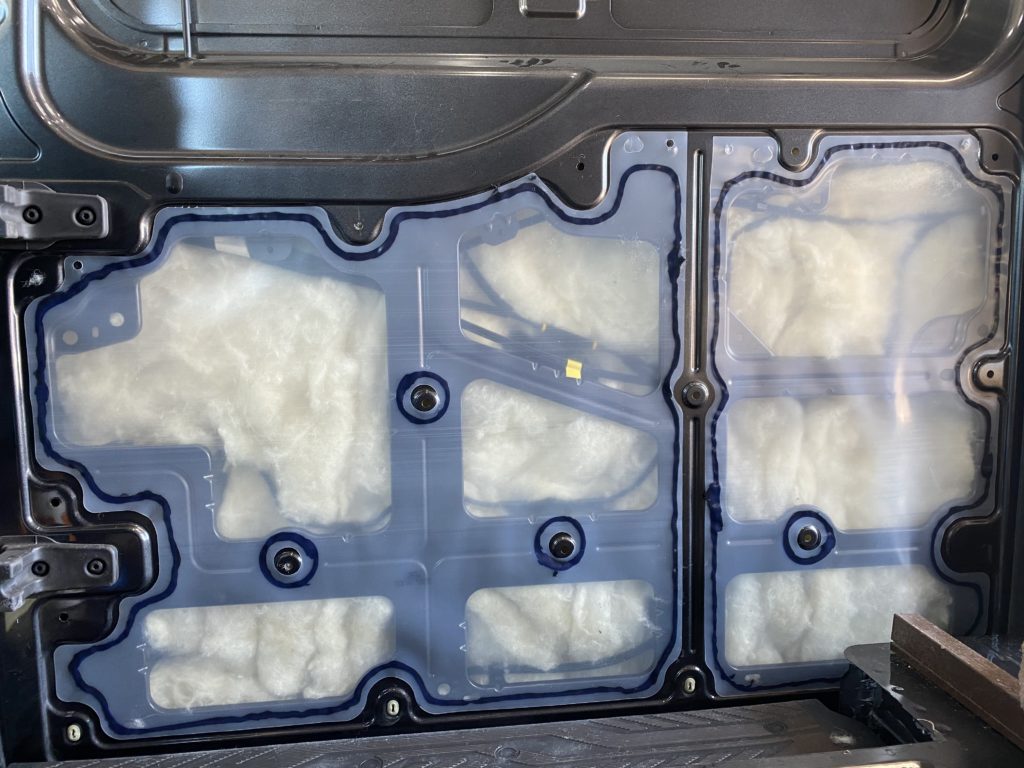
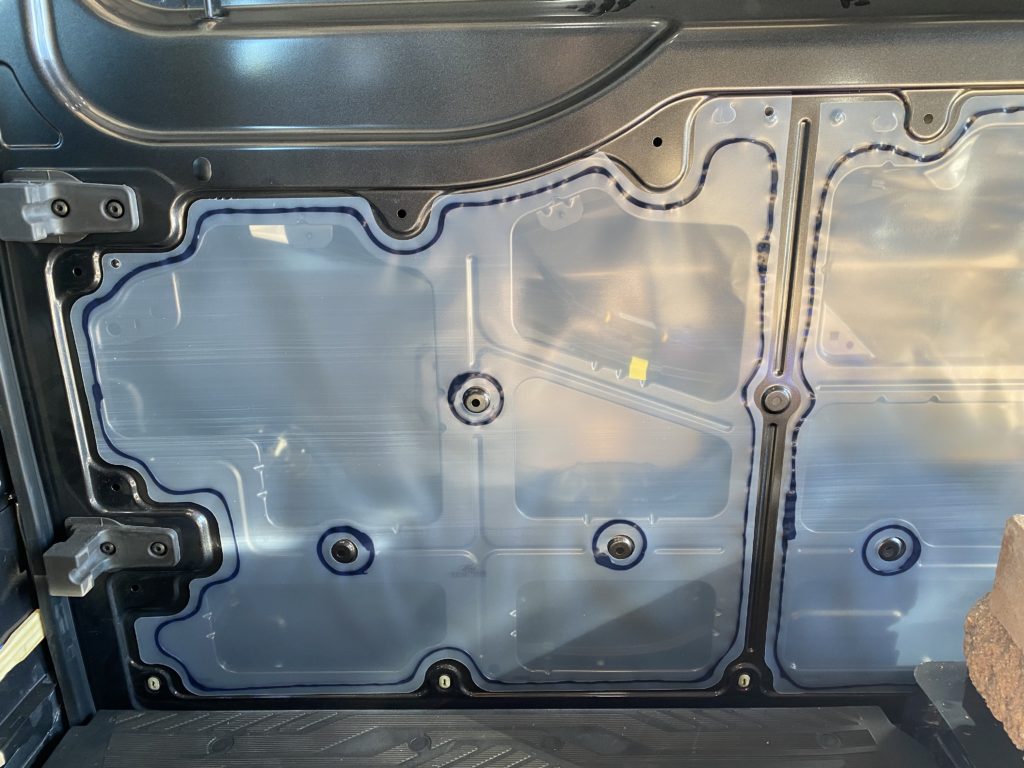
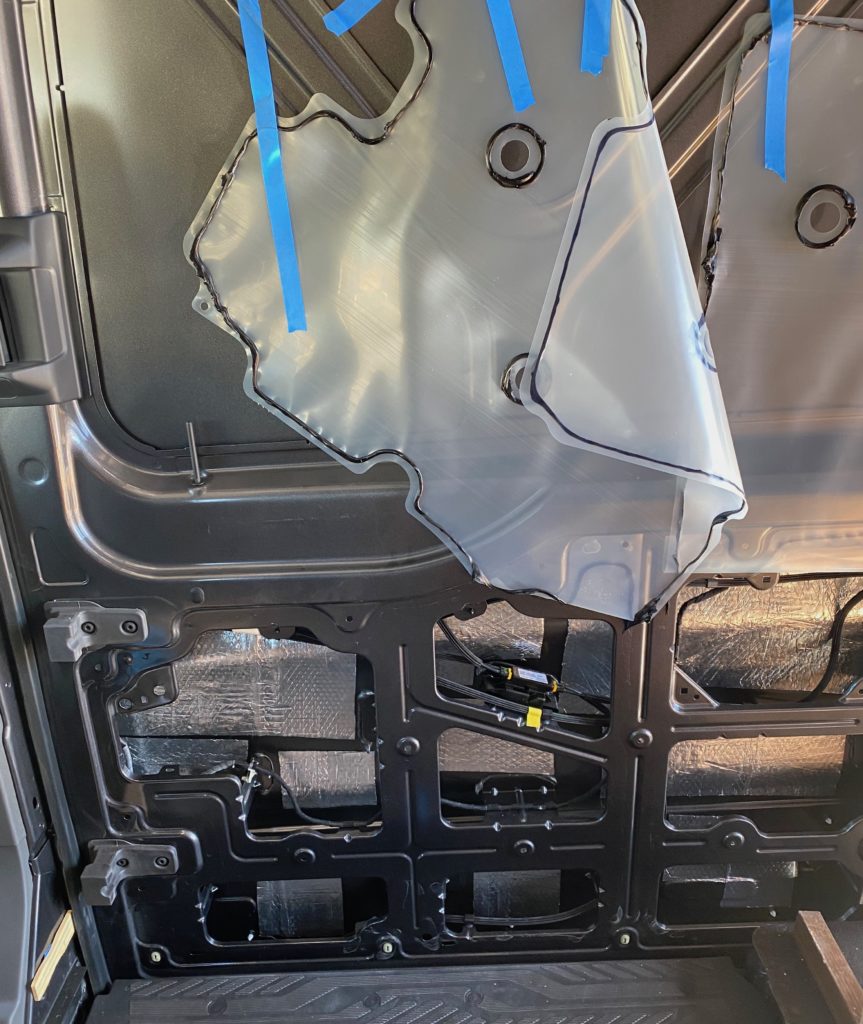
Step 2: Remove Clear Plastic Film
There is a clear plastic film adhered to the door with a bead of black tacky adhesive. Pick any spot and gently pull the plastic towards you. The adhesive may stretch a bit, but it should release from the metal and stay fully attached to the plastic film all the way around.
I chose to leave the film attached to the door along the top, and used blue painters tape to keep it up out of the way.
Step 3: Install Noico Sound Dampener
I used some random bits of Noico left over from other projects to fill in behind the door, or you can cut it to size. Make sure where ever you place it, you have sufficient room to use a barrel roller to adhere it to the door, and don’t forget to clean the surface with isopropyl alcohol first!
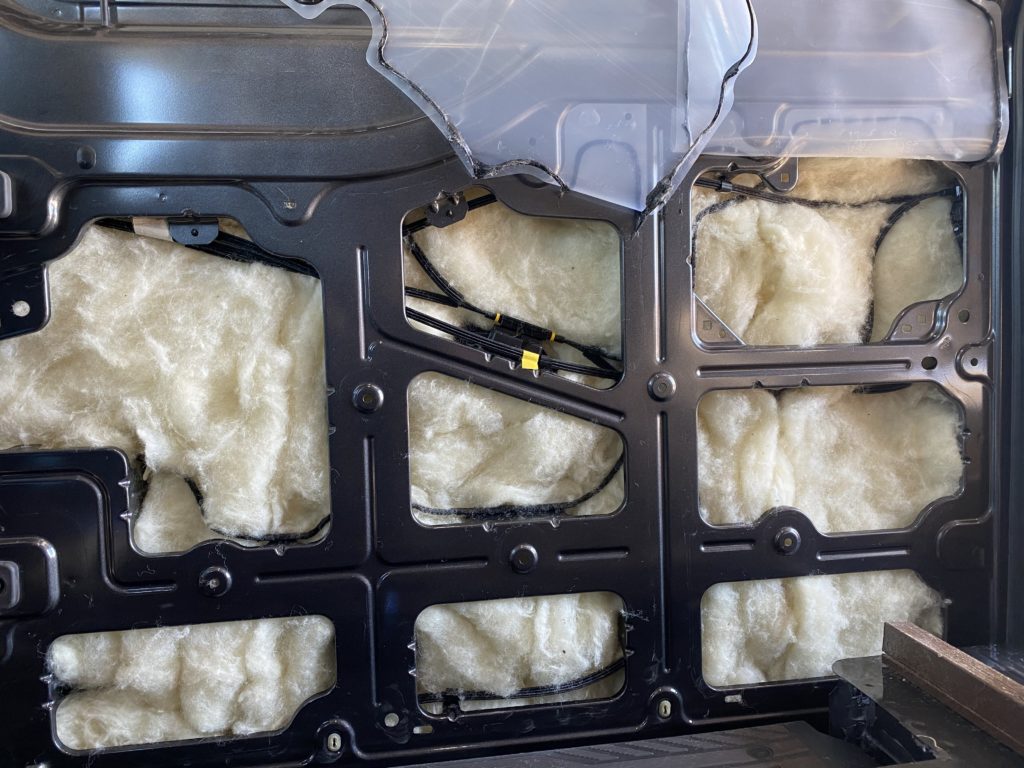
Step 4: Install Havelock Wool
One of the great things about Havelock Wool is that you can squeeze it in all the tight and hard to reach spots around your van. The door has all sorts of wires and things running through it, but you can easily fill in around them with the wool. I didn’t use any kind of adhesive, and the wool seemed to stay snugly in its spot through multiple cycles of opening and closing the door.
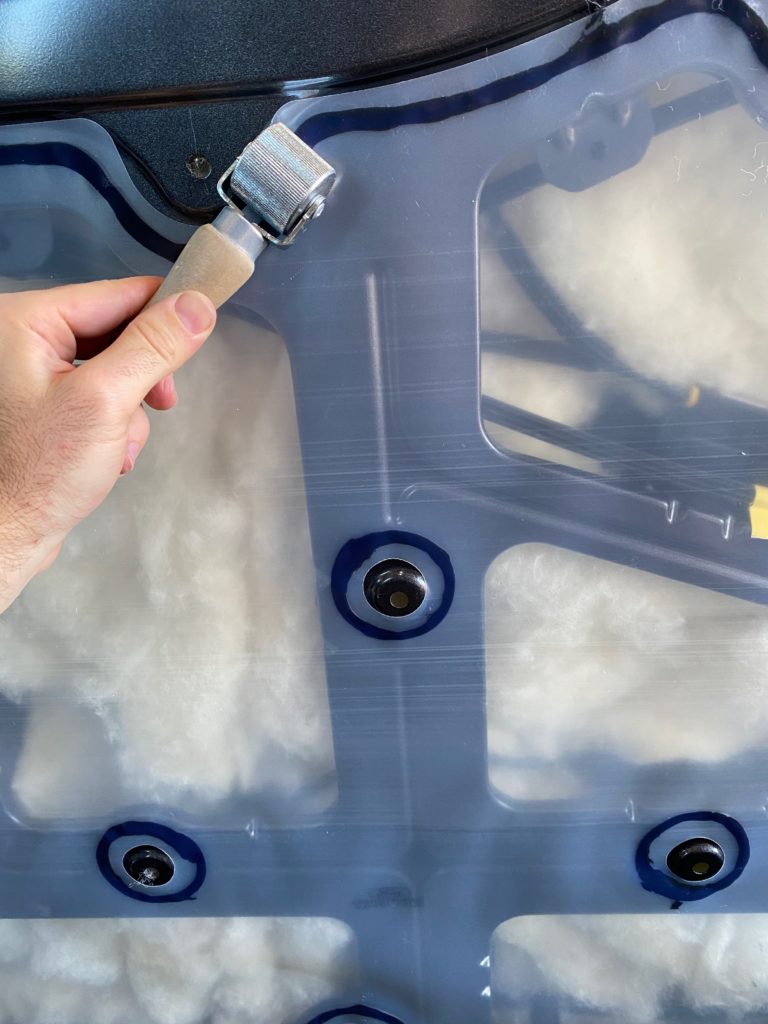
Step 5: Re-adhere Plastic Film To Door
Now that your sound dampener and insulation is installed, its time to close the door back up, starting with replacing the plastic film. The bead around the film requires a bit of force to re-adhere it to the door, a Noico Barrel Roller was the perfect tool for the job!
Step 6: Reinstall Factory Panel
The last step is to realign the factory door panel with the push pin and screw holes. Start by getting a few pins along the top in place to hold the panel up and then work your way around the rest. Thats it! Now you have one less place for road noise to creep in and one less place for hot or cold air to escape your van. You may even also notice that your door rattles less when you close it.
Don’t forget to follow us on Instagram: @MauiTheVan
Looks great but what are you gonna do when you get condensation around the wool?
Definitely something I thought about… Ive seen mixed reports about whether water actually gets into the door. Of all of the insulation options though, I think wool is best suited for managing moisture and drying out if it does get wet. I plan on doing 4 season adventures and spending time in very cold weather, so I’m insulating the van pretty thoroughly and that would be a giant spot losing heat. Its something I’ll keep my eye on and I’ll report back in a future blog post how it turns out.
Just wanted to say thank you for taking the time to document and share both this and the headliner access info!! Godsend as I have been mauling my poor van apart best I can to get these nooks insulated! And definitely getting the trim tool 😉
Awesome, I am so glad you found it helpful! Check out my other blog posts for inspiration and tips on other projects that you might be working on as well!
One of the biggest PITAs on most vans in a Live-Aboard situation is the Almost Useless Space on the Interior of a Sliding Side Door.
In the case of a Medium Roof Ford Transit (I believe the High Roof uses the same door) ways to make use of the Door’s interior that doesn’t impare it’s operation.
Another thing I missed about was any kind of Barn Door Aftermarket or Mod?
At Very Least Being Able to Replace the Lower Trim Panel with something with Nominal Storage Capacity in addition to Insulating it.
Also something similar in the Upper Window Section in the Place of the Window.
Correction in the above: “missed” should be “mused”
My touch screen considers itself infinitely smarter than I, and spews algorithm generated conventional wisdom.
I’d like to see a scale template of the rib work in the door, possibly there is a way of being able to design small holding areas that fit in around those structural ribs.
Similar to the window space. In Northern California there’s a business called TAP plastics that will cut plastic to order given a detailed request. Having a similar plot for the window space interior, I was thinking of putting a plastic mirror on part of it and a wall mounted shoe rack closer to the right hand side where it does open up further to accommodate the side of the vehicle. What else would be good to put insulation under it probably something relatively thin but again has some kind of means of coping with moisture.