This post contains affiliate links. Learn more here.
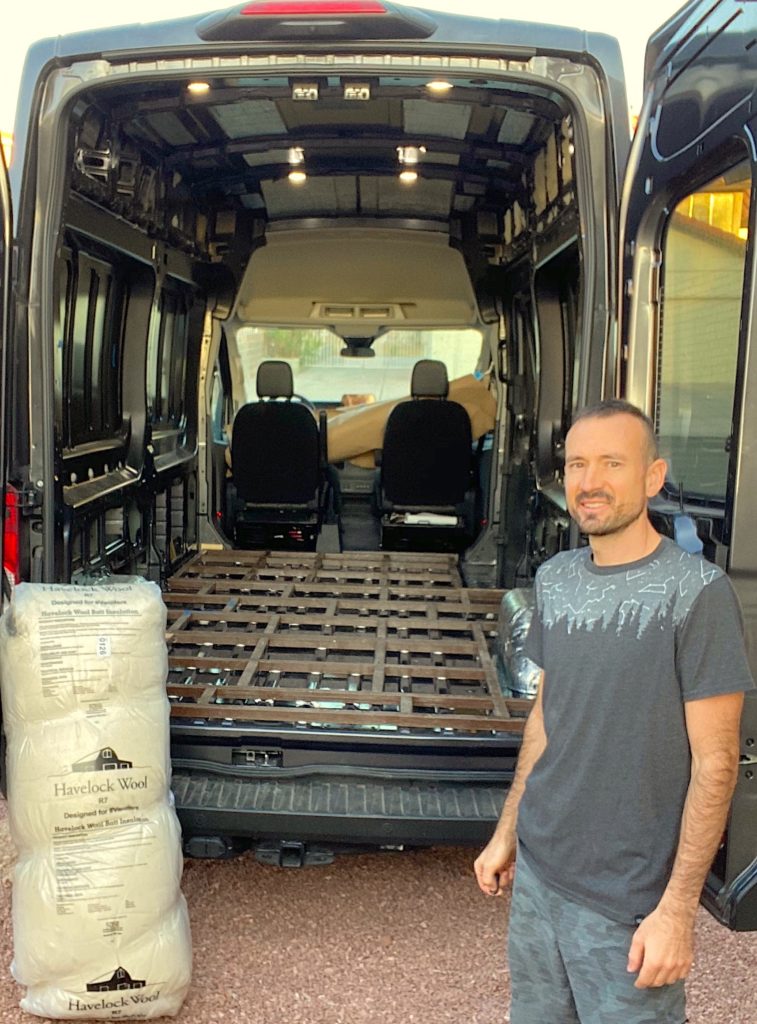
After countless days of researching van insulation materials and weighing the pros and cons of all the options, you finally decided to go with Havelock Wool… good choice! It’s easy to stuff in the wall cavities, but if you’re scratching your head wondering how the heck you’re supposed to insulate a VAN FLOOR with wool, this guide is for you!
You probably figured out by now that you can’t just sandwich wool insulation between the metal floor and a sheet of plywood. Wool needs to be fluffy to insulate effectively, so your subfloor needs to be supported above the wool, without compressing it. I spent a bunch of time researching how others insulated their van floors and incorporated the best aspects of each approach into this design, plus I learned several things along the way that’ll make your install go even smoother.
In order to fully support the weight of a plywood subfloor and everything on top of it, I chopped up some 2″x2″ (1.5″ x 1.5″ actual) and created a grid that sits on top of the corrugated floor. The spacing of the wood strips supports 1/2″ plywood and provides a solid feeling subfloor while allowing the majority of it to be “floating” above a 2-inch cloud of fluffy wool insulation! The grid is setup to prevent uneven or sagging joints where the plywood sheets meet and the whole thing is securely attached to the van floor without drilling any holes through it.

Why insulate the floor? Before I show you exactly how to insulate your van floor, lets address the “heat rises, so the floor is the least important place to insulate” myth… If you want to keep your van toasty warm in winter, then well insulated walls and ceiling will help prevent heat from rising up and OUT of the van. But, how about keeping unwanted heat from rising up and INTO the van – during extreme summer temps for example?! In the desert southwest, where I live, daily summertime highs exceed 100°F+ and black asphalt baking in the sun can soar upwards of 200°F. I rather quickly realized after buying my van that driving on roads radiating that much heat, with an uninsulated floor, results in a blazing hot bare metal that literally becomes too hot to touch. Proper floor insulation is a must to keep as much of that heat out of your living space as possible!
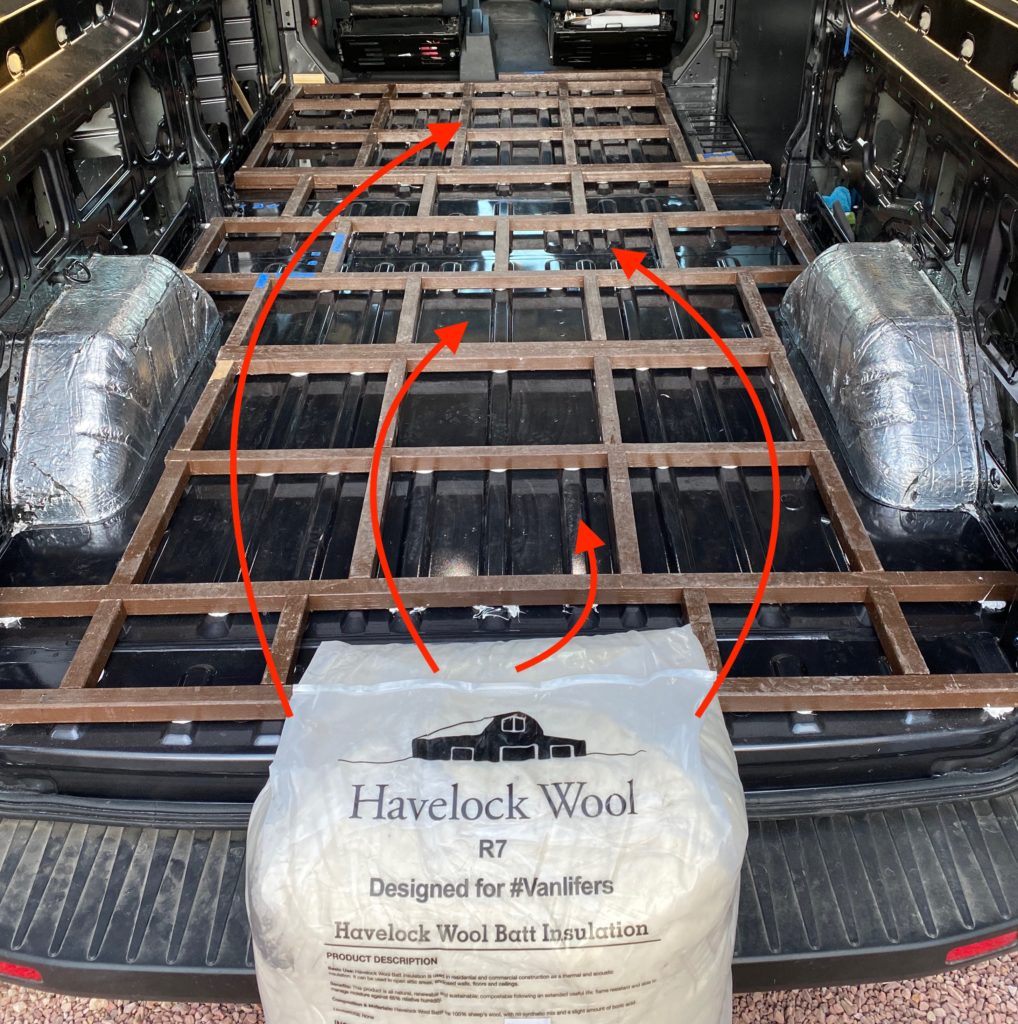
Will I have to sacrifice headroom? Is it worth raising your floor 1.5″ with a layer of insulation to prevent your van from becoming an oven from the bottom up? I totally think so, especially if you’re going to #vanlife in hot climates with a high roof van, or you’re short enough to get away with it in what ever van you’re building. Even if you don’t plan on spending time in very hot climates, a properly insulated floor will still help maintain a comfortable temperature year around, wherever your van does take you! I’m 5’10” and still have ample clearance above my head in my High Roof Transit after installing the floor as outlined in this post.
Tools & Materials You’ll Need
- Miter Saw (or similar saw)
- Drill
- 2 x 24″ Trigger Clamps
- 2 x 12″ Trigger Clamps
- 2 x 6″ Trigger Clamps
- Kreg Pocket Hole Kit (K4 preferred, or R3)
- 80 x Kreg 2.5″ Pocket Screws
- 13 x 2″x2″x96″ Furring Strip Boards (actual 1.5″x1.5″)
- Tape Measure
Steps
- Step 0: Measure Your Floor
- Step 1: Cut “Width of Van” Strips
- Step 2: Cut Cross-members (“Length of Van” Strips)
- Step 3: Building The Grid
- Step 4… continues in Part 2
Step 0: Measure Your Floor
I spent a ton of time taking extensive measurements of the floor and coming up with potential ways to layout the furring strips. If you have a 2020 Transit with a 148″ wheelbase, you can skip to Step 1 – I’m going to give you all the measurements and tell you exactly how to cut the wood to form a perfect grid! If you have another year Transit or you are insulating a Sprinter or other van, you will need to take measurements and adjust the cuts you make accordingly.
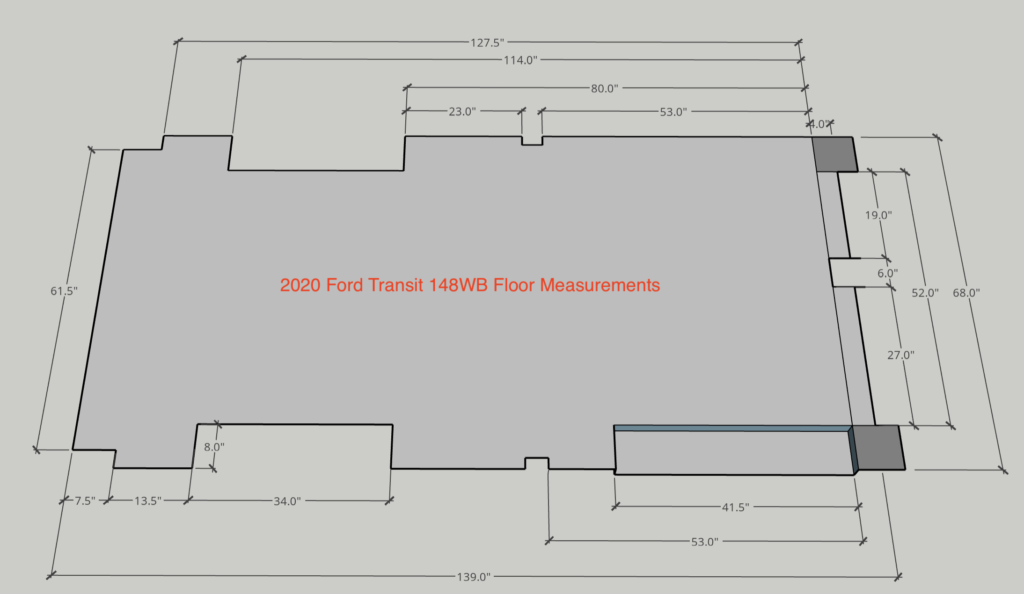
Click to enlarge image.
Step 1: Cut “Width Of Van” Strips
The furring strips will lay across the top of the corrugations on the van floor creating cavities that can be filled with wool. The strips running the width of the van will be uninterrupted, solid pieces and smaller cross-members will be chopped up to fill in the rows running from front to back in Step 2.
Remember, these measurements are for the 2020 148″ Transit and can be adjusted to suit your van. Extended lengths will require additional strips and for non-Transit vans, the length of the strips may vary.
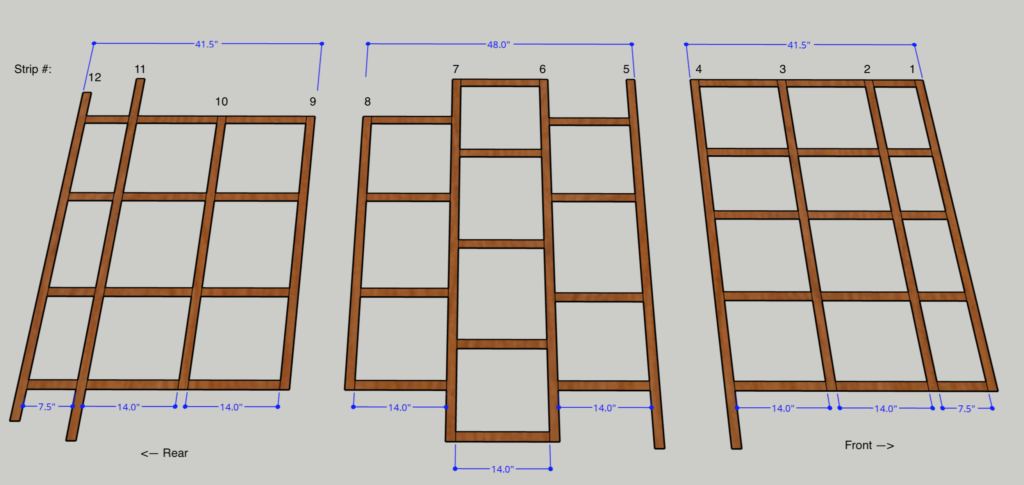
Get thirteen 96″ x 2″ x 2″ (8′ x 1.5″ x 1.5″ actual) furring strips from anywhere that sells wood around you and chop twelve of them into the following lengths using a Miter Saw or similar saw…
Cut List:
- 3 @ 50″ long
- 3 @ 58″ long
- 1 @ 60″ long
- 5 @ 66″ long

Click to enlarge image.
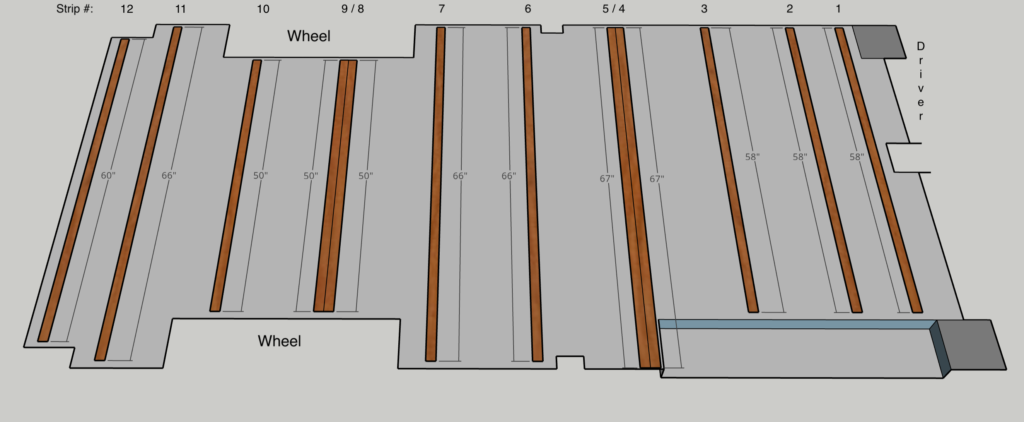
Once those are cut, lay them out in your van – #1 will be directly behind the driver/passenger seats and #12 will be at the rear doors. Don’t worry about how much space is between them yet, they’ll be adjusted to accommodate the length of the cross-members that get cut in the next step.
Click to enlarge image.
Take note that strips #4 & #5 as well as strips #8 & #9 are butted up against each other. These are where the plywood joints will be, so for maximum support, there is one 2×2 supporting each sheet of plywood where they meet. You will need three 4’x8′ sheets of plywood, two of them will remain 4′ wide, and the last one will be trimmed to fit.
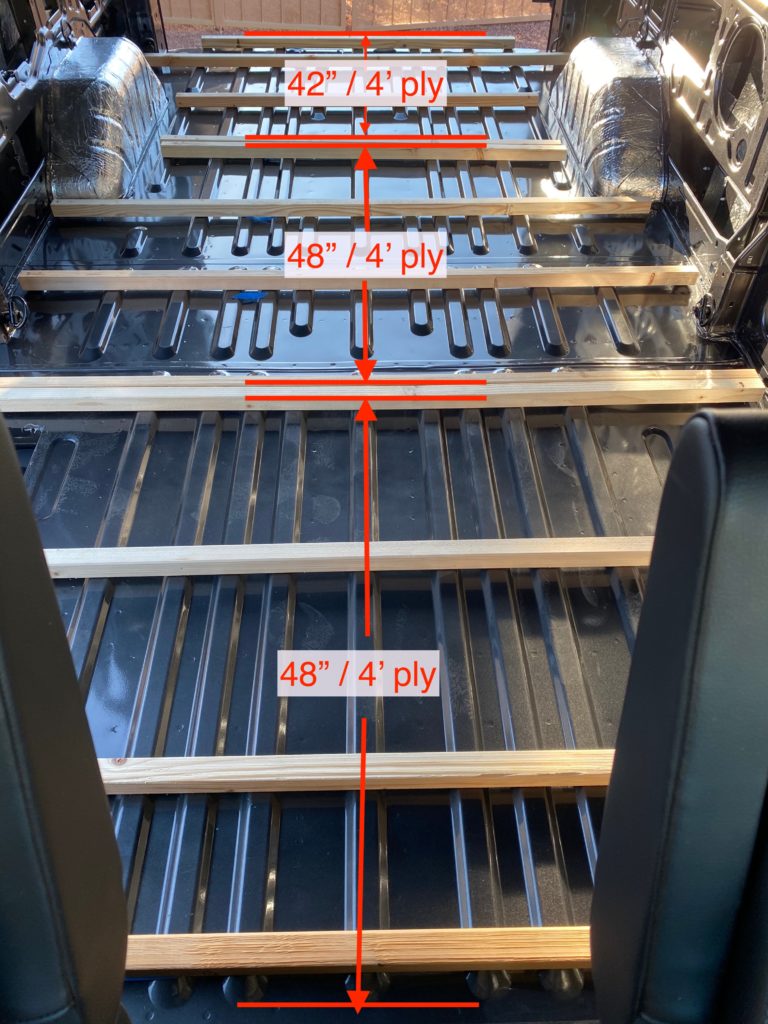
I’ve seen some folks stop here and run long bats of insulation between the rows only to later find out their floor sags! Of course, there isn’t enough support unless you use really thick (and heavy!) plywood. To eliminate that problem, and make the floor more structurally secure, the rows should be connected with shorter cross-members.
Step 2: Cut Cross-members (“Length of Van” Strips)
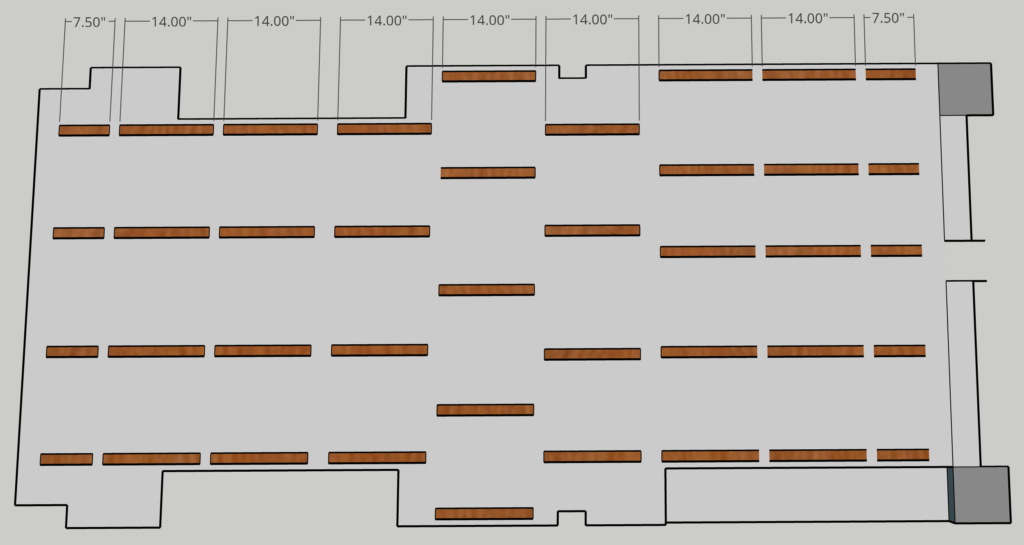
Click to enlarge image.
Each cross-member needs to be exactly the same size in order for the grid to fit together properly, and there are a bunch of these to cut! You’re definitely going to want some way to chop consistently sized pieces. I rigged up some scrap wood on one end of my miter saw using a combo of 6″ and 12″ trigger clamps to create a stop block which guaranteed my cuts were precisely the same length, every single time.
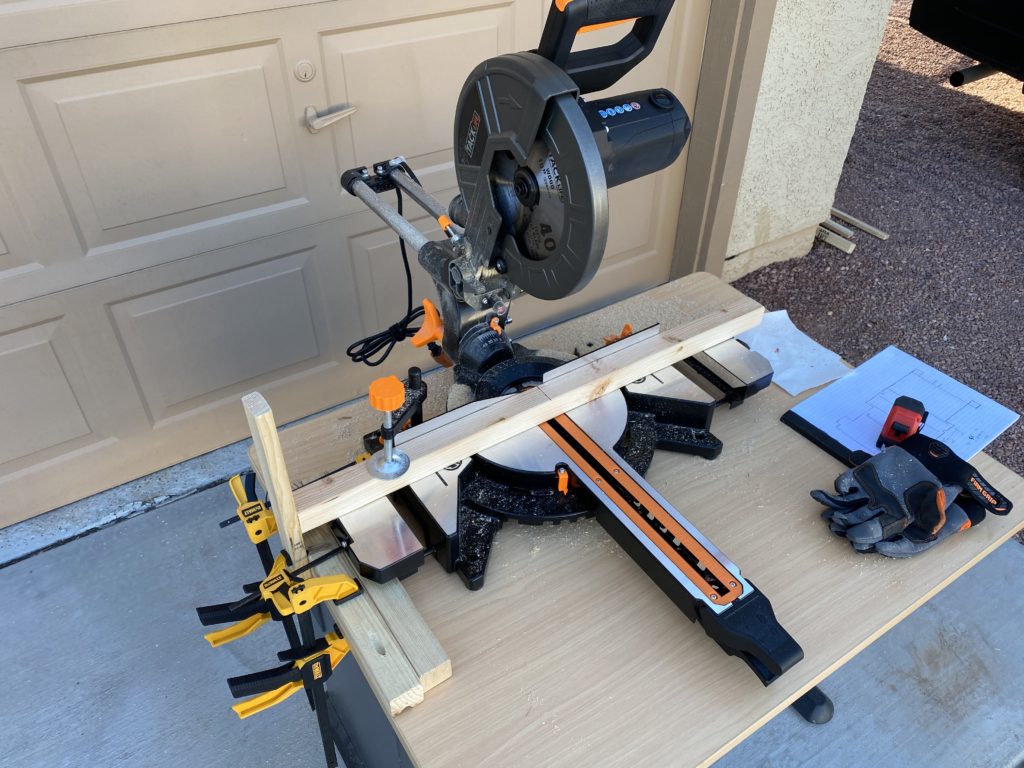
Grab the leftovers from cutting the strips in Step #1 plus one additional 8-foot 2×2 strip… chop them into the following sizes:
Cut List:
- 31 strips that are 14″
- 9 strips that are 7.5″
These cross-members will be attached between the long strips using one 2.5″ pocket hole screw at each joint, so now would be a good time to drill one hole in each end using your Kreg pocket hole kit.
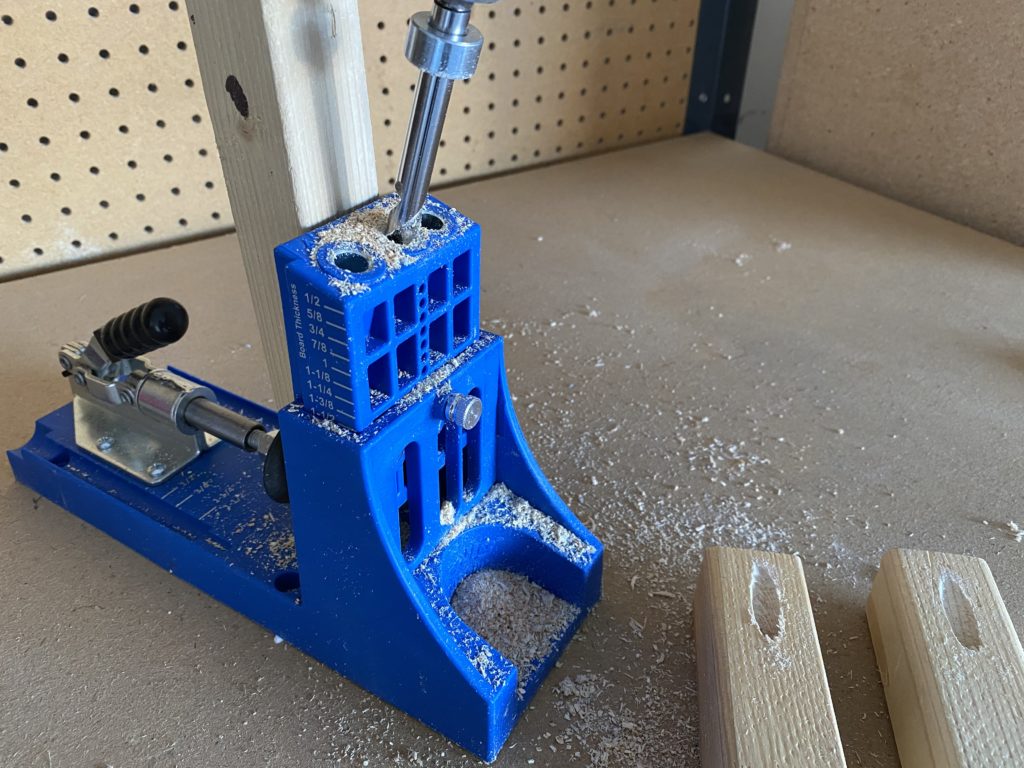
With all the pieces now prepped, you can finish laying out the grid in your van. The 7.5″ pieces go in between the #1 and #2 strips (behind the seats) and in between the #11 and #12 strips (at the back door). The 14″ pieces fill in the rest of the grid. These cross-members should almost always rest entirely along the metal ribs, which will help support the subfloor and everything built on top of it.
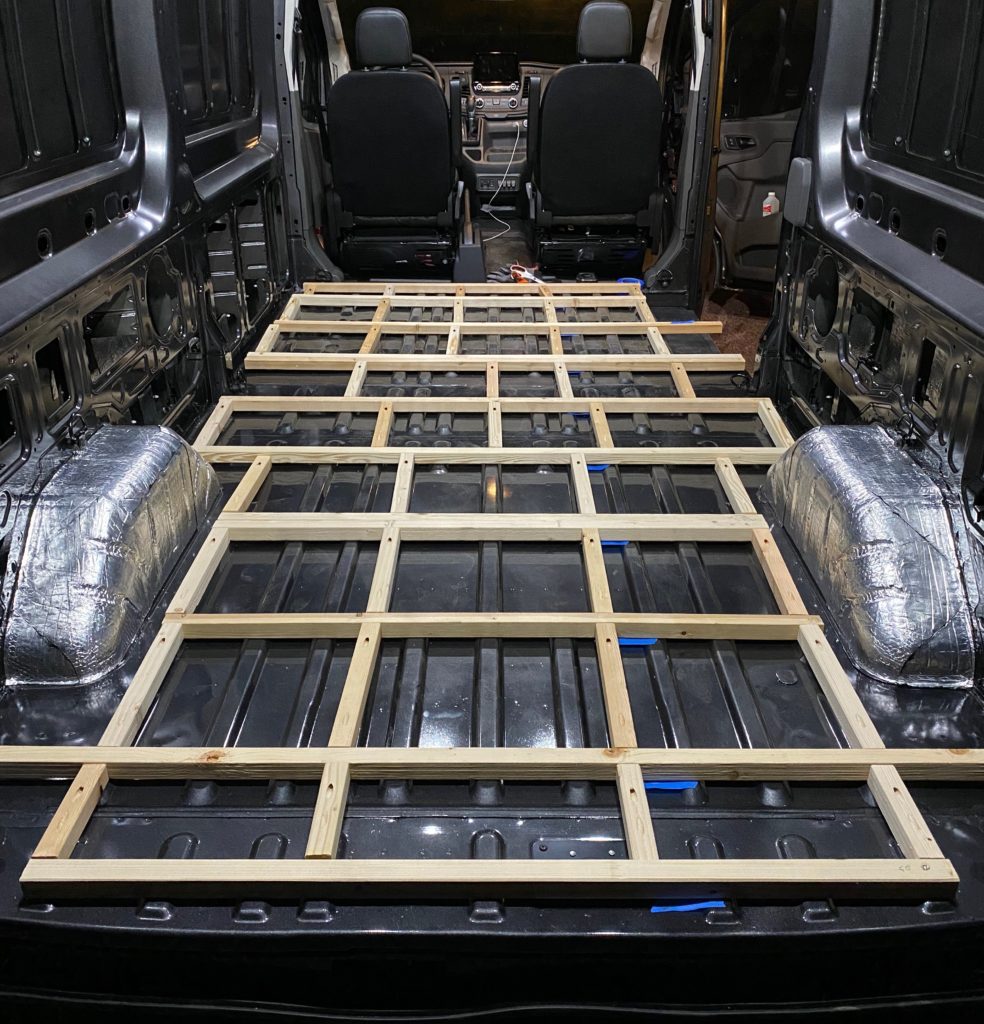
Step 3: Building The Grid
Now that you have all of the puzzle pieces cut, drilled, and laid out nicely in your van, its time to build the grid. Its best to start by creating three separate grid sections, they’ll be easier to move around and work with until they are secured to the floor and become a single grid in a later step.
*Note: I applied a sealer to the furring strips after I cut them, and before I screwed them together, which created a ton of additional and unnecessary work. I’ll talk more about sealing the furring strips later. For now, I’d recommend continuing to work with bare wood despite the pictures that follow showing sealed wood.
Using a pair of 24″ Trigger Clamps, clamp the first row (behind the seats) ensuring that all of the cross-members are resting on top of the ridges along the floor. While the clamp holds the 7.5″ cross-members that go between strips #1 and #2, use a 2.5″ pocket hole screw on both ends of each cross-member to attach them to the strips that run the width of the van.
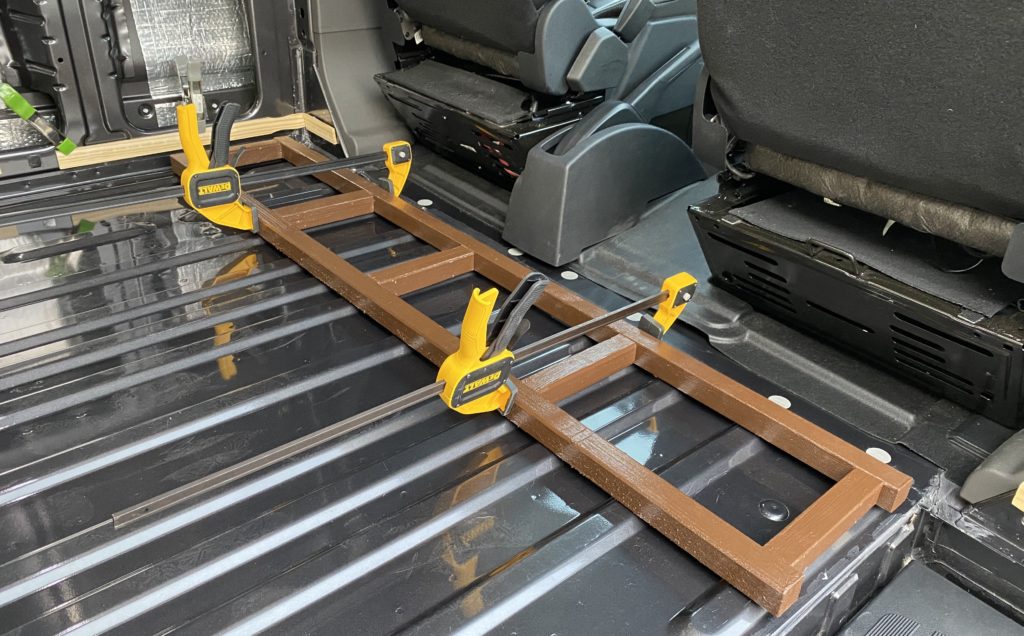
I deliberated about which side the pocket holes should be on. I plan on fastening the plywood subfloor, and potentially other items, to these furring strips, so I wanted the top surface to be solid. If the pocket holes were facing up, any screws that went into them would have less wood to grip onto, potentially resulting in weaker joints. I opted to have the holes along the bottom, facing the floor, but the downside (pun intended) to this approach is having to flip the rows over, after they are clamped, to get the screws in. It only required a little extra effort, but I’m not sure that it was totally necessary. If you leave the pocket holes facing up, just be mindful where you attach things from above later in your build.
Once the screws are holding the first row together, release and reposition the trigger clamps to hold the second row (strips #2 & #3 and their 14″ cross-members) in place while you screw them together. Repeat for the third row (strips #3 & #4) to complete the assembly of the first of the three grid sections.
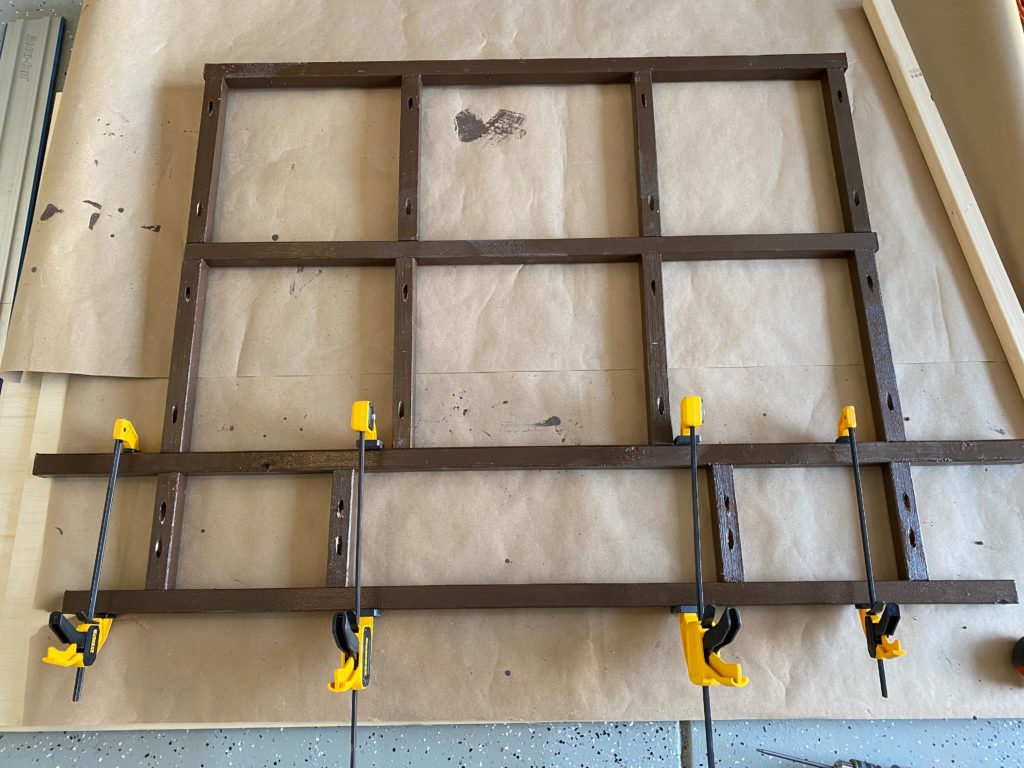
Continue to build out the second and third grid sections independently using the same method above. Doing this allows you to remove the grid segments from your van if necessary and will make gluing them to the floor easier later on.
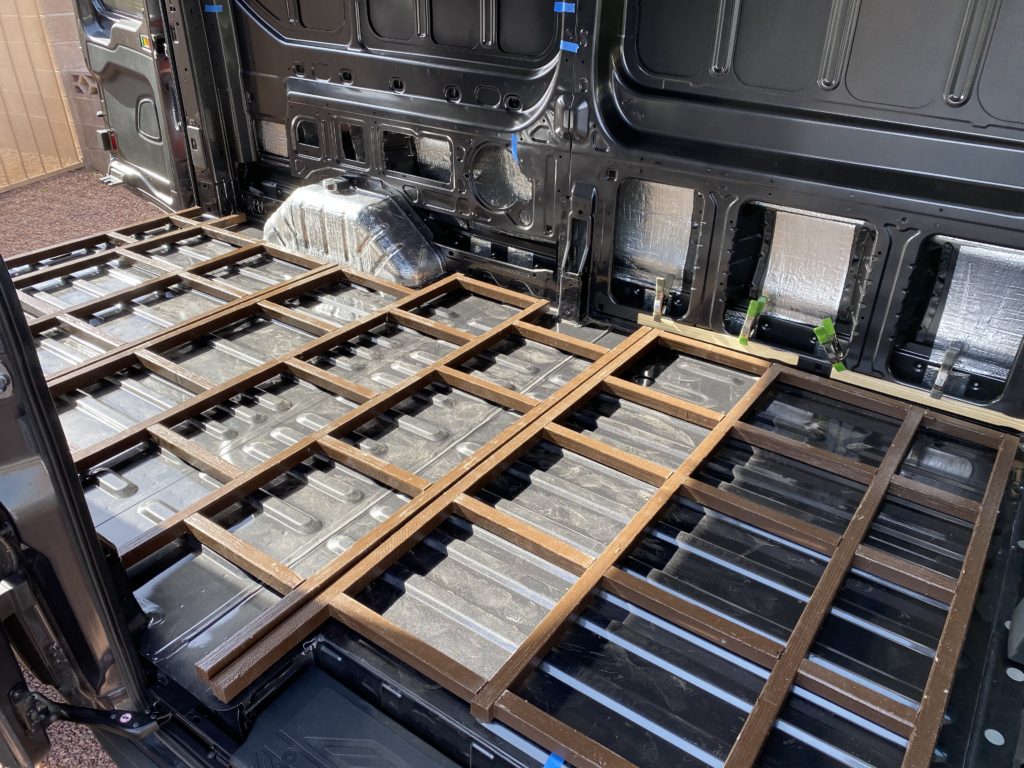
I paused work on the floor at this point because I’m still planning out several other projects that I know might affect its design. I’ll be installing an IsoTemp water heater and Espar air heater which both require drilling through the van floor, so I need to get the location of those sorted out while I still have easy access to the van floor and before I cover it up with my subfloor. I’ll also potentially be drilling more holes to drain my fresh water tank and to plumb into an underbody grey water tank. My electrical system will be on the passenger side, so I also want to figure out how I am going to run the cable between my starter and house batteries and whether its going to impact the floor in any way. Just some things for you to consider about your #vanbuild as well before proceeding with any more work on the floor…
Continue to Part 2 for a step-by-step guide to:
- Scribing, Cutting, Fitting & Trimming Plywood Subfloor
- Sealing Furring Strips
- Securing Grid to Van Floor
- …and more!
Don’t forget to follow us on Instagram: @MauiTheVan
Greetings to you.
I have a 2019 Transit Cargo Van.
I have mobility issues so My Son is helping to install the floor. Your article is SUPER HELPFUL.
I subscribed/follow you on Instagram
That’s great to hear, glad to be able to help you with your build! Make sure to check out PART 2 of this post here, and PART 3 is coming soon!