This post contains affiliate links. Learn more here.

I enjoy views of the epic outdoors… so adding some windows into my van was a priority!
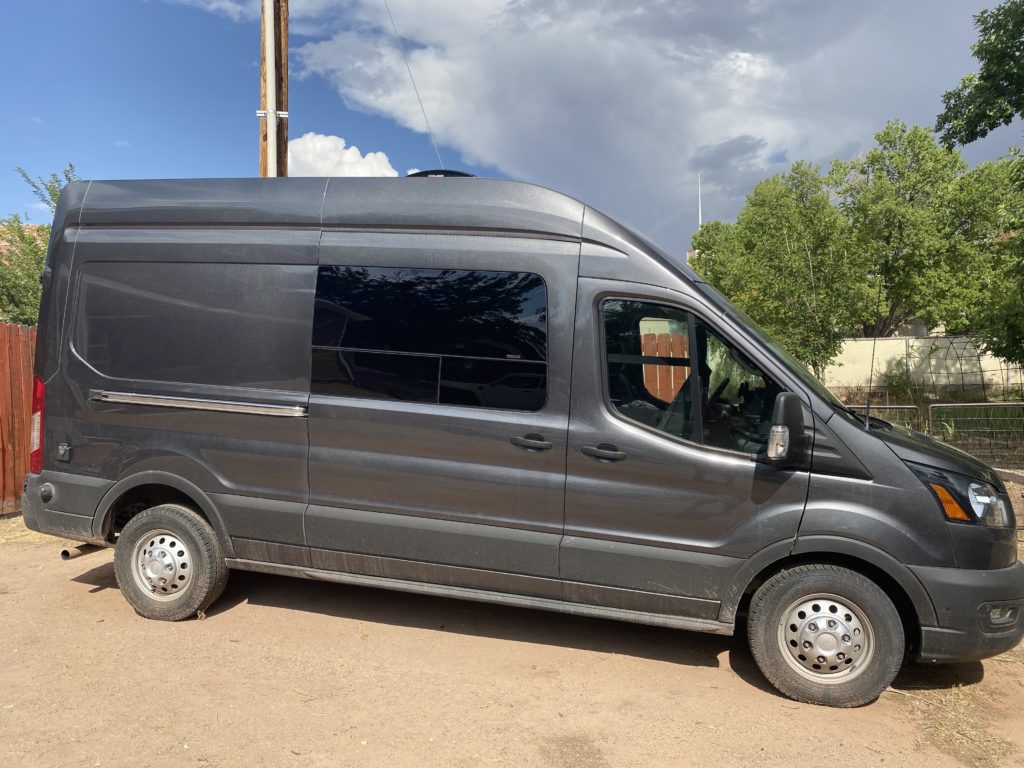
Since I installed the window in my slider door, there have been several instances of attempting to make a left-hand turn, with the van at an angle that makes it impossible to see on-coming traffic through the passenger window. Having additional visibility out the right side of the vehicle when navigating through some turns is really, really nice. The epic views out it don’t suck either.
This guide is for the C.R. Laurence FW293R Window, but most of the information contained in this post would still be relevant to other windows.
Tools & Materials You’ll Need
- C.R. Laurence FW293R Vented Slider Window
- Drill & Impact Driver
- Drill & Driver Bit Set
- Step Drill Bits
- Blue Painters Tape
- 6″ Spring Clamps
- Magnets
- Electric Metal Shear
- Dremel
- Metal Grinding Wheel
- Automotive Primer
Steps
Step 1: Make a Template
But first… unpack the window!
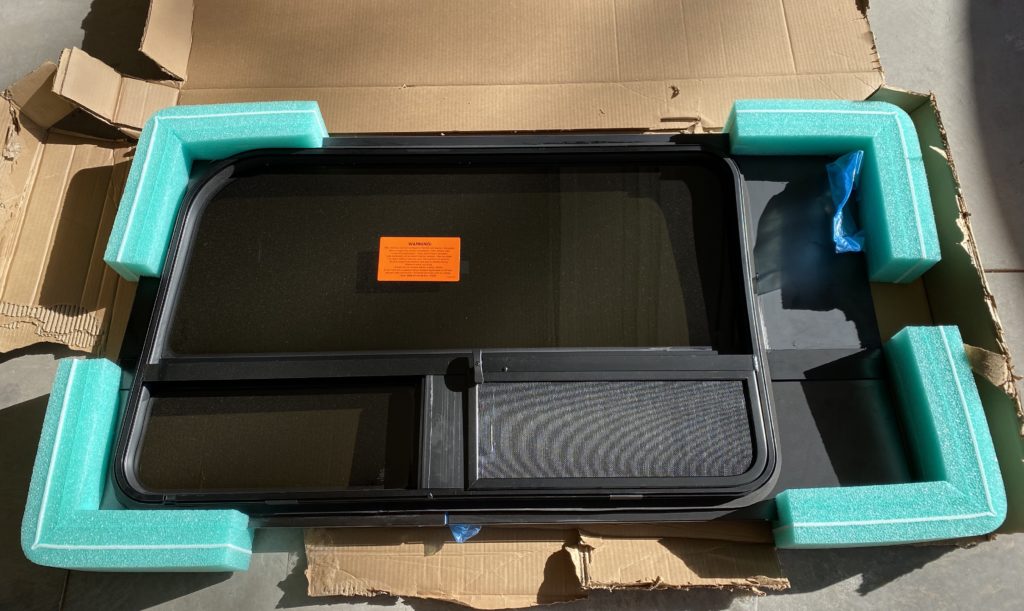
Ok, now to start tracing! When you’re about to cut a giant hole in the side of your van to install a window, you want to be super sure your cuts end up in exactly the right location and are exactly the right size. It seems like a common approach is to trace the window clamp ring onto a piece of cardboard, and use that cutout to transfer the template onto the interior of the van. I started going down that path, and it seemed like I was creating unnecessary work. Instead, I opted to use the clamp ring itself as the template.
For the most part, the clamp ring follows the contours of the stamping on the inside of the slider door. The radius of the top left corner is smaller than the factory stamping, so you’ll want to get the other three corners lined up first, and trace this corner last to ensure its in the proper position.
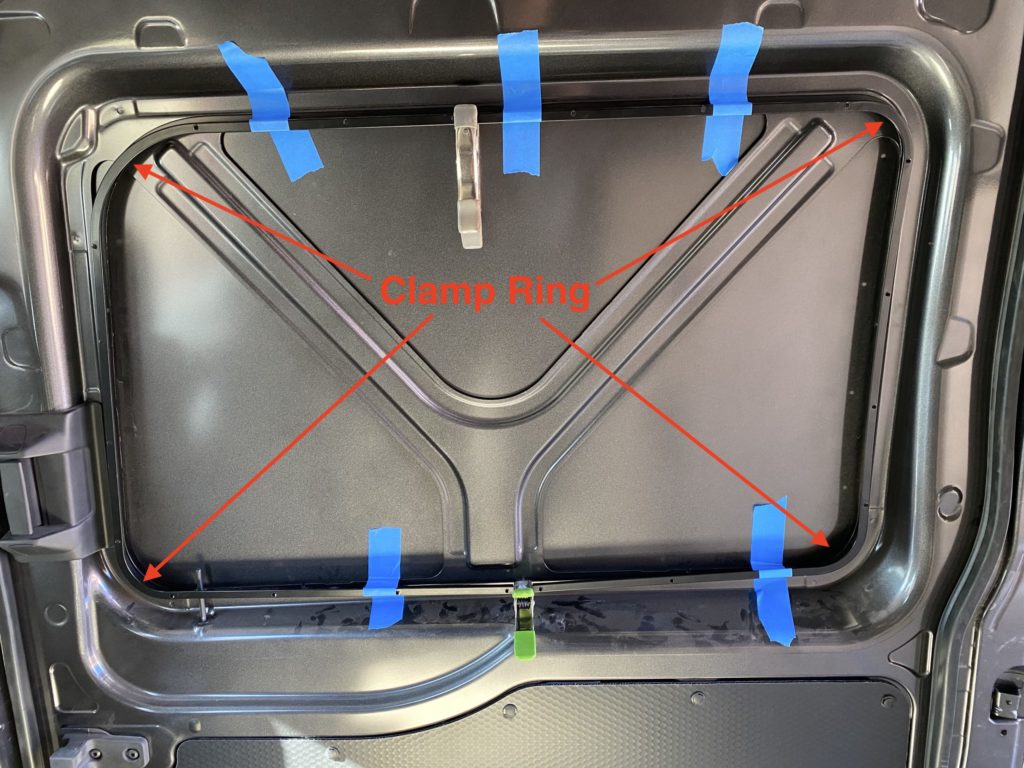
I used a combination of 6″ Spring Clamps and Blue Painters Tape to hold the clamp ring in place while I traced along the inside of it. I used a very small flathead screwdriver to “scratch” the cut lines onto the surface of the door.
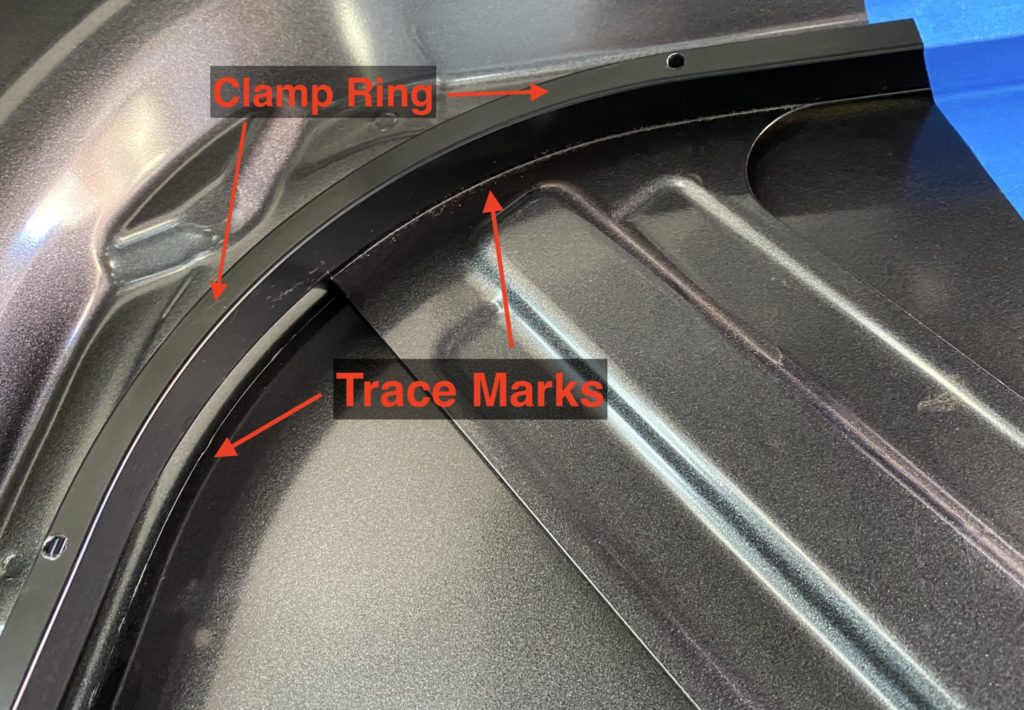
Once the inside edge of the clamp ring is traced all around, set it to the side. To make the cut line visible on the outside of the van, where the cutting will be done, I used a small drill bit to punch holes along the line, and then connected them on the van exterior with painters tape. On the round corners, I spaced many holes close together to frame out the curve. The long straight sections only required a couple holes to be able to “connect the dots”.
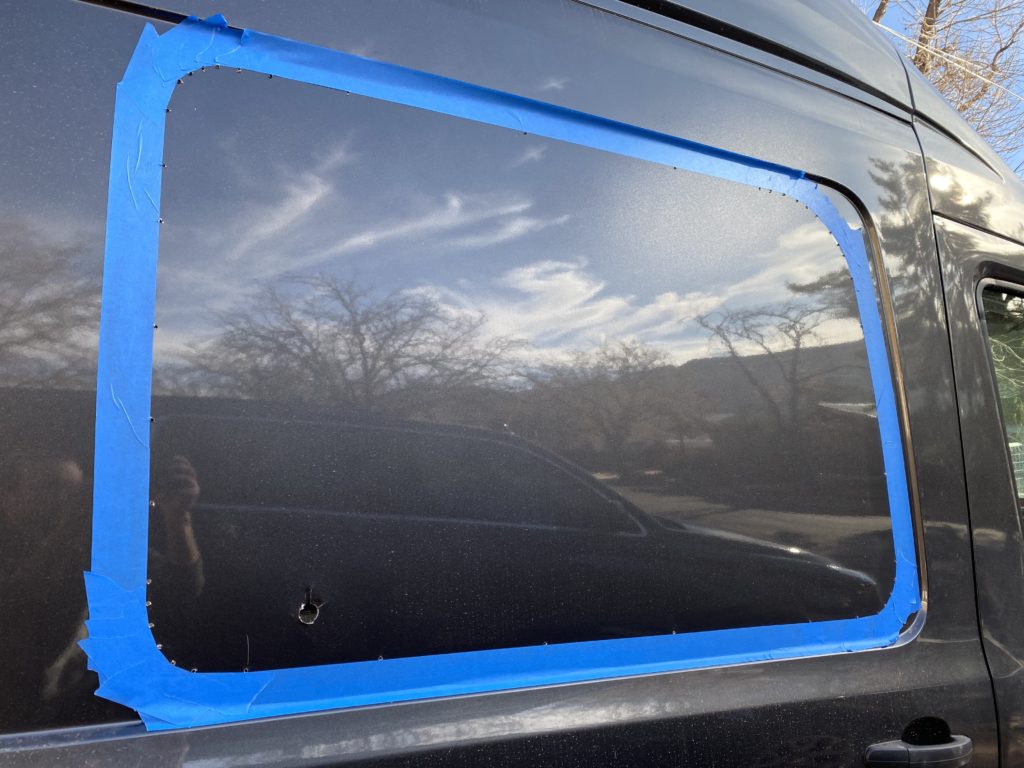
To minimize the mess of metal shavings from drilling out the holes, I used several bar magnets around and below the drill locations to catch the debris. Very little, if any of the shavings made it past the magnets, and I was sure to vacuum up any that did to prevent rust issues down the road.
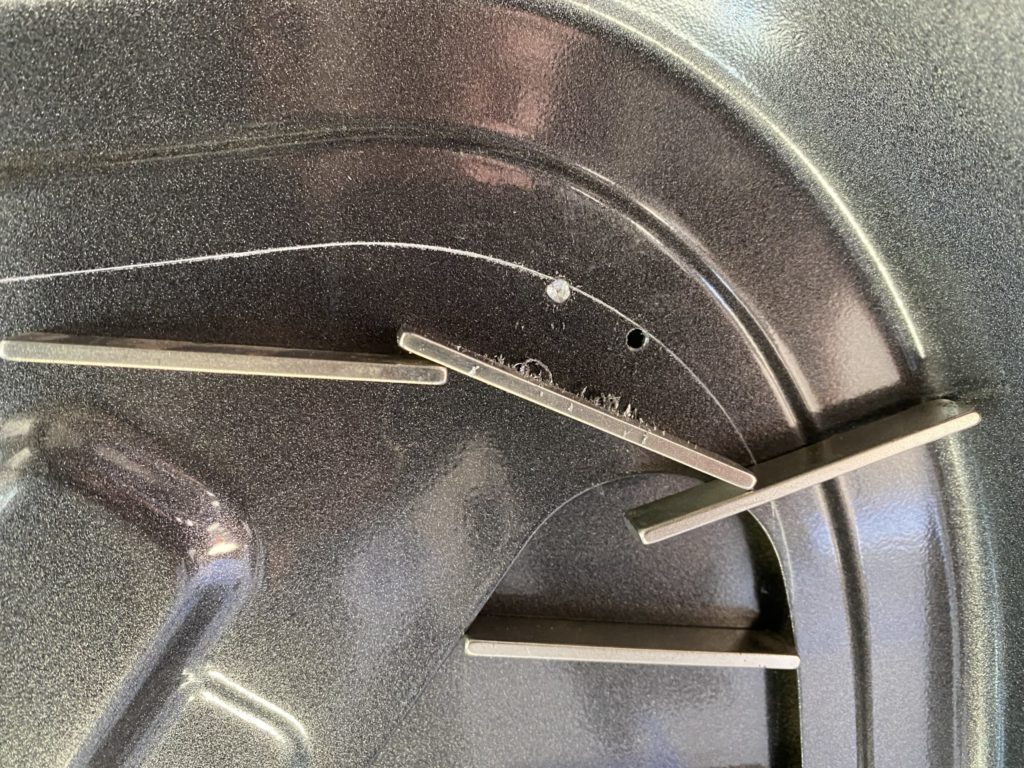
To prevent the shavings from falling into the gap along the bottom of the window, I stuffed a rolled up paper towel into the crack. Once I was done drilling all the holes, I ran a magnet along the paper towel to attract the debris that had collected on it, and then removed the paper towel.
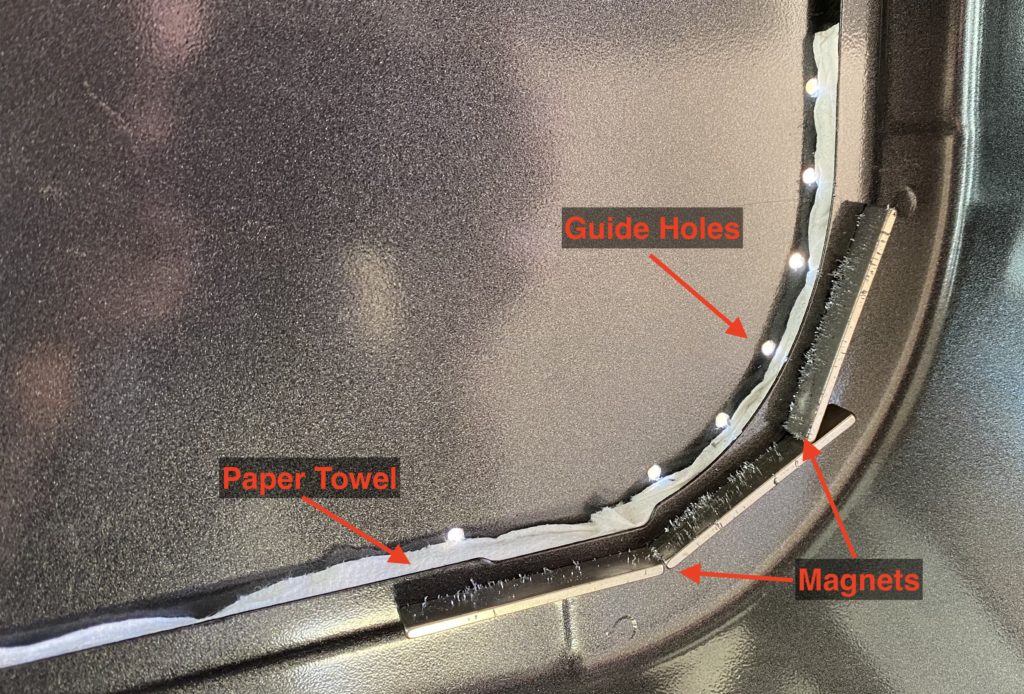
Once you have your guide line on the outside of the van and you’ve worked up the courage to cut it the rest of the way out, move on to Step 2.
Step 2: Cut Window Opening
There are lots of tools that are capable of cutting out the window… but that doesn’t necessarily mean they should be used. Jig saws and grinding wheels will chew through the metal, and make a huge mess in the process. Electric Metal Shears on the other hand, slice through the metal like a hot knife through butter!
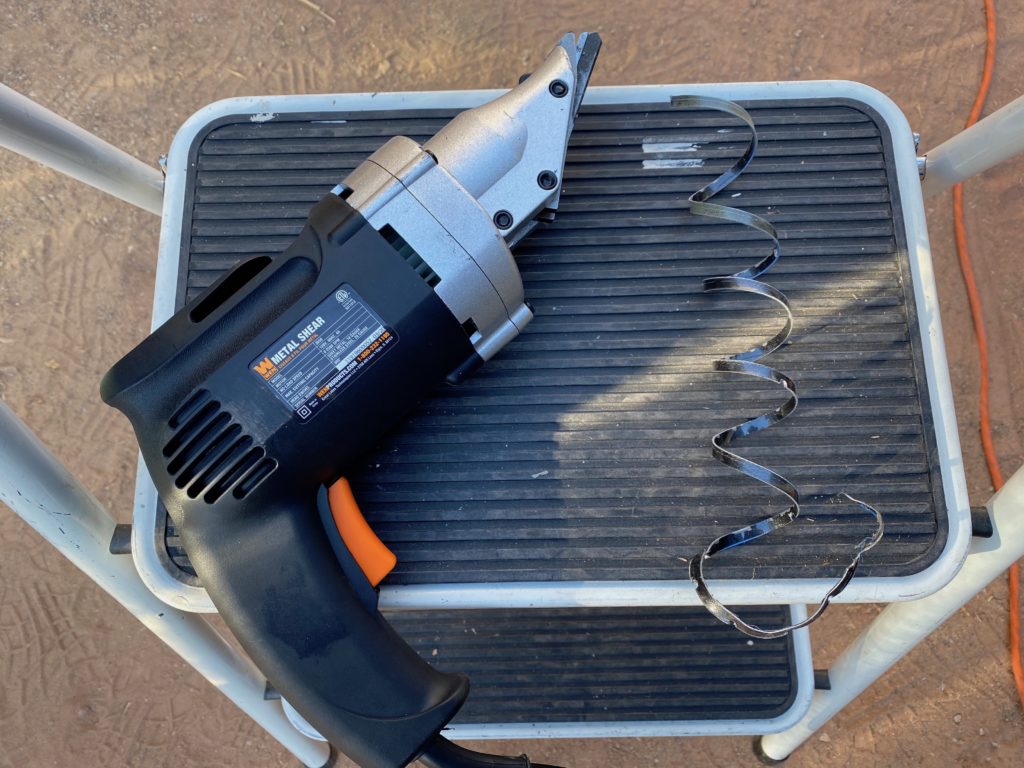
I used a step drill bit to make a few starter holes that were large enough to get the metal shear blade into. Ideally, you want the edge of the starter hole to touch the painters tape guideline without drilling pass it. Cutting along the tape lines is a piece of cake with electric shears, it practically melts right through the metal. The shears perform really well on straight lines, rounding the corners requires a bit of patience and effort to guide it through the turn, but its definitely doable.
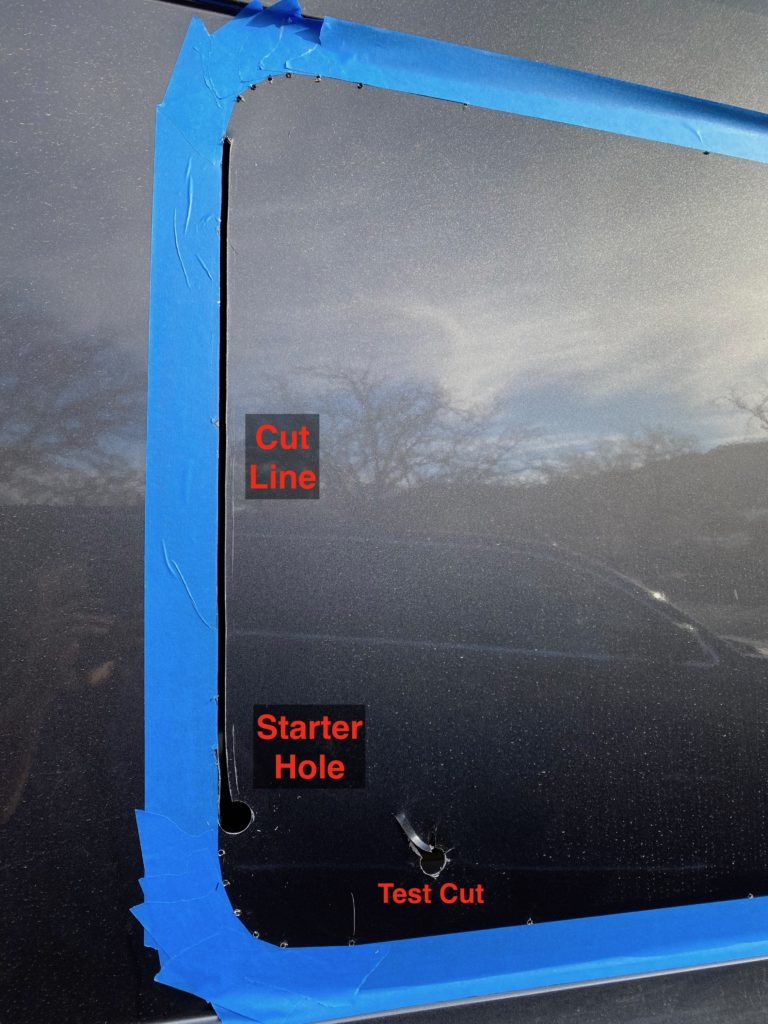
The blade on my electric metal shear was slightly large to fit between the sheet metal on the outside of the van and the “Y” support beams on the inside. I cut out everything except the top corners and bottom center, where the Y support gets in the way. I used a little bit of force and a hammer to pry the layers apart enough to get the blade to fit between them. Both of these pieces are coming out completely, but they needed to be cut out in separate passes. A jigsaw would chew right through that second layer, and send metal shards flying to be cleaned up…
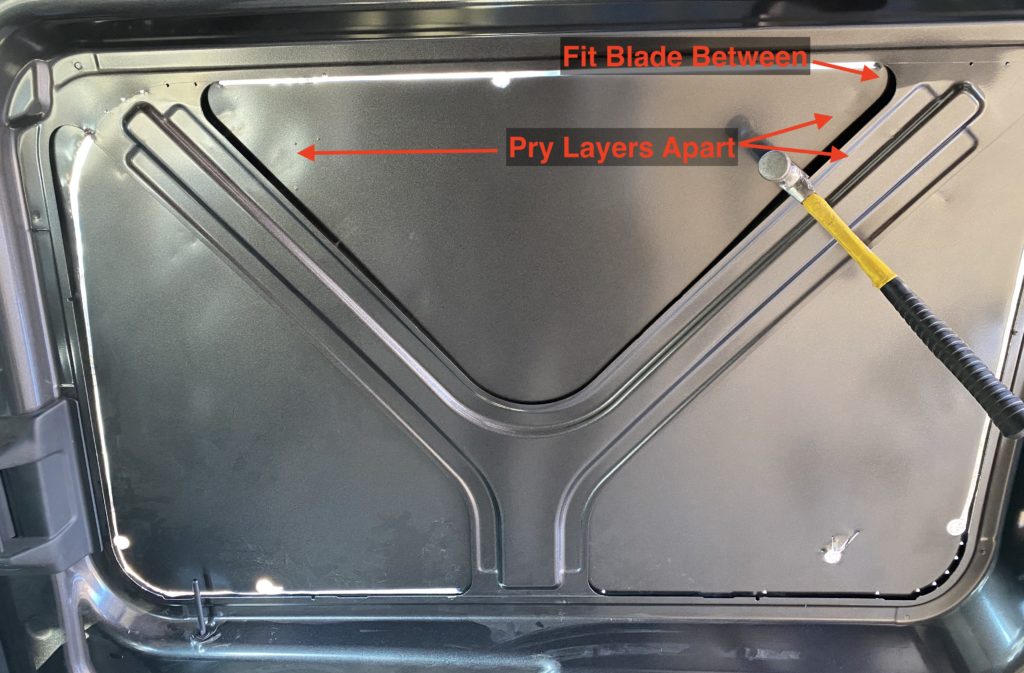
Once you get the blade between the layers and finish cutting out the exterior sheet metal, it will most likely still be attached to the “Y” support in some places and require a little bit of force to detach completely.
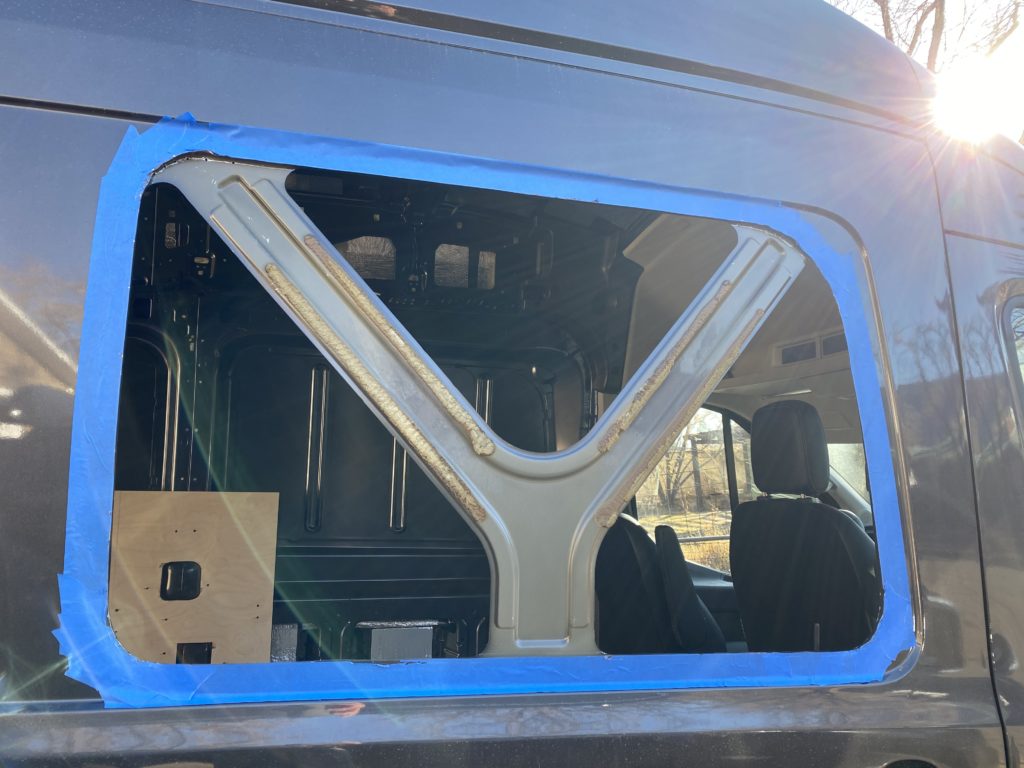
With the exterior sheet metal out of the way, it’s pretty straightforward to cut out the “Y” supports with the electric metal shears.
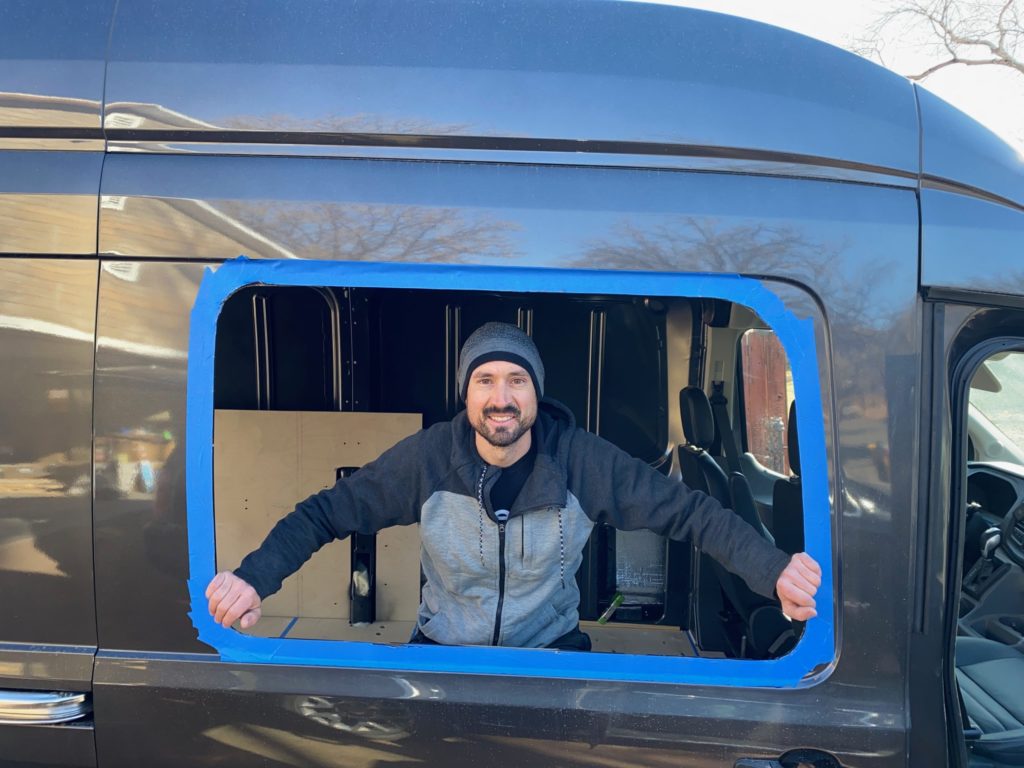
Remove the painters tape and sand down any rough edges. I used a Dremel and Metal Grinding Wheel to quickly knock off any sharp spots.
Congrats! You just put a huge hole in your vehicle. No turning back now – you’re committed, let’s get that window installed next!
Step 3: Test Fit & Trim
Lifting the window into place is a minimum two person job. I had a friend help me pick up the window and set it into the opening, then I would get into the van from the rear door and check the fit and alignment. There were a couple of spots around the window where the opening needed to be a little bit wider for the window to fit through. I would sand down these spots with a Dremel and Metal Grinding Wheel a bit and then test fit again.
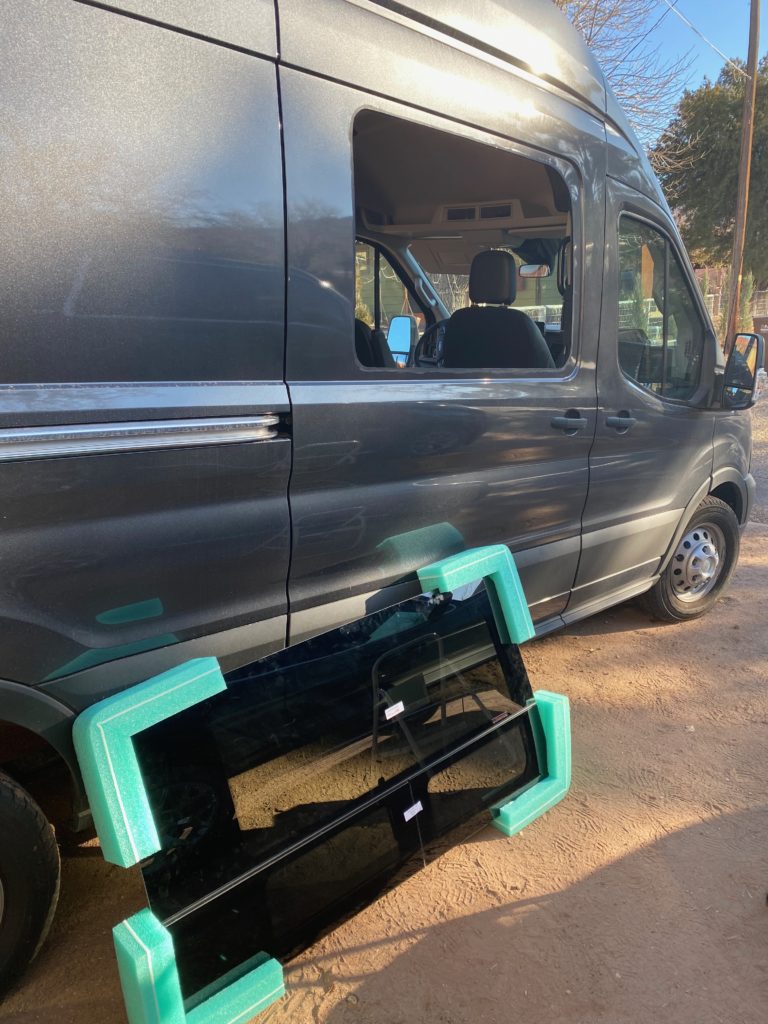
We probably lifted the window up and down about 8 times until it fit perfectly through the opening. I didn’t want to grind off too much material and make the opening too large, so I went slow to ensure a snug fit all the way around.
Once the window fits nicely through the hole in your door, and you’re done trimming/grinding/sanding on it, you’ll want to apply some kind of paint/primer to all of the bare metal you exposed to prevent rust.
Let that dry and then the window is ready to go in!
Step 4: Install Window
The screws that were provided weren’t self-tapping, so pilot holes had to be drilled into the frame. I set the clamp ring on the frame and then used a small bit to drill into the frame in each of the spots where pre-drilled clamp ring holes were.
Once you’re ready to install the window, have someone you trust help you lift the window into place. While they hold the window from the outside, get in the van and use an Impact Driver to attach the clamp ring to the frame of the window. You want to get these screws in tight so that the clamp ring is very firmly hugging the window and the weather strip is sealed against the van. Its probably best to get all of the screws started, and then gradually tighten them down over a couple of passes around the ring.
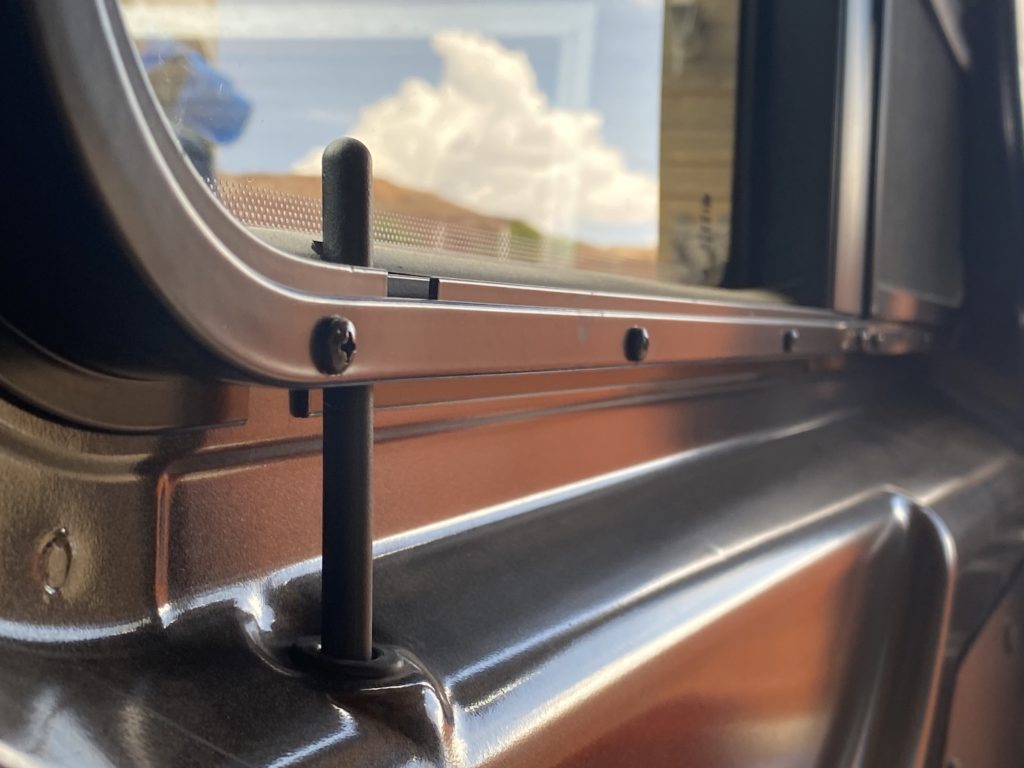
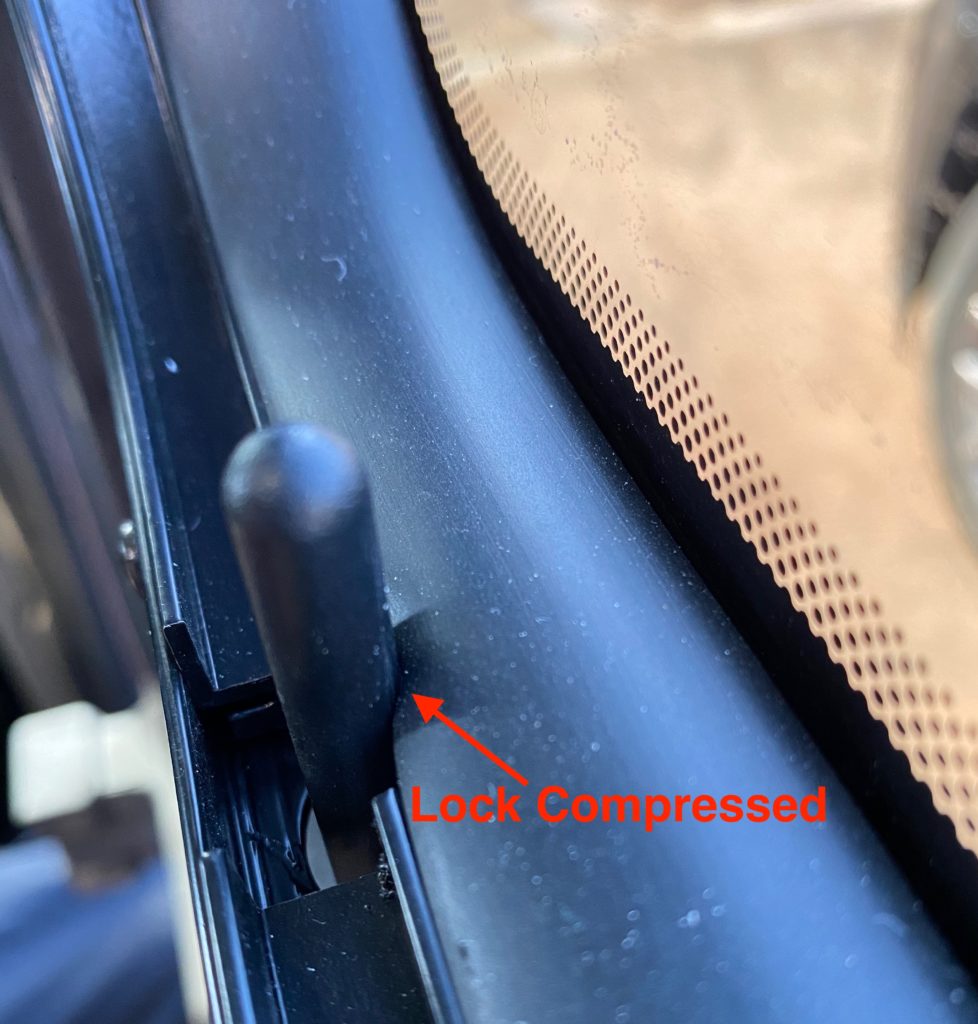
Once the clamp ring was on, I noticed that my slider door lock was stuck, it didn’t move up and down when the locks were triggered. The rubber seal that goes around the window was squished right up against the lock plunger. I used an X-acto Knife to carve away enough rubber material that the lock could move freely.
Cutting giant holes in your van isn’t so bad after all! The only thing that might be left to do at this point is to get out a hose and spray around the window while someone checks for leaks inside. Beyond that, cross this project off your to-do list and get out there and enjoy your new window!
Don’t forget to follow us on Instagram: @MauiTheVan
Nice job. In the market for a window for my slider door. Now that you have the window installed, are you happy with your choice of the C. R. Laurence window? I just want to make sure I get the best slider window. Thanks, Jim
Thanks! Definitely happy with the window. It looks great, it fits the slider door as if it were a factory window, and the install was easy. If I were going to build another van, I’d probably stick with the same window. Good luck with your build!